Epson PowerLite Pro Z9800W User Manual - Page 88
Adjusting the Image Height, Black Level
 |
View all Epson PowerLite Pro Z9800W manuals
Add to My Manuals
Save this manual to your list of manuals |
Page 88 highlights
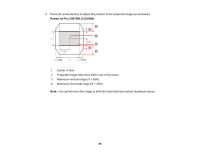
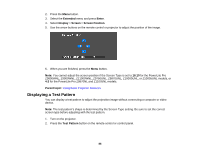
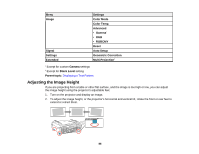
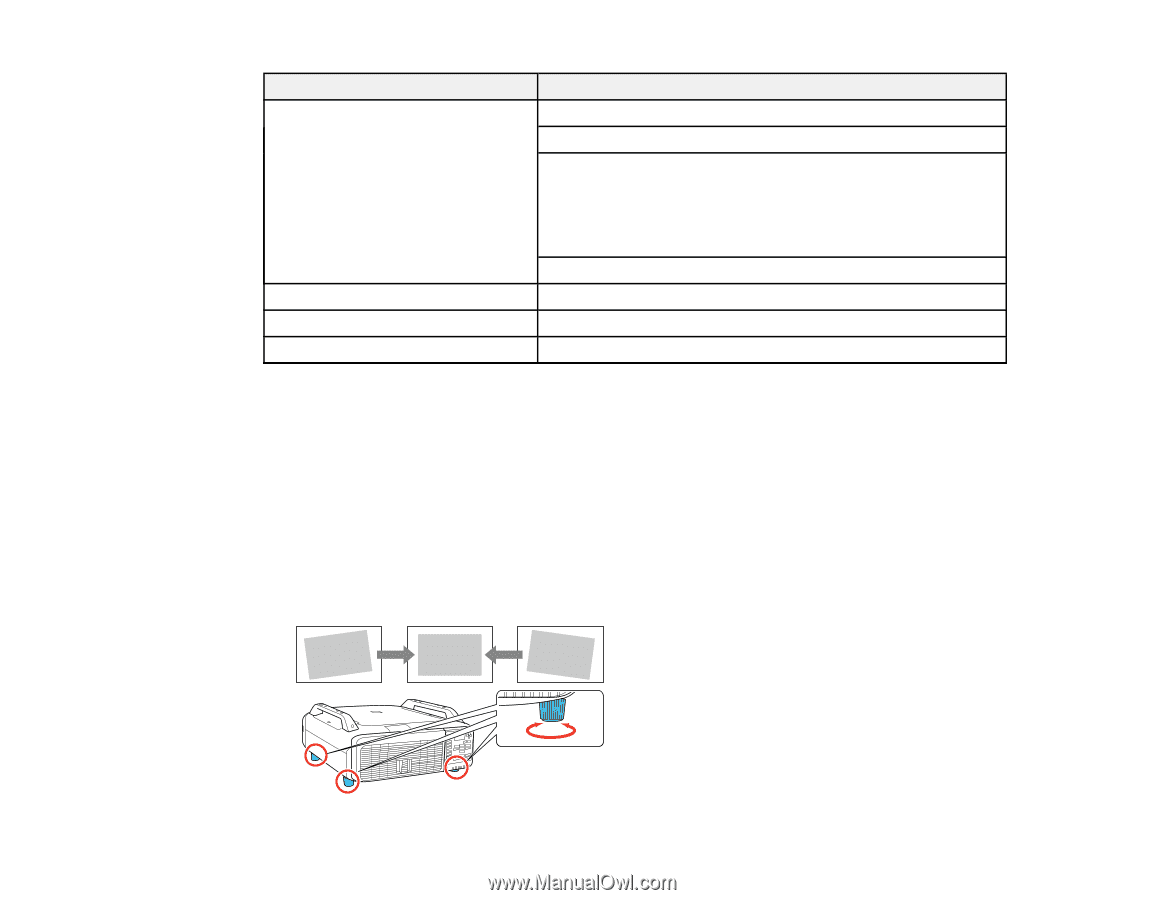
Menu Image Signal Settings Extended Settings Color Mode Color Temp. Advanced • Gamma1 • RGB • RGBCMY Reset Auto Setup Geometric Correction Multi-Projection2 1 Except for custom Gamma settings 2 Except for Black Level setting Parent topic: Displaying a Test Pattern Adjusting the Image Height If you are projecting from a table or other flat surface, and the image is too high or low, you can adjust the image height using the projector's adjustable feet. 1. Turn on the projector and display an image. 2. To adjust the image height, or the projector's horizontal and vertical tilt, rotate the front or rear feet to extend or retract them. 88
-
 1
1 -
2
-
3
-
4
-
5
-
6
-
7
-
8
-
9
-
10
-
11
-
12
-
13
-
14
-
15
-
16
-
17
-
18
-
19
-
20
-
21
-
22
-
23
-
24
-
25
-
26
-
27
-
28
-
29
-
30
-
31
-
32
-
33
-
34
-
35
-
36
-
37
-
38
-
39
-
40
-
41
-
42
-
43
-
44
-
45
-
46
-
47
-
48
-
49
-
50
-
51
-
52
-
53
-
54
-
55
-
56
-
57
-
58
-
59
-
60
-
61
-
62
-
63
-
64
-
65
-
66
-
67
-
68
-
69
-
70
-
71
-
72
-
73
-
74
-
75
-
76
-
77
-
78
-
79
-
80
-
81
-
82
-
 83
83 -
 84
84 -
 85
85 -
 86
86 -
 87
87 -
 88
88 -
 89
89 -
 90
90 -
 91
91 -
 92
92 -
 93
93 -
94
-
95
-
96
-
97
-
98
-
99
-
100
-
101
-
102
-
103
-
104
-
105
-
106
-
107
-
108
-
109
-
110
-
111
-
112
-
113
-
114
-
115
-
116
-
117
-
118
-
119
-
120
-
121
-
122
-
123
-
124
-
125
-
126
-
127
-
128
-
129
-
130
-
131
-
132
-
133
-
134
-
135
-
136
-
137
-
138
-
139
-
140
-
141
-
142
-
143
-
144
-
145
-
146
-
147
-
148
-
149
-
150
-
151
-
152
-
153
-
154
-
155
-
156
-
157
-
158
-
159
-
160
-
161
-
162
-
163
-
164
-
165
-
166
-
167
-
168
-
169
-
170
-
171
-
172
-
173
-
174
-
175
-
176
-
177
-
178
-
179
-
180
-
181
-
182
-
183
-
184
-
185
-
186
-
187
-
188
-
189
-
190
-
191
-
192
-
193
-
194
-
195
-
196
-
197
-
198
-
199
-
200
-
201
-
202
-
203
-
204
-
205
-
206
-
207
-
208
-
209
-
210
-
211
-
212
-
213
-
214
-
215
-
216
-
217
-
218
-
219
-
220
-
221
-
222
-
223
-
224
-
225
-
226
-
227
-
228
-
229
-
230
-
231
-
232
-
233
-
234
-
235
-
236
-
237
-
238
-
239
-
240
-
241
-
242
-
243
-
244
-
245
-
246
-
247
-
248
-
249
-
250
-
251
-
252
-
253
-
254
-
255
-
256
-
257
-
258
-
259
-
260
-
261
-
262
-
263
-
264
-
265
-
266
-
267
-
268
-
269
-
270
-
271
-
272
-
273
-
274
-
275
-
276
-
277
-
278
-
279
-
280
-
281
-
282
-
283
-
284
-
285
-
286
-
287
-
288
 |
 |
Menu
Settings
Image
Color Mode
Color Temp.
Advanced
•
Gamma
1
•
RGB
•
RGBCMY
Reset
Signal
Auto Setup
Settings
Geometric Correction
Extended
Multi-Projection
2
1
Except for custom
Gamma
settings
2
Except for
Black Level
setting
Parent topic:
Displaying a Test Pattern
Adjusting the Image Height
If you are projecting from a table or other flat surface, and the image is too high or low, you can adjust
the image height using the projector's adjustable feet.
1.
Turn on the projector and display an image.
2.
To adjust the image height, or the projector's horizontal and vertical tilt, rotate the front or rear feet to
extend or retract them.
88