Epson PowerLite S6 User's Guide - Page 55
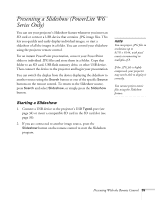
Presenting a Slideshow (PowerLite W6 Series Only), Starting a Slideshow
 |
View all Epson PowerLite S6 manuals
Add to My Manuals
Save this manual to your list of manuals |
Page 55 highlights
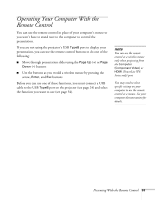
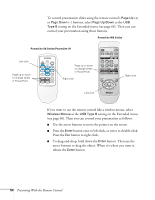
Presenting a Slideshow (PowerLite W6 Series Only) You can use your projector's Slideshow feature whenever you insert an SD card or connect a USB device that contains .JPG image files. This lets you quickly and easily display individual images, or start a slideshow of all the images in a folder. You can control your slideshow using the projector remote control. For an instant PowerPoint presentation, convert your PowerPoint slides to individual .JPG files and store them in a folder. Copy that folder to an SD card, USB flash memory drive, or other USB device. Then connect the device to the projector and begin your presentation. You can switch the display from the device displaying the slideshow to another source using the Search button or one of the specific Source buttons on the remote control. To return to the Slideshow source, press Search and select Slideshow, or simply press the Slideshow button. note You can project .JPG files in resolutions up to 8176 × 6144, with pixel counts incrementing in multiples of 8. If the .JPG file is highly compressed, your projector may not be able to display it correctly. You cannot project movie files using the Slideshow feature. Starting a Slideshow 1. Connect a USB device to the projector's USB TypeA port (see page 34) or insert a compatible SD card in the SD card slot (see page 36). 2. If you are connected to another image source, press the Slideshow button on the remote control to start the Slideshow program. Presenting With the Remote Control 55
-
 1
1 -
2
-
3
-
4
-
5
-
6
-
7
-
8
-
9
-
10
-
11
-
12
-
13
-
14
-
15
-
16
-
17
-
18
-
19
-
20
-
21
-
22
-
23
-
24
-
25
-
26
-
27
-
28
-
29
-
30
-
31
-
32
-
33
-
34
-
35
-
36
-
37
-
38
-
39
-
40
-
41
-
42
-
43
-
44
-
45
-
46
-
47
-
48
-
49
-
 50
50 -
 51
51 -
 52
52 -
 53
53 -
 54
54 -
 55
55 -
 56
56 -
 57
57 -
 58
58 -
 59
59 -
 60
60 -
61
-
62
-
63
-
64
-
65
-
66
-
67
-
68
-
69
-
70
-
71
-
72
-
73
-
74
-
75
-
76
-
77
-
78
-
79
-
80
-
81
-
82
-
83
-
84
-
85
-
86
-
87
-
88
-
89
-
90
-
91
-
92
-
93
-
94
-
95
-
96
-
97
-
98
-
99
-
100
-
101
-
102
-
103
-
104
-
105
-
106
-
107
-
108
-
109
-
110
-
111
-
112
-
113
-
114
-
115
-
116
-
117
-
118
 |
 |
