Epson R280 Quick Reference Guide - Page 3
Introduction - stylus photo ink
 |
UPC - 010343866171
View all Epson R280 manuals
Add to My Manuals
Save this manual to your list of manuals |
Page 3 highlights
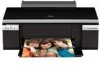
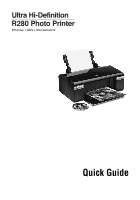
Introduction After you have set up your Epson Stylus® Photo R280 Series as described on the Start Here sheet, turn here to: ■ Load paper ■ Get the basic steps for printing from your computer ■ Print true BorderFree® frame-ready prints on select 4 × 6, 5 × 7, 8 × 10, and letter-size papers ■ Print on ink jet-printable CDs and DVDs ■ Perform routine maintenance ■ Solve simple problems For additional instructions, see the on-screen User's Guide by selecting the icon for it on your desktop. Please follow these guidelines as you read your R280 Series instructions: Warning: Warnings must be followed carefully to avoid bodily injury. Caution: Cautions must be observed to avoid damage to your equipment. Note: Notes contain important information about your R280 Series. Tip: Tips contain hints for better printing. Introduction 3
-
 1
1 -
 2
2 -
 3
3 -
 4
4 -
 5
5 -
 6
6 -
 7
7 -
 8
8 -
 9
9 -
10
-
11
-
12
-
13
-
14
-
15
-
16
-
17
-
18
-
19
-
20
-
21
-
22
-
23
-
24
-
25
-
26
-
27
-
28
-
29
-
30
-
31
-
32
 |
 |