Epson Stylus Photo 1270 Product Information Guide - Page 5
Installing an Ink Cartridge for the First - parts
 |
View all Epson Stylus Photo 1270 manuals
Add to My Manuals
Save this manual to your list of manuals |
Page 5 highlights
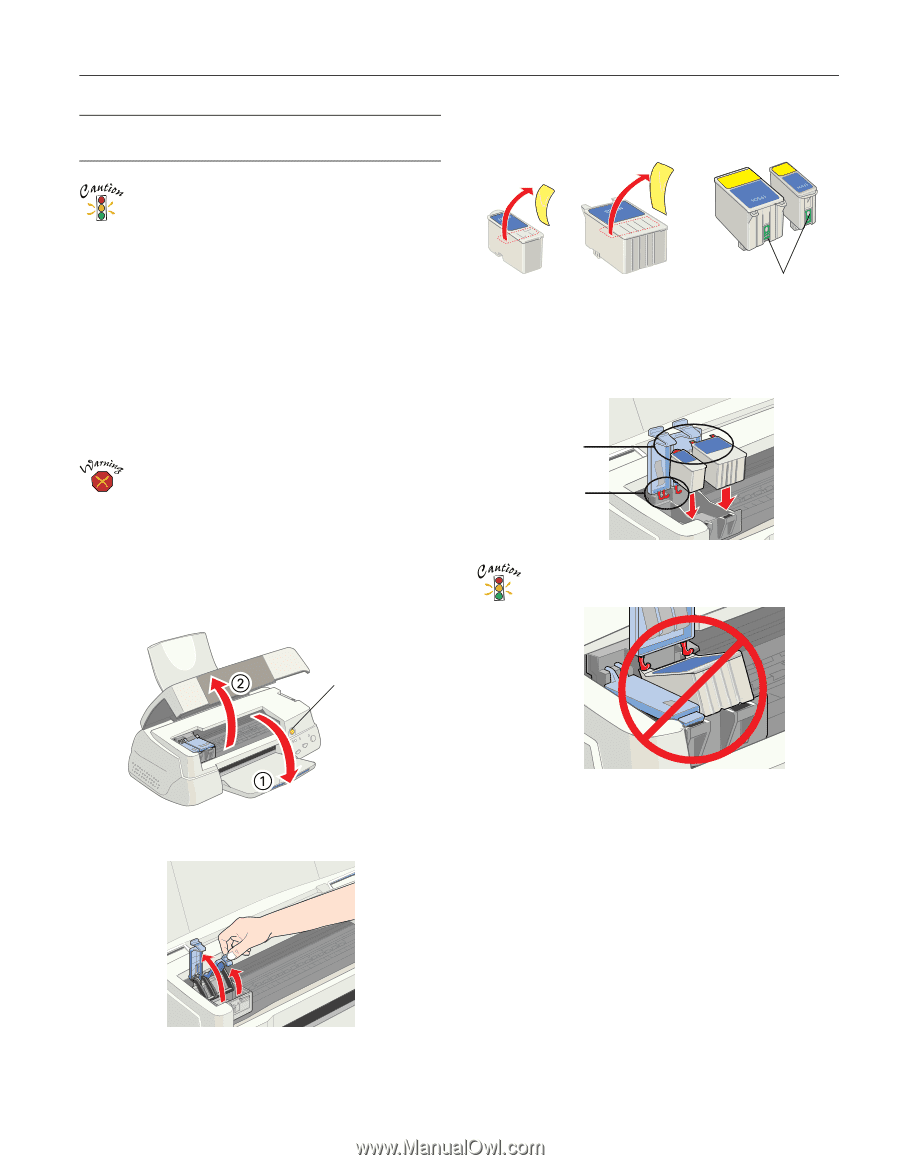
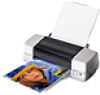
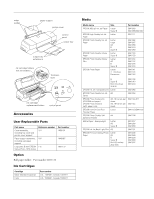
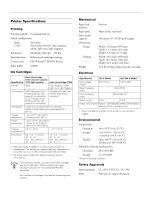
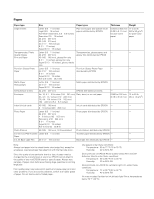
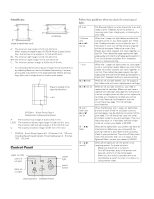
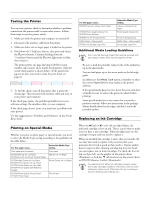
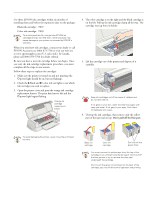
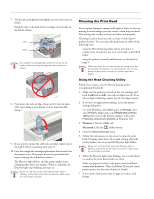
EPSON Stylus Photo 1270 Installing an Ink Cartridge for the First Time Follow these ink cartridge precautions and the others on pages 7 through 10 of the Printer Basics book: t Install both ink cartridges, and leave them installed for all types of printing, or the printer won't work. t Remove the yellow tape seal from the top of the ink cartridges or you'll permanently damage them. Don't remove the clear seals on the bottom or ink will leak out. t Don't touch the green chip on the back of the cartridge. This may inhibit normal operation and printing. t Never turn off the printer when the P power light is flashing, unless the printer hasn't moved or made any noise for more than five minutes. Keep ink cartridges out of the reach of children and do not drink the ink. If ink gets on your skin, wash the area thoroughly with soap and water. If ink gets in your eyes, flush them immediately with water. Before you begin, make sure the printer is plugged into an electrical outlet and turned on. 1. Lower the output tray and open the cover. 3. Unwrap the ink cartridges, then remove only the yellow part of the tape seal on top. Don't pull off the blue part. Black ink cartridge Color ink cartridge Don't touch the green chips 4. Tilt each cartridge forward slightly as you lower it into its holder. Hang the tabs at the back of the cartridge on the hooks on the holder clamps. tabs hooks Don't place the cartridges under the holder clamp; you may damage the clamp when you close it. Orange ink cartridge replacement button 2. Lift up the two ink cartridge clamps. 5. Close the ink cartridge clamps. (The color clamp is a bit harder to close.) 6. Press the orange ink cartridge replacement button (shown in step 1) and close the printer cover. Ink charging takes about two minutes, with the P power light flashing and the printer making noise until it's finished. Don't turn off the printer or interrupt charging or it will start over, using more ink than necessary. It's finished when the P power light stops flashing. 2/00 EPSON Stylus Photo 1270 - 5
-
 1
1 -
 2
2 -
 3
3 -
 4
4 -
 5
5 -
 6
6 -
 7
7 -
 8
8 -
 9
9 -
 10
10
 |
 |