Epson Stylus Photo R300M User Manual (P.I.M Plug-in) - Page 11
Printing in Photoshop 6.0, in the Mode box, then click
 |
View all Epson Stylus Photo R300M manuals
Add to My Manuals
Save this manual to your list of manuals |
Page 11 highlights
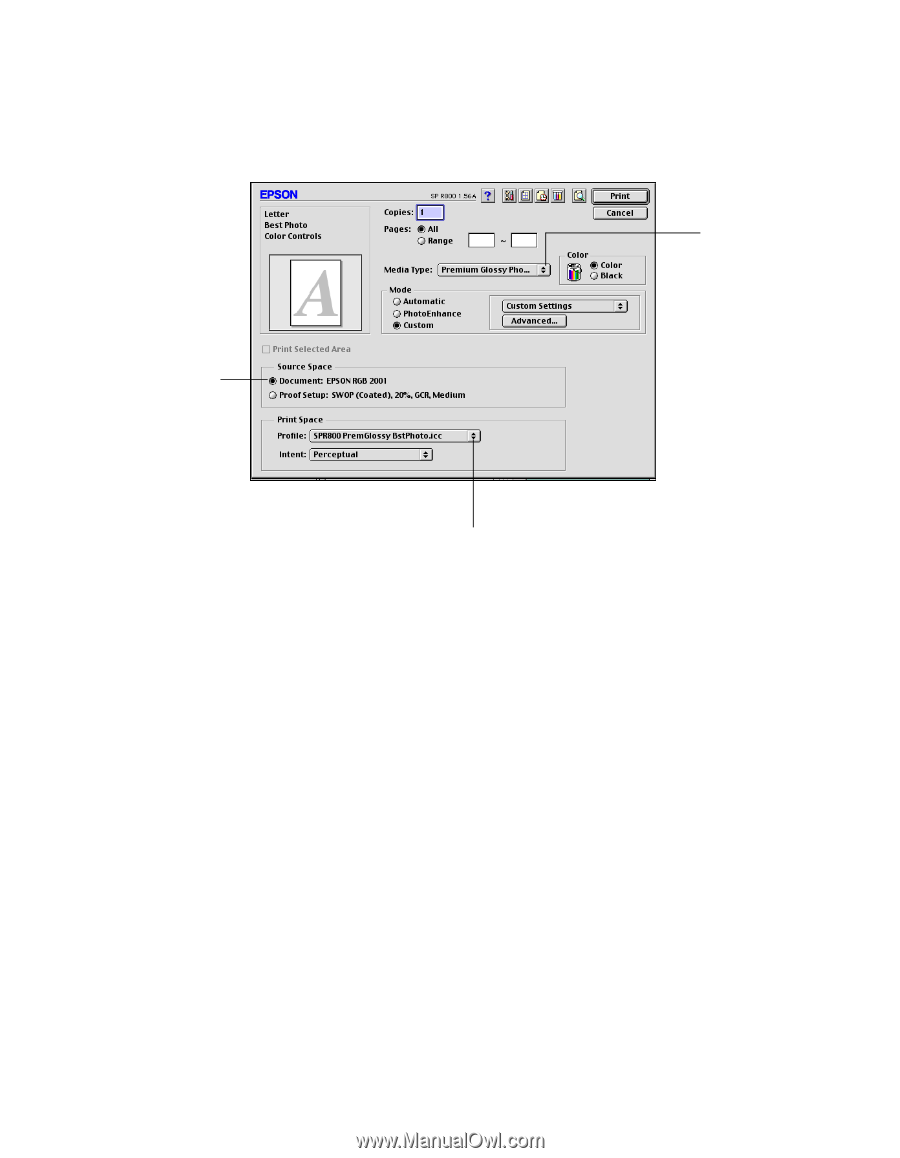
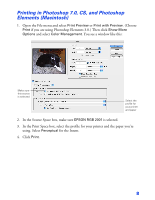
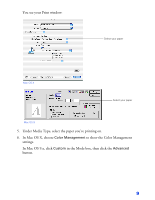
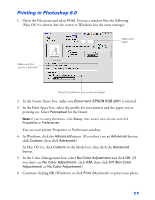
Printing in Photoshop 6.0 1. Open the File menu and select Print. You see a window like the following (Mac OS 9 is shown, but the screen in Windows has the same settings): Select your paper Make sure this source is selected Select the profile for your printer and paper 2. In the Source Space box, make sure Document: EPSON RGB 2001 is selected. 3. In the Print Space box, select the profile for your printer and the paper you're printing on. Select Perceptual for the Intent. Note: If you're using Windows, click Setup, then select your printer and click Properties or Preferences. You see your printer Properties or Preferences window. 4. In Windows, click the Advanced button. (If you don't see an Advanced button, click Custom, then click Advanced.) In Mac OS 9.x, click Custom in the Mode box, then click the Advanced button. 5. In the Color Management box, select No Color Adjustment and click OK. (If you don't see No Color Adjustment, click ICM, then click Off (Not Color Adjustment) or No Color Adjustment.) 6. Continue clicking OK (Windows) or click Print (Macintosh) to print your photo. 11
-
 1
1 -
2
-
3
-
4
-
5
-
 6
6 -
 7
7 -
 8
8 -
 9
9 -
 10
10 -
 11
11 -
 12
12
 |
 |