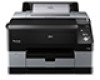
Epson Stylus Pro 4900 Designer Edition Quick Reference Guide - Page 3
Loading Roll Paper, Close the roll paper cover.
 |
View all Epson Stylus Pro 4900 Designer Edition manuals
Add to My Manuals
Save this manual to your list of manuals |
Page 3 highlights
Loading Roll Paper 1 Slide the black paper stop off the end of the spindle. Note: To use paper with a 2-inch core, remove the gray adapters from the paper stops at each end. See your User's Guide for details. 2 Position the roll as shown, then slide it onto the spindle. The gray end should be on the right with the paper unwinding from the top. 3 Slide the black paper stop back onto the spindle and insert it firmly into the end of the roll. 7 Insert the leading edge of the roll paper into the roll paper feeder until the message on the LCD screen changes to "Press the button". 8 Press the button. The printer automatically feeds the paper to the printing position. 9 Close the roll paper cover. 4 Open the roll paper cover. 5 Place the roll paper in the printer as shown. (The black end of the spindle goes on the left.) 10 Slide out the output tray. Do not raise the paper stopper. If the paper stopper is raised while printing, the paper may not eject correctly. 6 Make sure the printer is turned on, then press the button on the control panel. 11 Set up the paper eject support for your paper type (see your User's Guide for details) . 2
-
 1
1 -
 2
2 -
 3
3 -
 4
4 -
 5
5 -
 6
6 -
 7
7 -
 8
8 -
 9
9 -
10
-
11
-
12
-
13
 |
 |
