Epson Stylus Pro 7900 Computer To Plate System User's Guide - Page 14
Aligning the Plate Guide, the nut, extend the pin, and then tighten the nut. - stylus pro computer to plate systems
 |
View all Epson Stylus Pro 7900 Computer To Plate System manuals
Add to My Manuals
Save this manual to your list of manuals |
Page 14 highlights
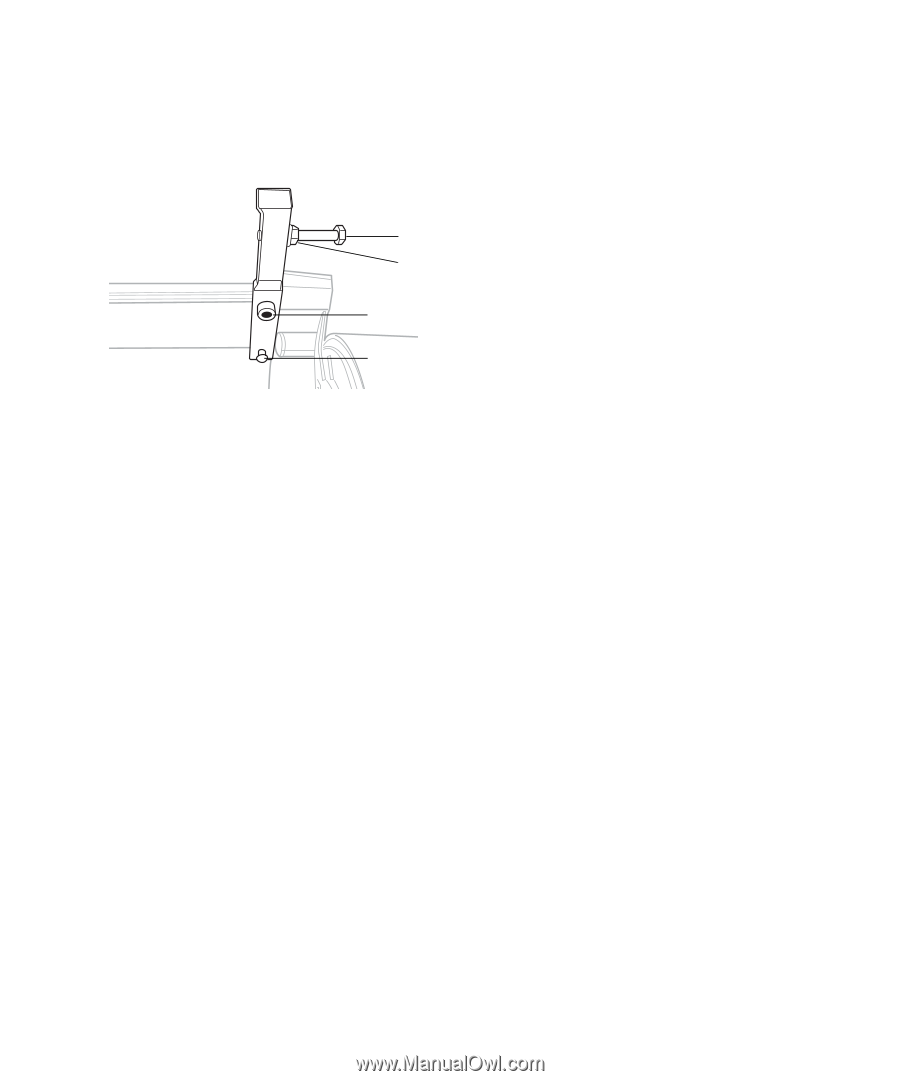
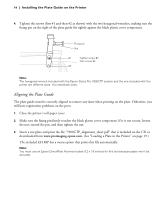
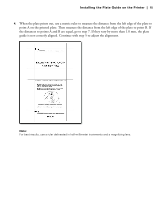
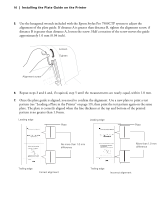
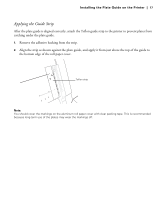
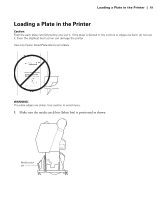
14 | Installing the Plate Guide on the Printer 4. Tighten the screws (first #1 and then #2 as shown) with the two hexagonal wrenches, making sure the fixing pin on the right of the plate guide fits tightly against the black plastic cover component. Fixing pin Nut #1 Tighten screw #1 then screw #2 #2 Note: The hexagonal wrench included with the Epson Stylus Pro 7900CTP system and the one included with the printer are different sizes. You need both sizes. Aligning the Plate Guide The plate guide must be correctly aligned to remove any skew when printing on the plate. Otherwise, you will have registration problems on the press. 1. Close the printer's roll paper cover. 2. Make sure the fixing pin firmly touches the black plastic cover component. If it is not secure, loosen the nut, extend the pin, and then tighten the nut. 3. Insert a test plate and print the file "7900CTP_alignment_sheet.pdf" that is included on the CD or downloaded from www.proimaging.epson.com. (See "Loading a Plate in the Printer" on page 19.) The included EFI RIP has a menu option that prints this file automatically. Note: You must use an Epson DirectPlate Aluminum plate (12 × 18 inches) for this test because paper won't be accurate.
-
 1
1 -
2
-
3
-
4
-
5
-
6
-
7
-
8
-
 9
9 -
 10
10 -
 11
11 -
 12
12 -
 13
13 -
 14
14 -
 15
15 -
 16
16 -
 17
17 -
 18
18 -
 19
19 -
20
-
21
-
22
-
23
-
24
-
25
-
26
-
27
-
28
 |
 |