Epson Stylus Pro 7900 Computer To Plate System User's Guide - Large Plate Acce - Page 4
Aligning the Large Plate Guide - stylus pro used computer to plate systems
 |
View all Epson Stylus Pro 7900 Computer To Plate System manuals
Add to My Manuals
Save this manual to your list of manuals |
Page 4 highlights
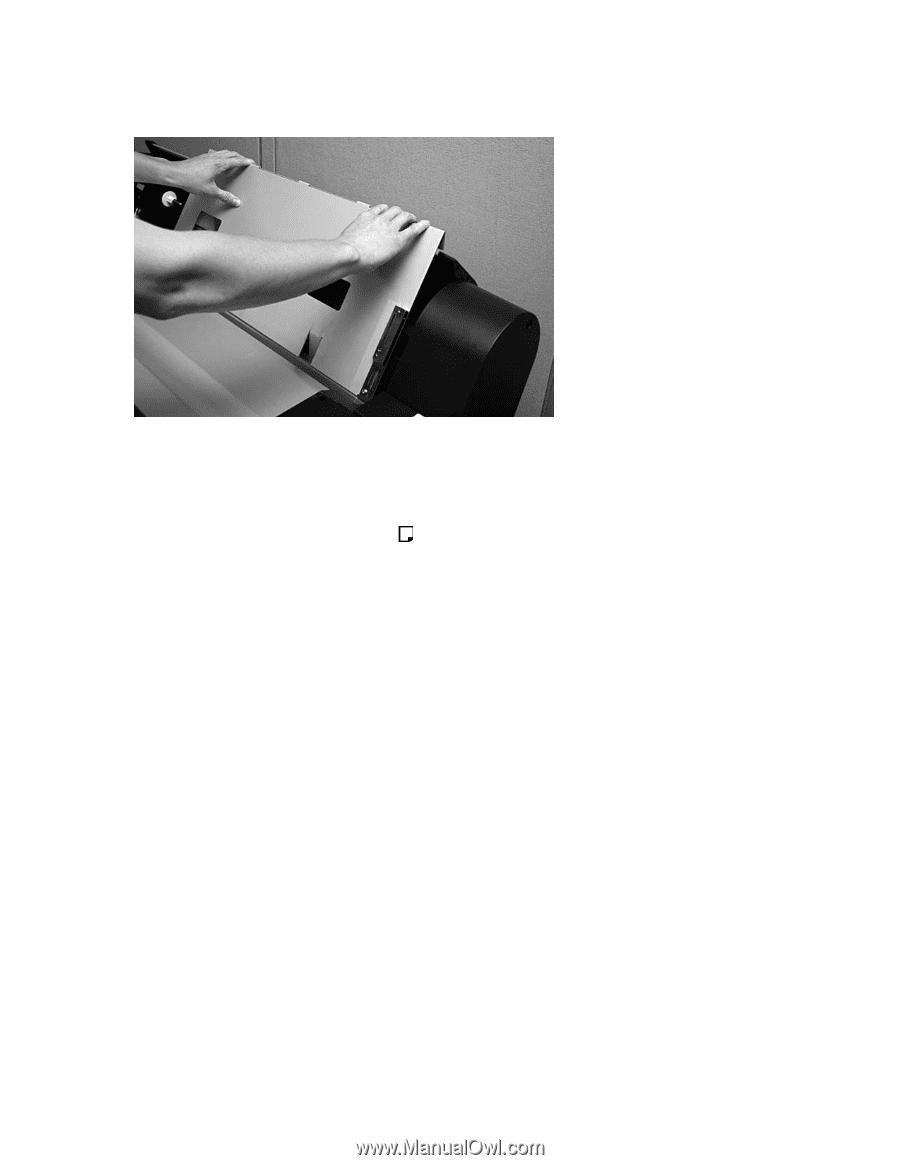
4 | Aligning the Large Plate Guide 6. Gently press the top of the guide on both sides to secure it into position. Aligning the Large Plate Guide The large plate guide must be correctly aligned to prevent any skew when printing on the plate. 1. Press the l Paper Source button until the Sheet icon appears on the LCD screen. 2. Insert a test plate (see "Loading a Plate in the Printer" on page 7) and print the file "7900CTP_alignment_sheet.pdf" that is included on the CD with the Epson Stylus Pro 7900CTP system. If you don't have the CD, you can download it from www.proimaging.epson.com. If you are using the RIP included with the Epson Stylus Pro 7900CTP system, you can print the file using the menu options. Note: You must use an Epson DirectPlate Aluminum plate for this test because paper won't be accurate. You should use the same size plate you will use for final printing.
-
 1
1 -
 2
2 -
 3
3 -
 4
4 -
 5
5 -
 6
6 -
 7
7 -
 8
8 -
 9
9 -
 10
10 -
11
-
12
 |
 |