Epson Stylus Pro 9800 Professional Edition Printer Guide - Page 42
other end to your network hub or to your computer's Ethernet port.
 |
View all Epson Stylus Pro 9800 Professional Edition manuals
Add to My Manuals
Save this manual to your list of manuals |
Page 42 highlights
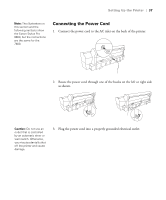
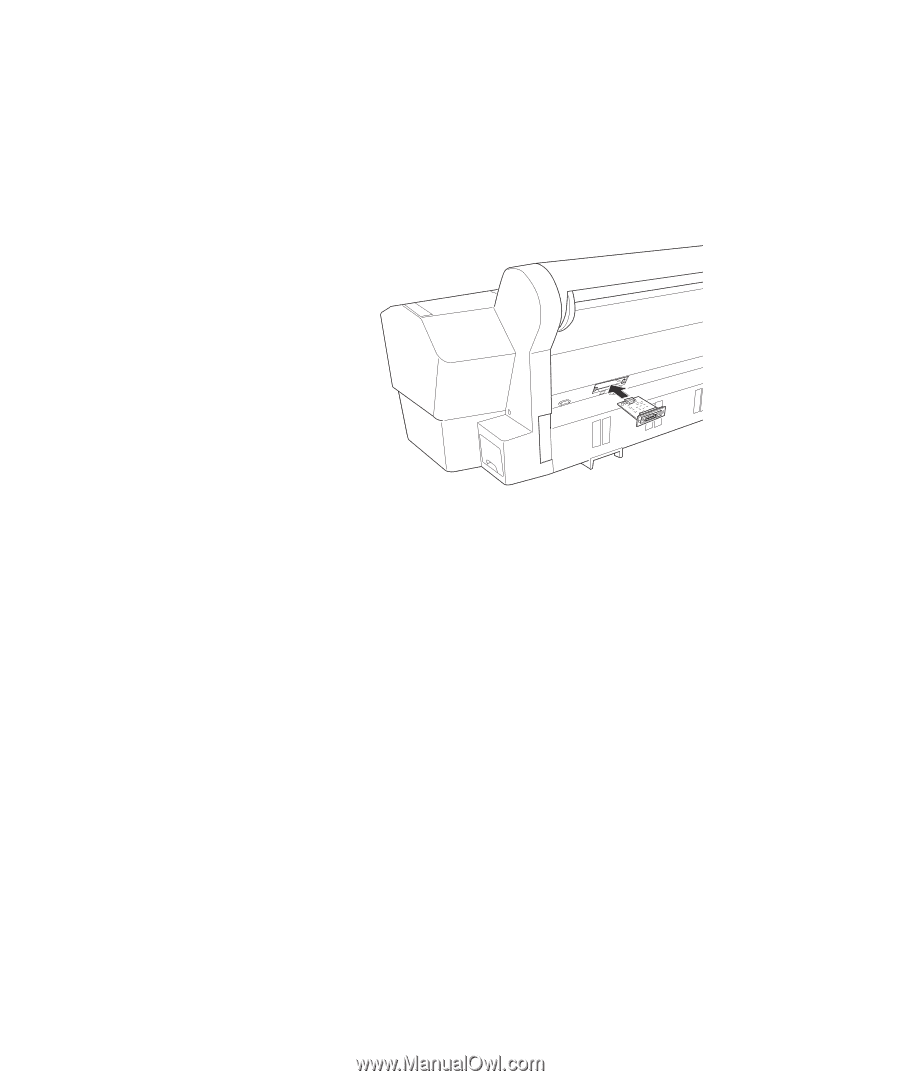
42 | Setting Up the Printer Make sure you keep the screws in case you need to remove the card and replace the cover. 5. Slide the card along the slots inside the compartment. Push it in firmly to fully insert the connector into the printer's internal slot. 6. Use the two screws included with the card to secure it. 7. Connect one end of the appropriate cable to the card. Then connect the other end to your network hub or to your computer's Ethernet port. 8. Plug in the printer's power cord. Follow the instructions in the next section to install your printer software, then configure the printer for your network as described on page 53. 1-42
-
 1
1 -
2
-
3
-
4
-
5
-
6
-
7
-
8
-
9
-
10
-
11
-
12
-
13
-
14
-
15
-
16
-
17
-
18
-
19
-
20
-
21
-
22
-
23
-
24
-
25
-
26
-
27
-
28
-
29
-
30
-
31
-
32
-
33
-
34
-
35
-
36
-
 37
37 -
 38
38 -
 39
39 -
 40
40 -
 41
41 -
 42
42 -
 43
43 -
 44
44 -
 45
45 -
 46
46 -
 47
47 -
48
-
49
-
50
-
51
-
52
-
53
-
54
-
55
-
56
-
57
-
58
-
59
-
60
-
61
-
62
-
63
-
64
-
65
-
66
-
67
-
68
-
69
-
70
-
71
-
72
-
73
-
74
-
75
-
76
-
77
-
78
-
79
-
80
-
81
-
82
-
83
-
84
-
85
-
86
-
87
-
88
-
89
-
90
-
91
-
92
-
93
-
94
-
95
-
96
-
97
-
98
-
99
-
100
-
101
-
102
-
103
-
104
-
105
-
106
-
107
-
108
-
109
-
110
-
111
-
112
-
113
-
114
-
115
-
116
-
117
-
118
-
119
-
120
-
121
-
122
-
123
-
124
-
125
-
126
-
127
-
128
-
129
-
130
-
131
-
132
-
133
-
134
-
135
-
136
-
137
-
138
-
139
-
140
-
141
-
142
-
143
-
144
-
145
-
146
-
147
-
148
-
149
-
150
-
151
-
152
-
153
-
154
-
155
-
156
-
157
-
158
-
159
-
160
-
161
-
162
-
163
-
164
-
165
-
166
-
167
-
168
-
169
-
170
-
171
-
172
-
173
-
174
-
175
-
176
 |
 |
1-42
42
|
Setting Up the Printer
Make sure you keep the screws in case you need to remove the card and
replace the cover.
5.
Slide the card along the slots inside the compartment. Push it in firmly
to fully insert the connector into the printer’s internal slot.
6.
Use the two screws included with the card to secure it.
7.
Connect one end of the appropriate cable to the card. Then connect the
other end to your network hub or to your computer’s Ethernet port.
8.
Plug in the printer’s power cord.
Follow the instructions in the next section to install your printer software,
then configure the printer for your network as described on page 53.