Epson TM T88II Technical Reference - Page 17
Warning - serial cable
 |
View all Epson TM T88II manuals
Add to My Manuals
Save this manual to your list of manuals |
Page 17 highlights
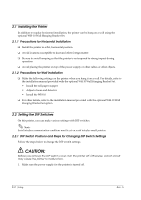
TM-T88II/T88III Technical Reference Guide 1.2.4 Connectors All cables are connected to the connector panel on the lower rear of the printer. FG FG DK DC24V Interface connector Drawer kick-out connector Power supply connector Figure 1-3 Connector panel ❏ Drawer kick-out connector for connecting the cash drawer ❏ Power supply connector for connecting the power supply unit ❏ Interface connector to connect the printer to the host computer interface (serial, parallel, etc.) Note: The picture above shows a serial interface model. For details on the various interfaces and how to connect the power supply connector and cash drawer, see "Connecting Power Supply Unit and Cash Drawer" (page 2-15) and "Connecting the Printer to the Host Computer" (page 2-8). 1.3 Handling the Printer WARNING: Do not open the printer cover during printing. Doing so may damage the printer. Do not touch the manual cutter with your hands when installing or replacing roll paper. The manual cutter is sharp and may cause an injury. 1.3.1 Selecting Paper Width The customer can select either 58 mm {2.28"} or 80 mm {3.15"} paper. This option is performed at the factory by installation of a spacer, as shown below. Rev. A Figure 1-4 Paper spacer Product Overview 1-5
-
 1
1 -
2
-
3
-
4
-
5
-
6
-
7
-
8
-
9
-
10
-
11
-
 12
12 -
 13
13 -
 14
14 -
 15
15 -
 16
16 -
 17
17 -
 18
18 -
 19
19 -
 20
20 -
 21
21 -
 22
22 -
23
-
24
-
25
-
26
-
27
-
28
-
29
-
30
-
31
-
32
-
33
-
34
-
35
-
36
-
37
-
38
-
39
-
40
-
41
-
42
-
43
-
44
-
45
-
46
-
47
-
48
-
49
-
50
-
51
-
52
-
53
-
54
-
55
-
56
-
57
-
58
-
59
-
60
-
61
-
62
-
63
-
64
-
65
-
66
-
67
-
68
-
69
-
70
-
71
-
72
-
73
-
74
-
75
-
76
-
77
-
78
-
79
-
80
-
81
-
82
-
83
-
84
-
85
-
86
-
87
-
88
 |
 |
