Epson WorkForce 845 Start Here - Page 1
Epson WorkForce 845 Manual
 |
View all Epson WorkForce 845 manuals
Add to My Manuals
Save this manual to your list of manuals |
Page 1 highlights
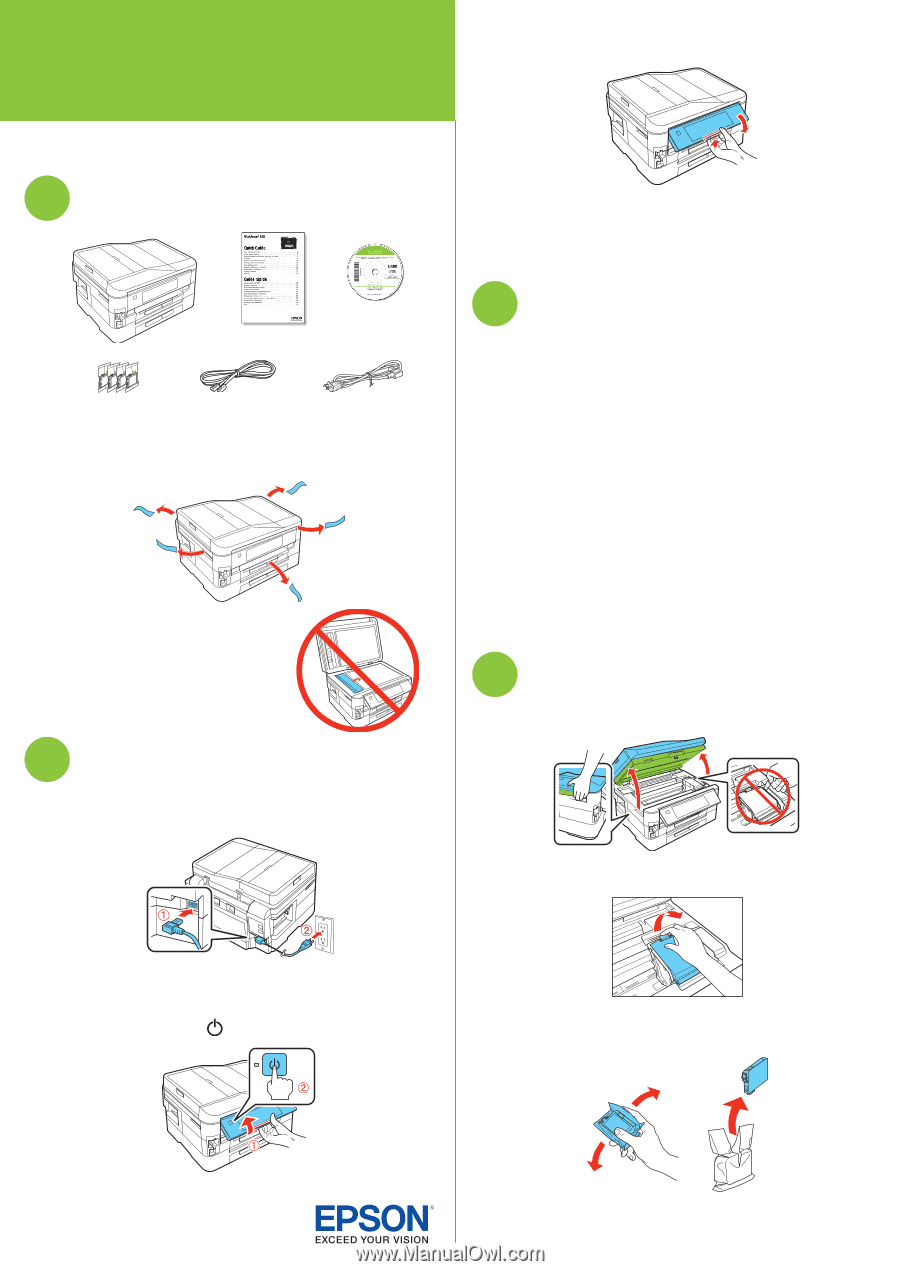
WorkForce® 845 Start Here Read these instructions before using your product. 1 Unpack Note: If you want to lower the control panel, squeeze the release bar underneath. Caution: To avoid damaging the printer, always squeeze the release bar to lower the control panel. Don't try to push it down without releasing it. Caution: Do not open ink cartridge packages until you are ready to install the ink. Cartridges are vacuum packed to maintain reliability. Remove all protective materials. Caution: Do not remove the plastic strip shown. It is part of the Automatic Document Feeder. 2 Turn on 1 Connect the power cord to the back of the printer and to an electrical outlet. 3 Select settings 1 Select your language and country. Touch the screen to select the desired option. 2 Select Summer if Daylight Saving Time is in effect (spring through summer); otherwise, select Winter. 3 Select the date format. 4 Use the numeric keypad to set the date, then press OK. 5 Select 12h (AM/PM) or 24h. 6 Use the numeric keypad to set the time. 7 Press OK when done. Note: You can change the date and time settings using the product's control panel. For more information, see the online User's Guide. 4 Install ink cartridges 1 Raise the scanner unit. 2 Open the cartridge cover. Caution: Do not connect to your computer yet. 2 Squeeze the release bar underneath to raise the control panel. Then press the On button. 3 Shake the ink cartridges gently 4 or 5 times, then unpack them. *412191300* *412191300*
-
 1
1 -
 2
2 -
 3
3 -
 4
4
 |
 |