Epson WorkForce WF-2760 User Manual - Page 1
Epson WorkForce WF-2760 Manual
 |
View all Epson WorkForce WF-2760 manuals
Add to My Manuals
Save this manual to your list of manuals |
Page 1 highlights
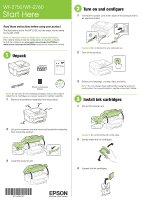
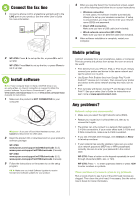
WF-2750/WF-2760 Start Here Read these instructions before using your product. The illustrations show the WF-2750, but the steps are the same for the WF-2760. Note for Spanish speakers/Nota para hispanohablantes: Para obtener instrucciones de configuración en español, consulte la Guía de instalación en www.epson.com/support/wf2750sp o www.epson.com/support/wf2760sp (requiere una conexión a Inernet). 1 Unpack 2 Turn on and configure 1 Connect the power cord to the back of the product and to an electrical outlet. Caution: Do not connect to your computer yet. 2 Turn on the product. French control panel stickers Note: Do not open the ink cartridge packages until you are ready to install the ink. Cartridges are vacuum packed to maintain reliability. 1 Remove all protective materials from the product. 3 Select your language, country, date, and time. Note: You can change these settings later using the product's control panel. For more information, see the online User's Guide. 3 Install ink cartridges 1 Lift up the scanner unit. 2 Lift up the scanner unit and remove all protective materials from inside the product. Caution: Do not touch the flat, white cable. 2 Gently shake the ink cartridges. 3 Lower the scanner unit. 3 Unpack the ink cartridges. *413163100* *413163100*
-
 1
1 -
 2
2 -
 3
3 -
 4
4
 |
 |