Epson WorkForce WF-7620 User Manual - Page 44
Using EpsonNet Config Network Configuration Software, Installing EpsonNet Config
 |
View all Epson WorkForce WF-7620 manuals
Add to My Manuals
Save this manual to your list of manuals |
Page 44 highlights
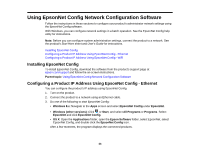
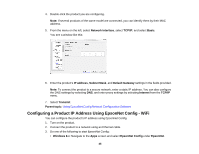
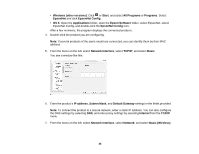
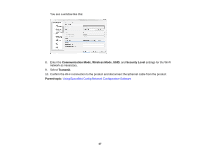
Using EpsonNet Config Network Configuration Software Follow the instructions in these sections to configure your product's administrator network settings using the EpsonNet Config software. With Windows, you can configure network settings in a batch operation. See the EpsonNet Config help utility for instructions. Note: Before you can configure system administration settings, connect the product to a network. See the product's Start Here sheet and User's Guide for instructions. Installing EpsonNet Config Configuring a Product IP Address Using EpsonNet Config - Ethernet Configuring a Product IP Address Using EpsonNet Config - WiFi Installing EpsonNet Config To install EpsonNet Config, download the software from the product's support page at epson.com/support and follow the on-screen instructions. Parent topic: Using EpsonNet Config Network Configuration Software Configuring a Product IP Address Using EpsonNet Config - Ethernet You can configure the product's IP address using EpsonNet Config. 1. Turn on the product. 2. Connect the product to a network using an Ethernet cable. 3. Do one of the following to start EpsonNet Config: • Windows 8.x: Navigate to the Apps screen and select EpsonNet Config under EpsonNet. • Windows (other versions): Click or Start, and select All Programs or Programs. Select EpsonNet and click EpsonNet Config. • OS X: Open the Applications folder, open the Epson Software folder, select EpsonNet, select EpsonNet Config, and double-click the EpsonNet Config icon. After a few moments, the program displays the connected products. 44
-
 1
1 -
2
-
3
-
4
-
5
-
6
-
7
-
8
-
9
-
10
-
11
-
12
-
13
-
14
-
15
-
16
-
17
-
18
-
19
-
20
-
21
-
22
-
23
-
24
-
25
-
26
-
27
-
28
-
29
-
30
-
31
-
32
-
33
-
34
-
35
-
36
-
37
-
38
-
 39
39 -
 40
40 -
 41
41 -
 42
42 -
 43
43 -
 44
44 -
 45
45 -
 46
46 -
 47
47 -
 48
48 -
 49
49 -
50
-
51
-
52
-
53
-
54
-
55
-
56
 |
 |
