Fagor Convection Drop Down Oven User's Manual - Page 12
Finishing Your Installation
 |
View all Fagor Convection Drop Down Oven manuals
Add to My Manuals
Save this manual to your list of manuals |
Page 12 highlights
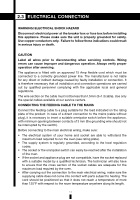
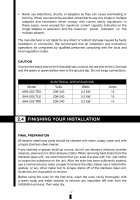
• Never use reductions, shunts, or adaptors as they can cause overheating or burning. If their use cannot be avoided, remember to use only single or multiple adapters and extensions which comply with current safety regulations. In these cases, never exceed the maximum current capacity indicated on the single adapter or extension and the maximum power indicated on the multiple adapter. The manufacturer is not liable for any direct or indirect damage caused by faulty installation or connection. We recommend that all installation and connection operations be completed by qualified personnel complying with the local and local regulation codes. CAUTION Connect the black wire to the N (neutral) tab; connect the red wire to the L (live) tab and the green or green/yellow wire to the ground tab. Do not swap connections. Model 6HA-200 TDX 6HA-200 TLX 6HA-200 TRX ELECTRICAL SPECIFICATIONS Volts Watts 208-240 3.2 kW 208-240 3.2 kW 208-240 3.2 kW Amps 15 15 15 2.4 FINISHING YOUR INSTALLATION FINAL PREPARATION All exterior steel body parts should be cleaned with warm, soapy water and with a liquid stainless steel cleaner. If any staining or grease build-up occurs, do not use abrasive cleaners, powder cleaners, steel wool or other abrasive cloths. When removing hard stains from the stainless steel unit, we recommend that you soak the area with hot, wet cloths to loosen the substance on the unit. After the stain has been sufficiently soaked, use a normal wood or nylon scraper to remove the stain. Never use a metal knife, spatula, or any other metal tool to scrape stains off of the stainless steel unit. Scratches are impossible to remove. Before using the oven for the first time, wash the oven cavity thoroughly with a warm soap and water solution to remove any impurities left over from the installation process, then wipe dry. 12
-
 1
1 -
2
-
3
-
4
-
5
-
6
-
 7
7 -
 8
8 -
 9
9 -
 10
10 -
 11
11 -
 12
12 -
 13
13 -
 14
14 -
 15
15 -
 16
16 -
 17
17 -
18
-
19
-
20
-
21
-
22
-
23
-
24
-
25
-
26
-
27
-
28
-
29
-
30
-
31
-
32
-
33
-
34
-
35
-
36
-
37
-
38
-
39
-
40
-
41
-
42
-
43
-
44
-
45
-
46
-
47
-
48
-
49
-
50
-
51
-
52
 |
 |
