Fantec MR-35HDC Manual - Page 11
SteelVine Storage Processor, the SteelVine Processor device
 |
View all Fantec MR-35HDC manuals
Add to My Manuals
Save this manual to your list of manuals |
Page 11 highlights
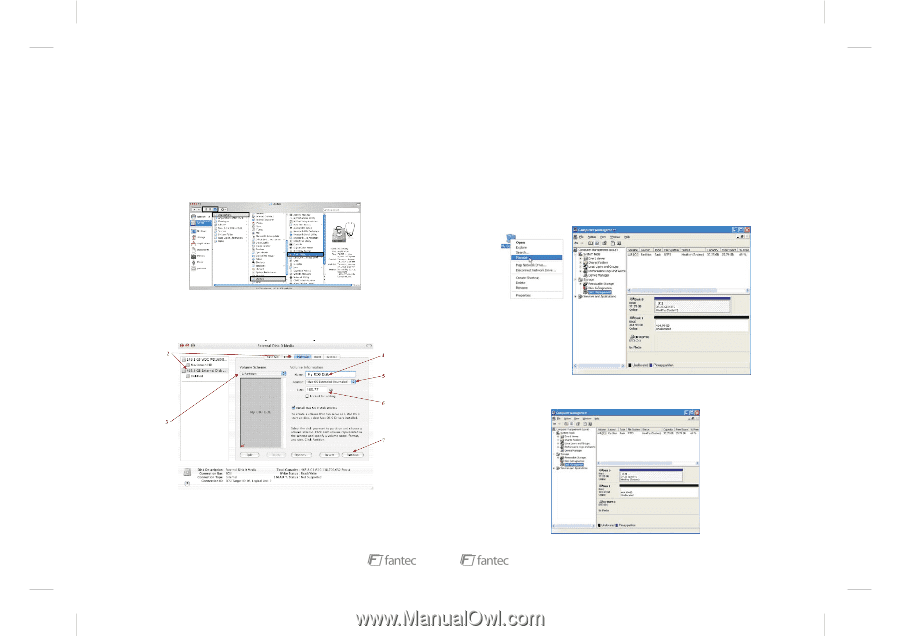
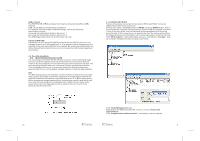
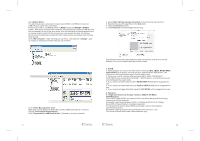
8. Name and format the partition and click Next. 9. Review the file system settings and click Finish to create the logical partition. Mac OS X Important: Before reconfiguring a volume, back up your data and drag the old drive to the trash to un-mount previously defined partition. If no hard drives are connected to the Storage Appliance, the disk (8.0 GB Config Disk Media) will appear. Do not remove or modify that partition. After you configure and partition the new volumes, restore the backed-up data to the new configuration. 1. Launch Disk Utility from the Application > Utilities folder. 2.1.5 Partitioning Volumes This section explains how to partition volumes after configuring them in the GUI. You must partition volumes for the host computer's operating system before you can store data on the volumes. Refer to the operating system's documentation for further guidance. Partition a Volume MS Windows Important: Before reconfiguring a volume, back up your data and delete previously defined partitions. If no hard disk drives are connected to the SteelVine Storage Processor, the SteelVine Processor device (the "Not Initialized" disk with no capacity allocated to it) will appear. Do not initialize or modify that device. 1. Right-click the My Computer icon on your desktop and select Manage from the pop-up window. 2. Select a configured disk and click the Partition tab. This procedure illustrates the BIG Storage Policy configuration, which concatenates the capacity of all hard drives connected to the unit. 2. Select Disk Management under Storage to open the Windows Disk Manager. 3. Select 1 Partition from the Volume Scheme drop-down list. 4. Enter a name for the volume in the Name field (such as "My BIG disk".) 13 10
-
 1
1 -
2
-
3
-
4
-
5
-
 6
6 -
 7
7 -
 8
8 -
 9
9 -
 10
10 -
 11
11 -
 12
12
 |
 |