Fisher and Paykel DE60FA2 Dryers DE70FA* & DG70FA* User Guide (English, Sp - Page 9
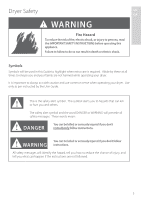
Risk of fire
 |
View all Fisher and Paykel DE60FA2 manuals
Add to My Manuals
Save this manual to your list of manuals |
Page 9 highlights
Installation Instructions US CA WARNING - Risk of fire ƒ Clothes dryer installation must be performed by a qualified installer. ƒ Install the clothes dryer according to the manufacturer's instructions and local codes. ƒ Do not install a clothes dryer with flexible plastic venting materials. If flexible metal (foil-type) duct is installed, it must be of a specific type identified by the appliance manufacturer as suitable for use with clothes dryers. Flexible venting materials are known to collapse, be easily crushed, and trap lint. These conditions will obstruct clothes dryer airflow and increase the risk of fire. ƒ To reduce the risk of sever injury or death, follow all installation instructions. ƒ Save these instructions Read the Important Safety Instructions on pages 6 - 8 before you start installing your dryer. Check to make sure you have all the tools and parts necessary to correctly install this appliance. Tools Required ƒ /" nut driver or socket wrench ƒ Phillips screwdriver ƒ Flat-blade screwdriver ƒ Adjustable wrench 200 or 250mm (8" or 10") for gas connections (gas models only) ƒ Pipe joint compound (pipe dope or tape) for gas pipe connections that is resistant to LP Propane, Butane and Natural Gas (gas dryer only) ƒ Level ƒ Caulking gun and compound (for installing new exhaust vent) ƒ Gloves ƒ Safety glasses ƒ Knife ƒ Duct tape Accessories ƒ Mobile Home Installation Kit Part No 14-D346-33 ƒ Drying Rack Kit Part No WE1M396 ƒ Cover Plate to Rear of Cabinet Kit Part No WE1M454 See the rating plate in the door opening to identify the appropriate kit number (Mxx) for conversion to LP or natural gas. Parts Needed Check with local codes and read electrical, gas and venting requirements before purchasing parts. If you need to purchase a power supply cord kit or power supply cable, they must meet the requirements on page 23. 9
-
 1
1 -
2
-
3
-
 4
4 -
 5
5 -
 6
6 -
 7
7 -
 8
8 -
 9
9 -
 10
10 -
 11
11 -
 12
12 -
 13
13 -
 14
14 -
15
-
16
-
17
-
18
-
19
-
20
-
21
-
22
-
23
-
24
-
25
-
26
-
27
-
28
-
29
-
30
-
31
-
32
-
33
-
34
-
35
-
36
-
37
-
38
-
39
-
40
-
41
-
42
-
43
-
44
-
45
-
46
-
47
-
48
-
49
-
50
-
51
-
52
-
53
-
54
-
55
-
56
-
57
-
58
-
59
-
60
-
61
-
62
-
63
-
64
-
65
-
66
-
67
-
68
-
69
-
70
-
71
-
72
-
73
-
74
-
75
-
76
-
77
-
78
-
79
-
80
-
81
-
82
-
83
-
84
-
85
-
86
-
87
-
88
-
89
-
90
-
91
-
92
-
93
-
94
-
95
-
96
-
97
-
98
-
99
-
100
 |
 |
