Fisher and Paykel RF175WCLW1 Active Smart RF175 & RF195 User Guide & I - Page 10
Important, Installation precautions/warnings
 |
View all Fisher and Paykel RF175WCLW1 manuals
Add to My Manuals
Save this manual to your list of manuals |
Page 10 highlights
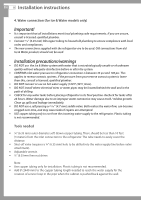
EN 8 Installation instructions 4. Water connection (for Ice & Water models only) Important! It is important that all installations meet local plumbing code requirements. If you are unsure, consult a licensed, qualified plumber. Connect 6.35 mm) OD copper tubing to household plumbing to ensure compliance with local codes and compliances. The new connections supplied with the refrigerator are to be used. Old connections from old Ice & Water products should not be used. Installation precautions/warnings DO NOT use the Ice & Water system with water that is microbiologically unsafe or of unknown quality without adequate disinfection before or after the system. CONFIRM inlet water pressure to refrigerator connection is between 35 psi and 100 psi. This applies to reverse osmosis systems. If the pressure from your reverse osmosis system is lower than this, consult a licensed, qualified plumber. DO NOT connect or use on hot water supply (100°F (38°C )max). DO NOT install where electrical wires or water pipes may be located behind the wall and in the path of drilling. CHECK for any water leaks before placing refrigerator in its final position. Recheck for leaks after 24 hours. Water damage due to an improper water connection may cause mold / mildew growth. Clean up spills and leakage immediately. DO NOT use a self piercing or 4.7 mm) saddle valve. Both reduce the water flow, can become clogged over time, and may cause leaks if repairs are attempted. USE copper tubing only to run from the incoming water supply to the refrigerator. Plastic tubing is not recommended. Tools needed ¼" (6.35 mm) outer diameter soft drawn copper tubing. There should be less than 10 feet (3 meters) from the inlet connection to the refrigerator. The tube needs to easily cover the distance. Shut-off valve (requires a ¼" (6.35 mm) hole to be drilled into the water supply line before valve attachment). Adjustable wrench. ¼" (6.35mm) hex nut driver. Note: Use copper tubing only for installation. Plastic tubing is not recommended. Add 8' (2440 mm) to the copper tubing length needed to reach the water supply for the creation of service loop in the pipe when the cabinet is pushed back against the wall.
-
 1
1 -
2
-
3
-
4
-
 5
5 -
 6
6 -
 7
7 -
 8
8 -
 9
9 -
 10
10 -
 11
11 -
 12
12 -
 13
13 -
 14
14 -
 15
15 -
16
-
17
-
18
-
19
-
20
-
21
-
22
-
23
-
24
-
25
-
26
-
27
-
28
-
29
-
30
-
31
-
32
-
33
-
34
-
35
-
36
-
37
-
38
-
39
-
40
-
41
-
42
-
43
-
44
-
45
-
46
-
47
-
48
-
49
-
50
-
51
-
52
-
53
-
54
-
55
-
56
-
57
-
58
-
59
-
60
-
61
-
62
-
63
-
64
-
65
-
66
-
67
-
68
-
69
-
70
-
71
-
72
-
73
-
74
-
75
-
76
-
77
-
78
-
79
-
80
-
81
-
82
-
83
-
84
-
85
-
86
-
87
-
88
-
89
-
90
-
91
-
92
-
93
-
94
-
95
-
96
 |
 |
