Foxconn A7VA English Manual. - Page 35
► Spread Spectrum, ► CPU Voltage Control, ► DRAM Voltage Control, ► NB Voltage Control, ► HT/SB
 |
View all Foxconn A7VA manuals
Add to My Manuals
Save this manual to your list of manuals |
Page 35 highlights
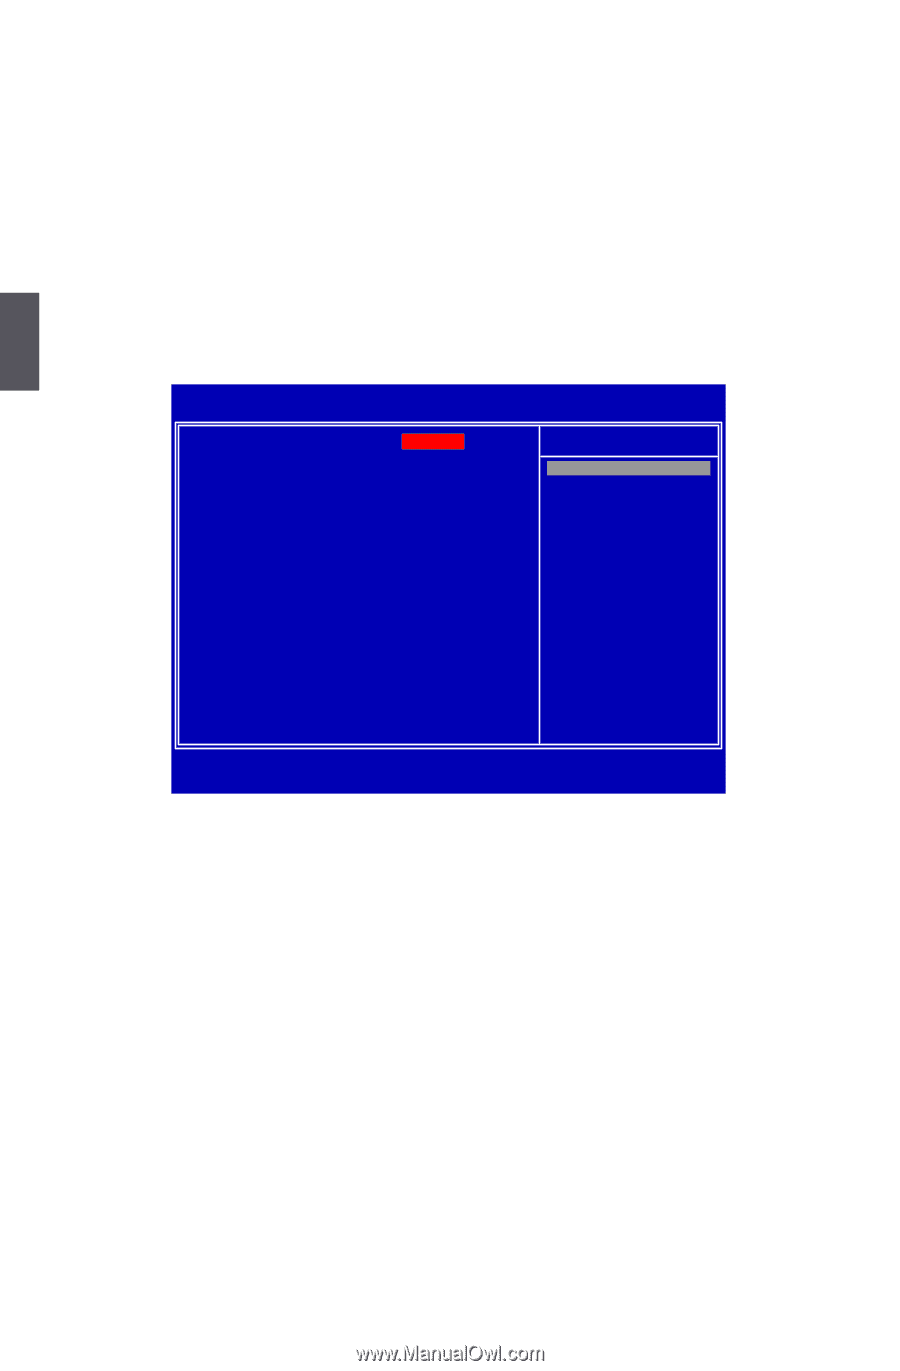
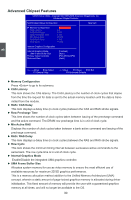
3 to change the clock rate of graphics engine. You can use the or keys to change the value, or you can type the desired value by using the numeric keypad. ► Spread Spectrum If you enabled this function, it can significantly reduce the EMI (Electromagnetic Interference) generated by the system, so to comply with FCC regulation. But if overclocking is activated, you had better disable it. Voltage Options CMOS Setup Utility - Copyright (C) 1985-2008, American Megatrends, Inc. Voltage Options CPU Voltage Control [Disabled] Help Item DRAM Voltage Control NB Voltage Control [Disabled] [Disabled] Options H��T�/S�B��V�o�lt�a�g�e�C�o�n�t�ro�l D��is�a�b�le�d�] D� � isab� � led +25mV 50mV 75mV +100mV 1� 25mV 1� 50mV 1� 75mV 2� 00mV 2� 25mV 2� 50mV 2� 75mV 3� 00mV 3� 25mV 3� 50mV Move Enter:Select +/-/:Value F10:Save ESC:Exit F1:General Help F9:Optimized Defaults ► CPU Voltage Control This option is used to change the CPU voltage in a step of 25mV. The voltage can be incremented from +25mV to +775mV. ► DRAM Voltage Control This option is used to change the DRAM voltage in a step of 50mV. The voltage can be incremented from +50mV to +600mV. ► NB Voltage Control This option is used to change the North Bridge voltage in a step of 30mV. The voltage can be incremented from +30mV to +360mV. ► H��T�/�S�B��V�o�l�t�a�g�e�C��o�n�t�r�o�l This option is used to change the HT/SB voltage in a step of 30mV. The voltage can be incremented from +60mV to +360mV. 28
-
 1
1 -
2
-
3
-
4
-
5
-
6
-
7
-
8
-
9
-
10
-
11
-
12
-
13
-
14
-
15
-
16
-
17
-
18
-
19
-
20
-
21
-
22
-
23
-
24
-
25
-
26
-
27
-
28
-
29
-
 30
30 -
 31
31 -
 32
32 -
 33
33 -
 34
34 -
 35
35 -
 36
36 -
 37
37 -
 38
38 -
 39
39 -
 40
40 -
41
-
42
-
43
-
44
-
45
-
46
-
47
-
48
-
49
-
50
-
51
-
52
-
53
-
54
-
55
-
56
-
57
-
58
-
59
-
60
-
61
-
62
-
63
-
64
-
65
-
66
-
67
-
68
-
69
-
70
-
71
-
72
-
73
-
74
-
75
-
76
-
77
-
78
-
79
-
80
-
81
-
82
-
83
-
84
-
85
-
86
-
87
-
88
-
89
-
90
-
91
-
92
-
93
-
94
-
95
-
96
-
97
-
98
-
99
-
100
-
101
-
102
-
103
-
104
-
105
 |
 |