Frigidaire FCM07A04K Complete Owner's Guide - Page 6
Tinstallation
 |
UPC - 012505747854
View all Frigidaire FCM07A04K manuals
Add to My Manuals
Save this manual to your list of manuals |
Page 6 highlights
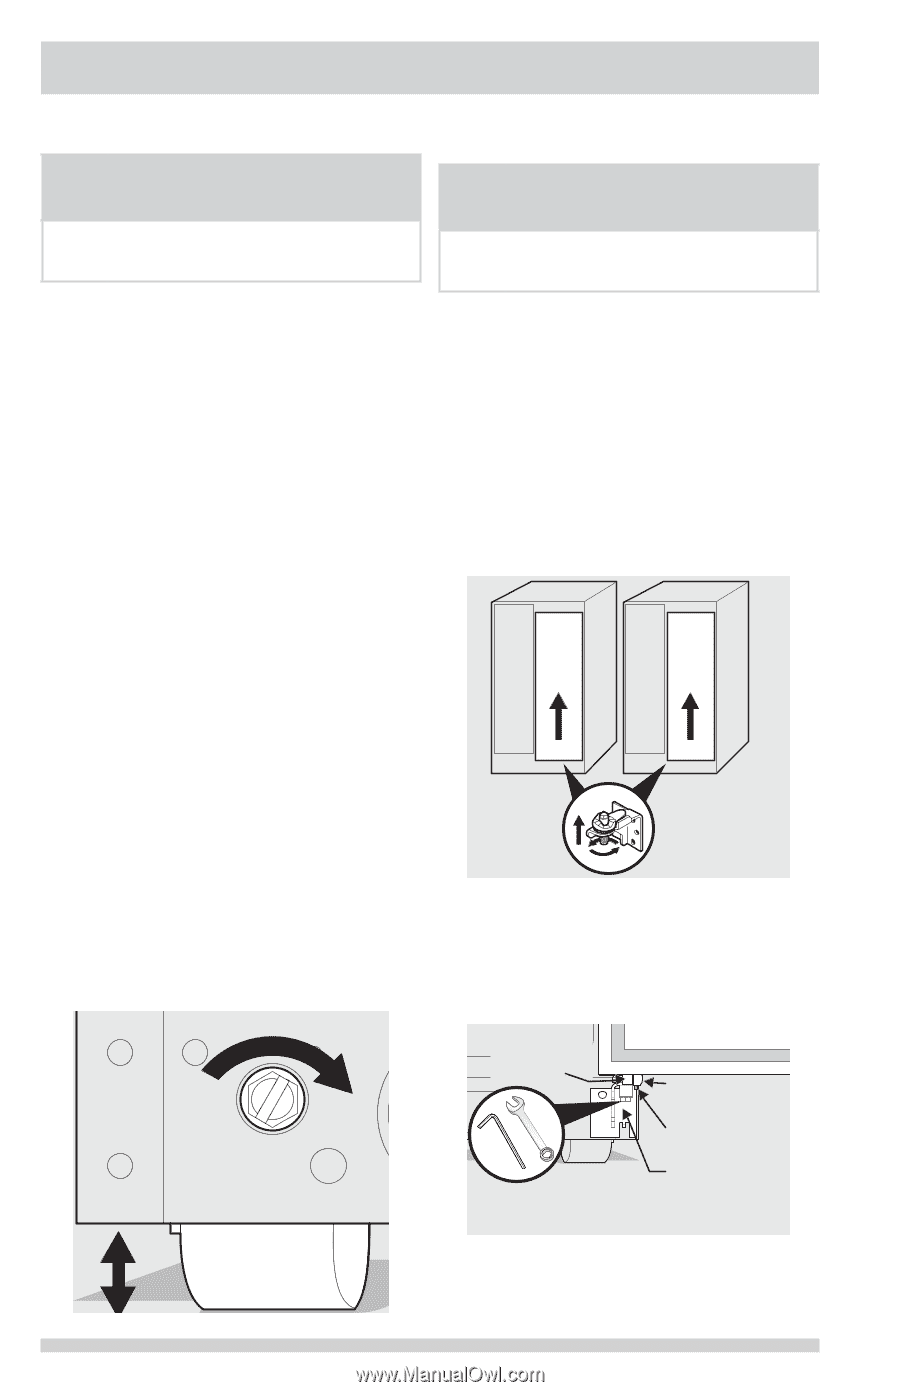
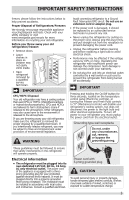
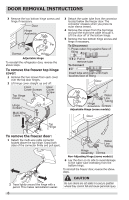
INSTALLATION Door Opening NOTE To level the doors using the adjustable lower hinge: NOTE The refrigerator doors are designed to shut by themselves within a 20 degree opening. Your refrigerator should be positioned to allow easy access to a counter or table when removing food. For best use of drawers and freezer baskets, the refrigerator should be in a position where both the refrigerator and freezer doors can be fully opened. Guidelines for final positioning of your refrigerator: • All four corners of the cabinet must rest firmly on the floor. • The cabinet should be level at the front and rear. Some models will not have a set screw. For those models follow steps 2 through 4. 1 Before leveling either door, remove set screw that locks door height into position. (The door cannot be adjusted without set screw removed). 2 If the refrigerator door is lower than the freezer door, raise the refrigerator door by turning the adjustment screw clockwise using a 7/16 inch wrench. (See illustration.) 3 If the freezer door is lower than the refrigerator door, raise the freezer door by turning the adjustment screw clockwise using a 7/16 inch wrench. (See illustration.) • The sides should tilt ¼ inch (6 mm) from front to back (to ensure that doors close and seal properly). • Doors should align with each other and be level. Door Door All of these conditions can be met by raising or lowering the adjustable front rollers. To level the cabinet using the front rollers: 1 Open both doors and remove the toe grille (see "Toe Grille Installation and Removal" in the "Installation" section). 2 Close the doors and use a flat-blade screwdriver or 3/8 inch socket wrench to raise or lower the front rollers. 3 Ensure both doors are bind-free with their seals touching the cabinet on all four sides. Raise Raise Door Raise Door 4 After leveling, verify door stop contacts lower hinge and top of door does not contact upper hinge through full movement of door (from fully closed to fully open). 5 Reinstall set screw, locking the door height. Door Stop Flange Open Door Hinge Flange Set Screw (some models) Hinge 7/16" Wrench and 3/32" Hex Key (some models) 6 Replace the toe grille by fitting it into place (see "Toe Grille Installation and Removal" in the "Installation" section). 6
-
 1
1 -
 2
2 -
 3
3 -
 4
4 -
 5
5 -
 6
6 -
 7
7 -
 8
8 -
 9
9 -
 10
10 -
 11
11 -
 12
12 -
13
-
14
-
15
-
16
-
17
-
18
-
19
-
20
-
21
-
22
-
23
-
24
-
25
-
26
-
27
-
28
-
29
-
30
 |
 |