Frigidaire FEF369HS Use and Care Manual - Page 8
Single Radiant Surface Elements, Element ON & Hot Surface Indicator Lights, About the Radiant
 |
UPC - 012505548307
View all Frigidaire FEF369HS manuals
Add to My Manuals
Save this manual to your list of manuals |
Page 8 highlights
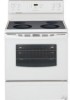
Setting Surface Controls (cont'd) About the Radiant Surface Elements The element temperature rises gradually and evenly. As the temperature rises, the element will glow red. To maintain the selected setting, the element will cycle ON and OFF. The heating element retains enough heat to provide a uniform and consistent heat during the off cycle. Warming Zone Surface Control (some models) ELEMENT ON INDICATOR LIGHT For efficient cooking, turn OFF the element several minutes before cooking is complete. This will allow residual heat to complete the cooking process. Single Radiant Surface Control (some models) Fig. 1 Single Radiant (some models) Dual Radiant (some models) Surface Control NOTE: Please read detailed instructions for ceramic glass cooktop cleaning in the General Care & Cleaning and Before You Call checklist sections of this Use & Care Manual. HOT SURFACE INDICATOR LIGHT Element ON & Hot Surface Indicator Lights Your range is equipped with two different types of radiant surface control indicator lights that will glow on your range- the Element ON indicator light and the Hot Surface indicator lights (Refer to Fig. 2). The Element ON indicator lights are located on the control panel above each radiant element control knob and will glow when a surface element is turned ON. A quick glance at this indicator light after cooking is an easy check to be sure ALL surface controls are turned OFF. The Hot Surface indicator light located on the control panel will glow when any surface cooking area heats up and will REMAIN ON until the glass cooktop has cooled to a MODERATE level. Fig. 2 NOTE: Radiant elements have a limiter that allows the element to cycle ON & OFF, even at the HI setting. This helps to prevent damage to the ceramic smoothtop. Cycling at the HI setting is normal and will occur more often if the cookware is too small for the radiant element or if the cookware bottom is not flat. Single Radiant Surface Elements (all models) To Operate a Single Radiant Element: 1. Place correctly sized cookware on radiant surface element. 2. Push in & turn the surface control knob in either direction to the desired setting (Refer to the Suggested Radiant Surface Element Settings Table & Fig. 3). Start most cooking operations on a higher setting and then turn to a lower setting to finish cooking. The surface control knobs do not have to be set exactly on a particular mark. Use the marks as a guide and adjust the control knob as needed. Each surface element provides a constant amount of heat at each setting. A glowing red surface heating area extending beyond the bottom edge of the cookware indicates the cookware is too small for the surface heating area. 3. When cooking is complete turn the surface element OFF before removing the cookware. Note: The Element ON indicator lights will glow when one or more of the surface elements are turned ON. A quick glance at these indicator lights when cooking is finished is an easy check to be sure all control knobs are turned OFF. The Hot Surface indicator light will continue to glow AFTER the control knob is turned to the OFF position & will glow until the heating surface area has cooled sufficiently. Fig. 3 Radiant surface elements may appear to have cooled after they have been turned OFF. The glass surface may still be hot and burns may occur if the glass surface is touched before it has cooled sufficiently. DO NOT place plastic items such as salt & pepper shakers, spoon holders or plastic wrappings on top of the range when it is in use. These items could melt or ignite. Potholders, towels or wooden spoons could catch fire if placed too close to the surface elements. 8
-
 1
1 -
2
-
 3
3 -
 4
4 -
 5
5 -
 6
6 -
 7
7 -
 8
8 -
 9
9 -
 10
10 -
 11
11 -
 12
12 -
 13
13 -
14
-
15
-
16
-
17
-
18
-
19
-
20
 |
 |
