Frigidaire FFAD6022W1 Complete Owners Guide - Page 6
continued
 |
View all Frigidaire FFAD6022W1 manuals
Add to My Manuals
Save this manual to your list of manuals |
Page 6 highlights
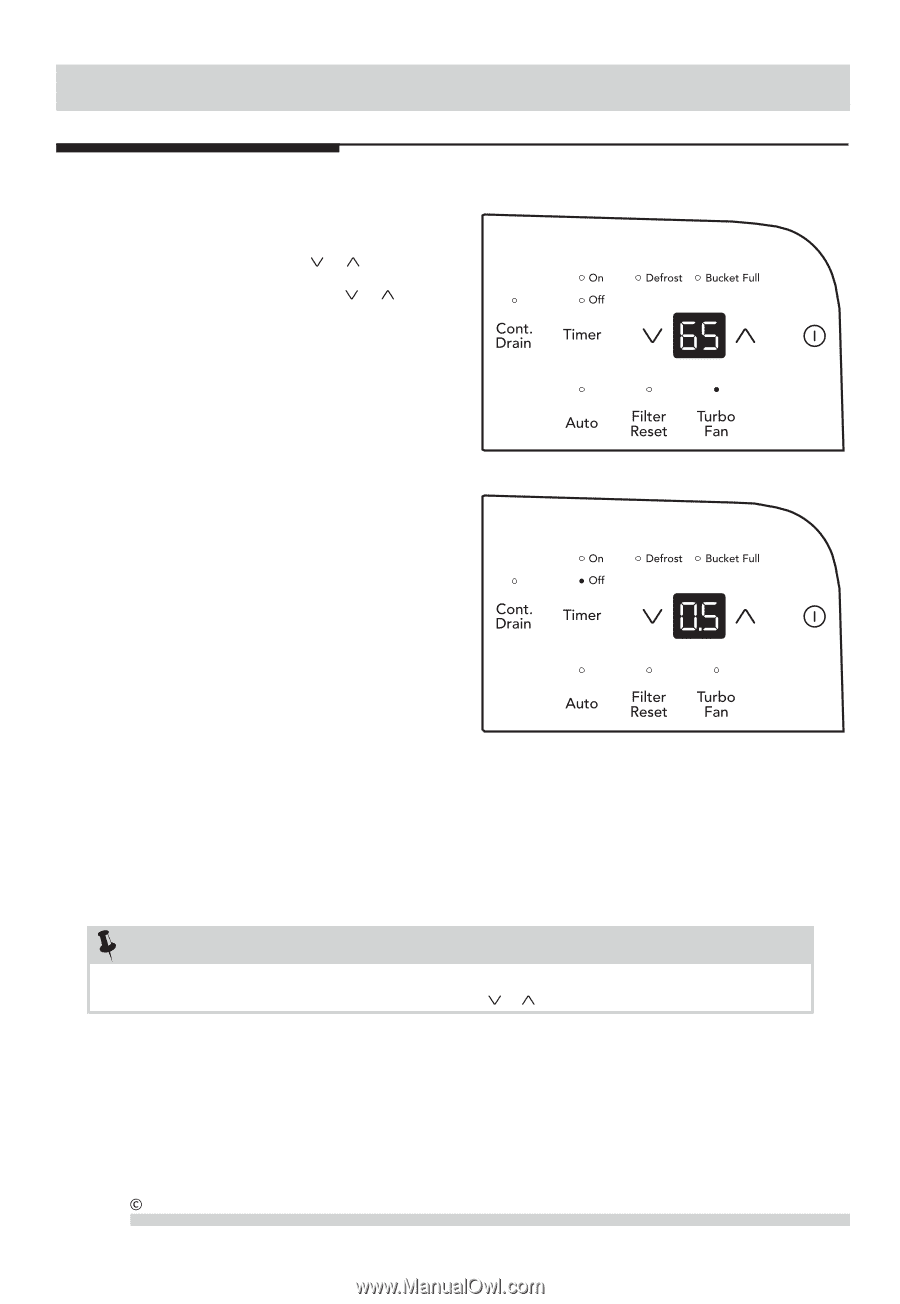
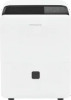
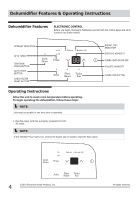
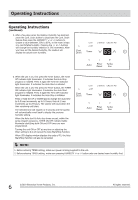
Operating Instructions Operating Instructions (continued) 5. After a few days when the Relative Humidity has declined, press the Cont. Drain button to deactivate the Cont. Drain feature then press the HUMIDITY or buttons to choose a value between 35% to 85%, so the room is kept at a comfortable humidity. Pressing the or buttons will change the humidity selection in 5% increments. After you have set the desired humidity, the readout will display the actual room humidity. 6. When the unit is on, first press the Timer button, the Timer Off indicator light illuminates. It indicates the Auto Stop program is initiated. Press it again the Time On indecator light illuminates. It indicates the Auto Start is initiated. When the unit is off, first press the Timer button, the TIMER ON indicator light illuminates. It indicates the Auto Start program is initiated. Press it again the Time Off indecator light illuminates. It indicates the Auto Stop is initiated. Press or hold the UP or DOWN pad to change the Auto time by 0.5 hour increments, up to 10 hours, then at 1 hour increments up to 24 hours. The control will count down the time remaining until start. The selected time will register in 5 seconds and the system will automatically revert back to display the previous humidity setting. When the Auto start & Auto stop times are set, within the same program sequence, TIMER ON OFF indicator lights illuminate identifying both ON and OFF times are now programmed. Turning the unit ON or OFF at any time or adjusting the timer setting to 0.0 will cancel the Auto Start/Stop function. When LED display window displays the code of P2, the Auto Start/Stop function will also be cancelled. NOTE: 1. Before entering TIMER setting, make sure power is being supplied to the unit. 2. Before entering TIMER setting, make sure pressing HUMIDITY or button sets one desired room humidity first. 6 2019 Electrolux Home Products, Inc. All rights reserved.
-
 1
1 -
 2
2 -
 3
3 -
 4
4 -
 5
5 -
 6
6 -
 7
7 -
 8
8 -
 9
9 -
 10
10 -
 11
11 -
 12
12
 |
 |