Frigidaire FFFH17F2QW Complete Owner's Guide - Page 6
Lid Removal, Door Removal
 |
View all Frigidaire FFFH17F2QW manuals
Add to My Manuals
Save this manual to your list of manuals |
Page 6 highlights
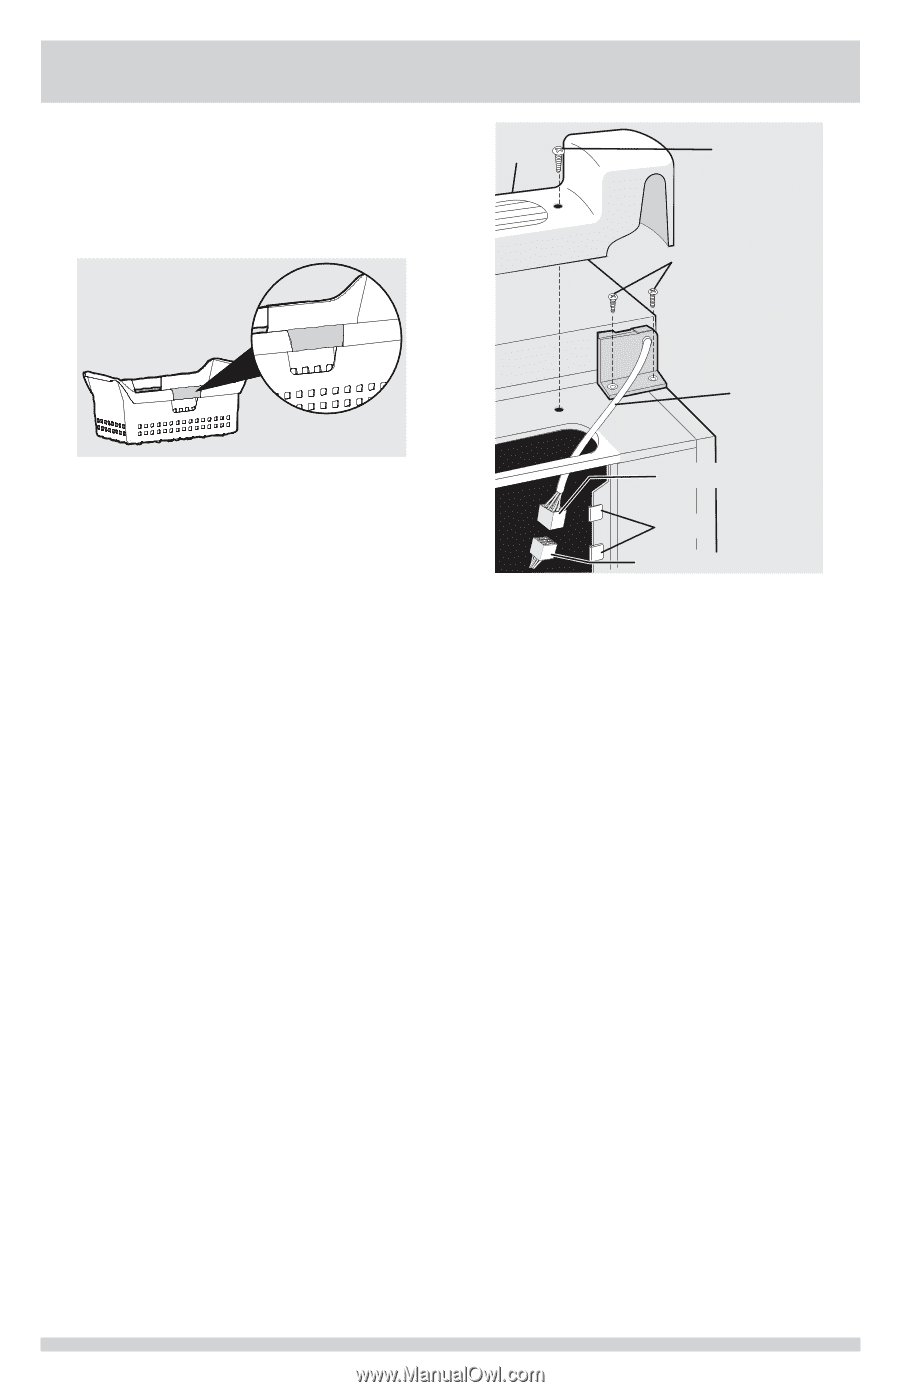
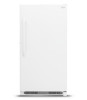
FIRST STEPS 3. Once the inside surface snaps in place, continue the process by rolling the handle clip slightly outward and pressing down firmly to snap onto the outside surface. If installed incorrectly, the handle clip will not lay flat. Base Panel Base Panel Screws Hinge Screws Wire Door Removal (upright models) If door must be removed, unplug the unit. 1. Gently lay the unit on its back, on a rug or blanket. 2. Remove 2 base screws and base panel. 3. Remove wire from clips on bottom of cabinet if required. 4. Unplug connector, if required, by holding the cabinet connector in place, and pulling door connector out. 5. Remove bottom hinge screws. 6. Remove plastic top hinge cover. 7. Remove screws from top hinge. 8. Remove top hinge from cabinet. 9. Remove door and bottom hinge from cabinet. 10. To replace door, reverse the above order and securely tighten all screws to prevent hinge slippage. Door Connector Clips Cabinet Connector Lid Removal (chest models) See Instructions on hinge label. Unplug the unit. 6
-
 1
1 -
 2
2 -
 3
3 -
 4
4 -
 5
5 -
 6
6 -
 7
7 -
 8
8 -
 9
9 -
 10
10 -
 11
11 -
 12
12 -
13
-
14
-
15
-
16
 |
 |