Frigidaire FFRE0633U1 Installation Instructions - Page 5
Removing the air conditioner From Window
 |
View all Frigidaire FFRE0633U1 manuals
Add to My Manuals
Save this manual to your list of manuals |
Page 5 highlights
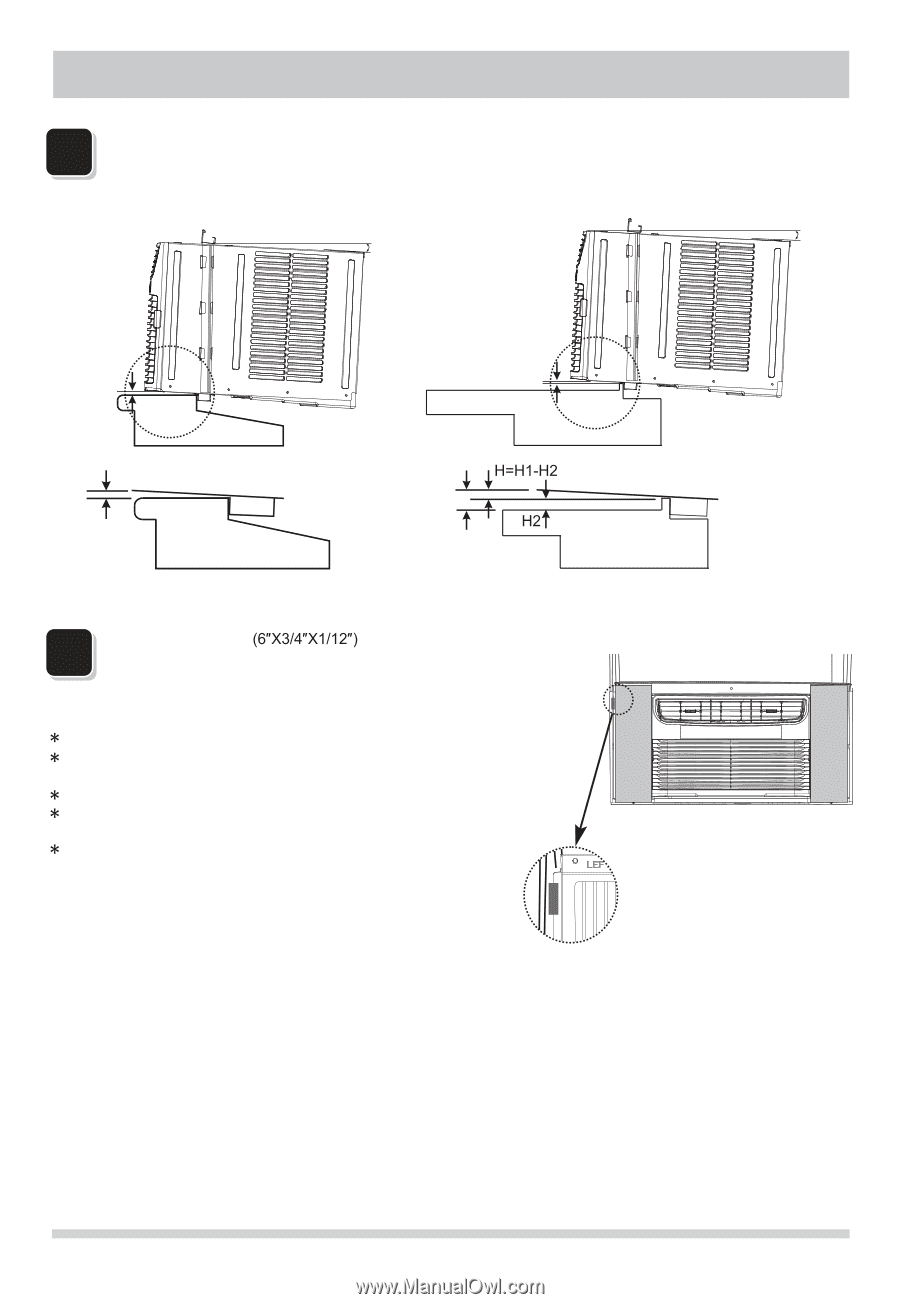
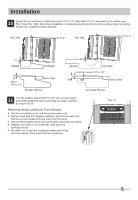
Installation 10 Check that air conditioner is tilted back about 1/4" to 1/2" (tilted about 2º to 4º downward to the outside, see FIG. 15A & FIG. 15B). After proper installation, condensate should not drain from the overflow drain hole during normal use, correct the slope otherwise. FIG. 15A 2º to 4º FIG. 15B 2º to 4º H INSIDE OUTSIDE H about 1/4" to 1/2" Bottom Rail Wooden Window H INSIDE OUTSIDE about 1/4" to 1/2" H1 Bottom Rail Vinyl-Clad Window 11 Trim the weather seal with a proper length, peel off the protective backing and plug any gaps if needed as shown FIG.16. Removing the air conditioner From Window Turn the air conditioner off, and disconnect power cord. Remove sash seal from between windows, and unscrew sash lock. Remove screws installed through frame and framelock. Remove the insulation panel and close (slide) side panels into frame. Keeping a firm grip on air conditioner, raise sash and carefully remove. Be careful not to spill any condensate water while lifting unit from window. Store parts WITH air conditioner. FIG. 16 5
-
 1
1 -
 2
2 -
 3
3 -
 4
4 -
 5
5
 |
 |