Frigidaire FGR641FS Use and Care Guide - Page 4
Drying Procedures, Important Safety Instructions Con't
 |
UPC - 012505376467
View all Frigidaire FGR641FS manuals
Add to My Manuals
Save this manual to your list of manuals |
Page 4 highlights
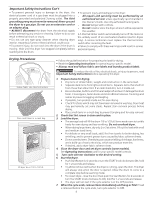
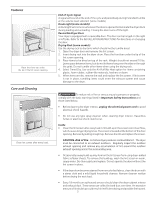
Important Safety Instructions Con't • To prevent personal injury or damage to the dryer, the electrical power cord of a gas dryer must be plugged into a properly grounded and polarized 3-prong outlet. The third grounding prong must never be removed. Never ground the dryer to a gas pipe. Do not use an extension cord or an adaptor plug. • ALWAYS disconnect the dryer from the electrical supply before attempting any service or cleaning. Failure to do so can result in electrical shock or injury. • Do not use any type spray cleanser when cleaning dryer interior. Hazardous fumes or electrical shock could occur. • To prevent injury, do not reach into the dryer if the drum is moving. Wait until the dryer has stopped completely before reaching into the drum. • To prevent injury and damage to the dryer: - All repairs and servicing must be performed by an authorized servicer unless specifically recommended in this Owner's Guide. Use only authorized factory parts. - Do not tamper with controls. - Do not install or store the dryer where it will be exposed to the weather. • A thermal limiter switch automatically turns off the motor in the unlikely event of an overheated situation (electric dryers only). A service technician must replace the thermal limiter switch after correcting the fault. • Failure to comply with these warnings could result in serious personal injuries. Drying Procedures Follow fabric care label instructions. Place small items in a mesh bag. Fill dryer drum 1/3 to 1/2 full. • Follow the guidelines below for preparing the load for drying. • Read the Operating Instructions for operating your specific model. • Always read and follow fabric care labels and laundry product labels. To reduce the risk of fire, electrical shock, or injury to persons, read Important Safety Instructions before operating this dryer. 1. Prepare items for drying. • Dry items of similar fabric, weight and construction in the same load. • Separate dark items from light-colored items. Separate items that shed lint from those that attract lint. If an item sheds lint, turn it inside out. • Be sure buckles, buttons and trim are heatproof and won't damage the drum finish. Close zippers, fasten hooks and Velcro®-like fasteners. Tie strings and sashes to prevent snagging and tangling. • If possible, turn pockets inside out for even drying. • Check for stains which may not have been removed in washing. Dryer heat may permanently set some stains. Repeat stain removal process before drying. • Place small items in a mesh bag to prevent tangling and for easy removal. 2. Check that lint screen is clean and in place. 3. Load the dryer. • The average load will fill the drum 1/3 to 1/2 full. Items need room to tumble freely for even drying and less wrinkling. Do not overload dryer. • When drying large items, dry only 2 or 3 at a time. Fill out the load with small and medium sized items. • For delicate or very small loads, add 2 lint-free towels for better drying, less wrinkling, and to prevent grease stains caused by fabric softener sheets. • Do not overdry items. Overdrying can cause wrinkling, shrinkage, harshness, and a build-up of static electricity, which can produce more lint. • If desired, add a dryer fabric softener sheet. 4. Close the dryer door and set dryer controls (some models). See Operating Instructions card for your specific model controls. 5. Turn cycle selector clockwise to the desired setting. 6. Start the dryer. • Push Start Button for 2 seconds or turn the START knob clockwise to ON, hold for 1-2 seconds and release. • To add or remove items when the dryer is running, open the door. The dryer will always stop when the door is opened. Allow the drum to come to a complete stop before reaching inside. • To restart dryer, close the door then push the Start Button for 2 seconds or turn the START knob clockwise to ON, hold for 1-2 seconds and release. • The dryer will not start if the cycle selector is in the OFF position. 7. When the cycle ends, remove items immediately and hang or fold. If load is removed before the cycle ends, turn cycle selector to OFF. 4
-
 1
1 -
 2
2 -
 3
3 -
 4
4 -
 5
5 -
 6
6 -
 7
7 -
 8
8 -
 9
9 -
 10
10 -
11
-
12
-
13
-
14
-
15
-
16
-
17
-
18
-
19
-
20
-
21
-
22
-
23
-
24
 |
 |
