Frigidaire FPHG2399MF Complete Owner's Guide (English) - Page 6
INSTALLATION, Leveling Freezer Drawer, Level Refrigerator & Adjust Doors
 |
View all Frigidaire FPHG2399MF manuals
Add to My Manuals
Save this manual to your list of manuals |
Page 6 highlights
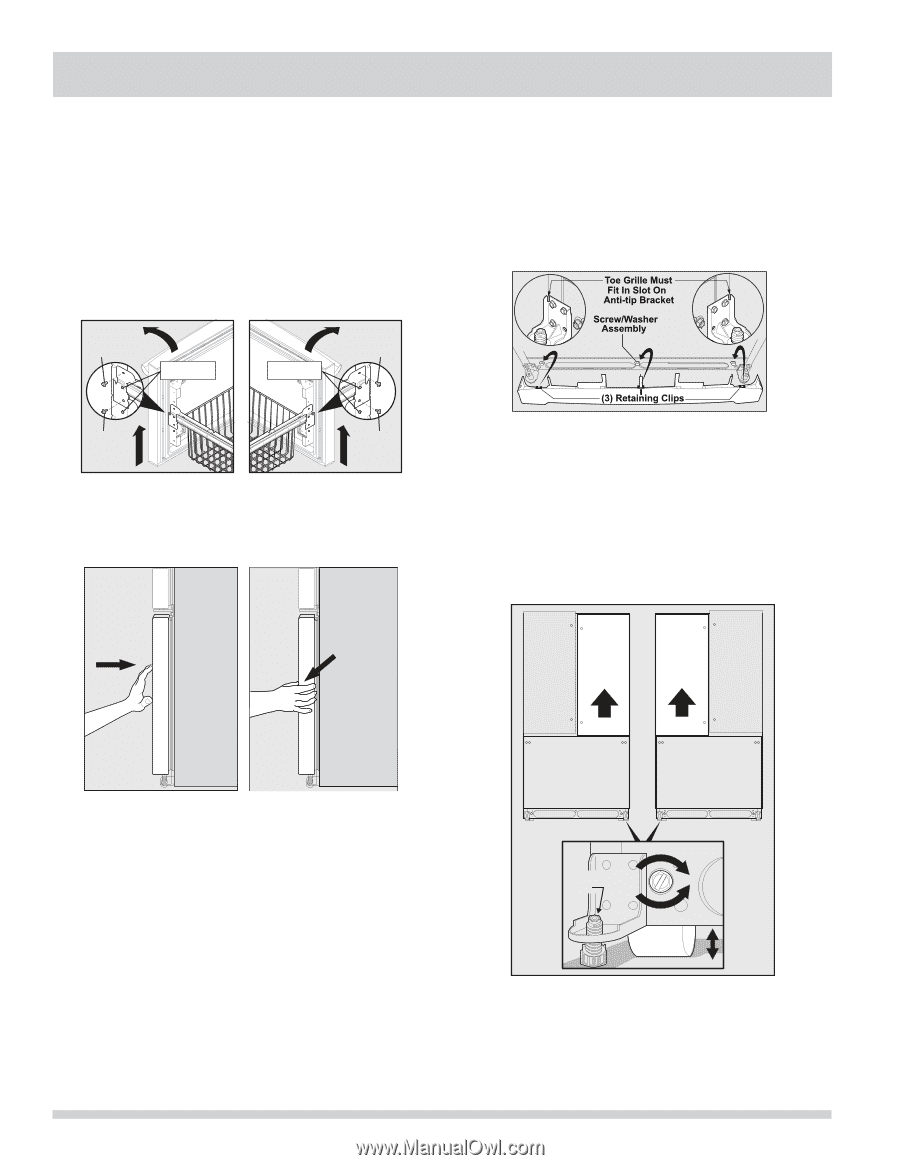
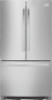
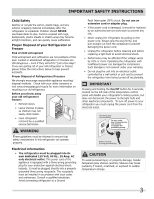
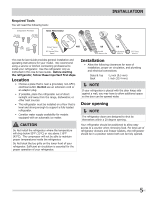
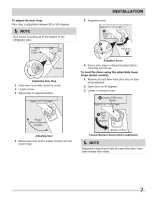
INSTALLATION Leveling Freezer Drawer (if necessary) 1 Check gasket seal around top, bottom, and sides of freezer drawer. 2 If gasket is not sealed, open drawer and slightly loosen four (4) drawer screws (two (2) on each side) to allow drawer to rotate. 3 Close drawer and recheck the seal on the gasket (A). Open the drawer grabbing by the sides in the center (B). Be careful not to rotate the drawer. To level the cabinet using the front rollers (select models): 1 Slightly open freezer drawer. Lift the toe grille and gently pull forward (see illustration). 2 You can raise or lower each door. Use a 3/8 inch socket wrench to turn the adjustment screws (1 per side). Remove Hex Head Drawer Screw Do Not Remove Other Screws Do Not Remove Other Screws Remove Hex Head Drawer Screw Remove Hex Head Drawer Screw 4 Tighten four (4) drawer screws. 5 Recheck gasket seal. Remove Hex Head Drawer Screw Push Against Freezer Drawer Grab Drawer At Center From Both Sides Then Pull Drawer Out To raise: turn adjustment screw clockwise. To lower: turn adjustment screw counterclockwise. 3 Ensure both doors are bind-free with their seals touching the cabinet on all four sides and that cabinet is stable. 4 After unit is leveled, lower anti-tip leg until it contacts the floor. A B Level Refrigerator & Adjust Doors (if necessary) Guidelines for final positioning of your refrigerator: • All four corners of the cabinet must rest firmly on the floor. • The sides should tilt 1/4 inch (6 mm) from front to back (to ensure that doors close and seal properly). • Doors should align with each other and be level. Most of these conditions can be met by raising or lowering the adjustable front rollers. Door Door Anti-tip Leg Raise Lower 5 Install the toe grille by fitting into place. 6
-
 1
1 -
 2
2 -
 3
3 -
 4
4 -
 5
5 -
 6
6 -
 7
7 -
 8
8 -
 9
9 -
 10
10 -
 11
11 -
 12
12 -
13
-
14
-
15
-
16
-
17
-
18
-
19
-
20
-
21
-
22
-
23
-
24
-
25
-
26
-
27
-
28
-
29
 |
 |