Frigidaire FPHG2399MF Complete Owner's Guide (English) - Page 8
To adjust the flipper mullion
 |
View all Frigidaire FPHG2399MF manuals
Add to My Manuals
Save this manual to your list of manuals |
Page 8 highlights
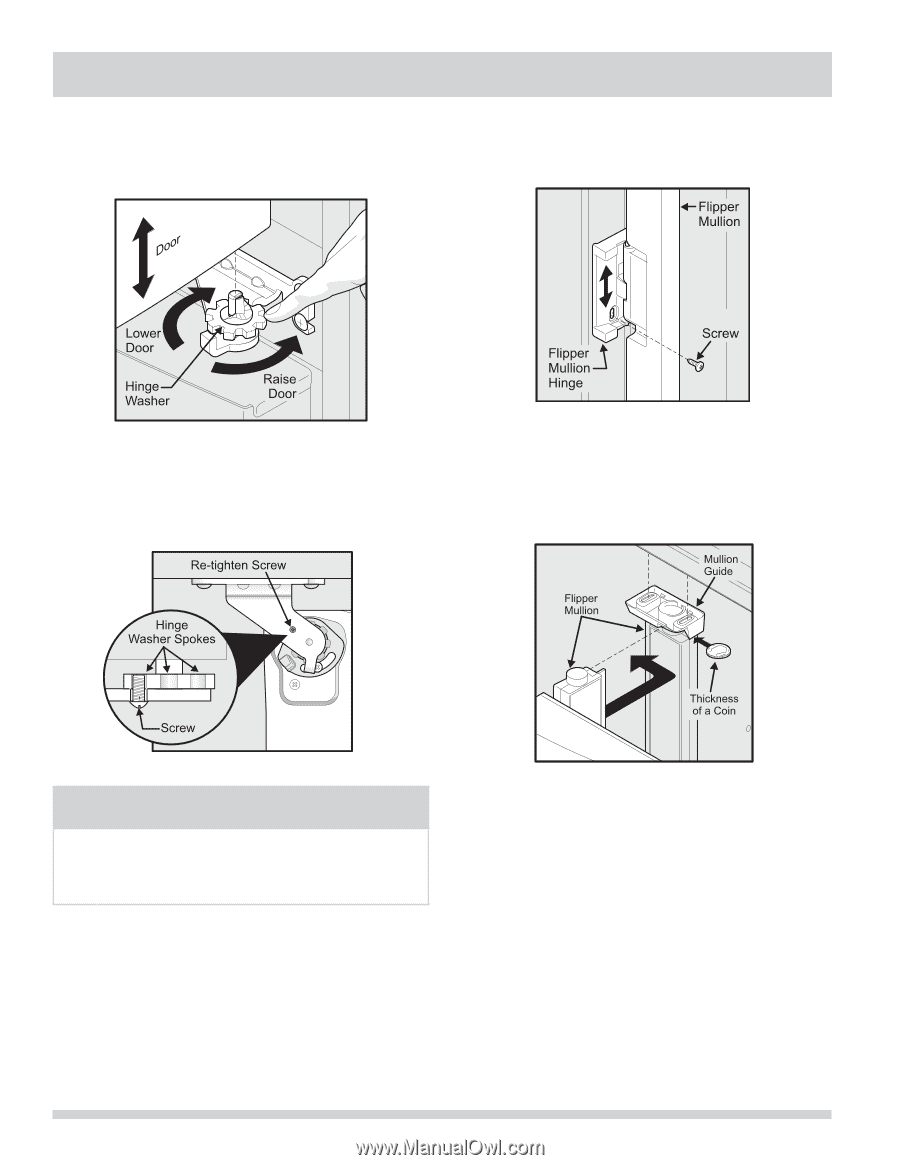
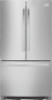
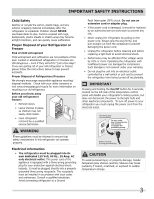
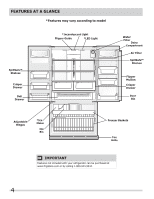
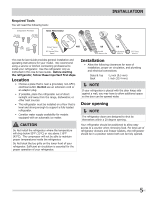
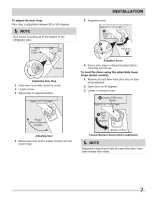
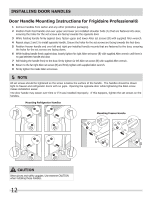
INSTALLATION 4 Lift the door while adjusting the washer. To raise the door, rotate washer clockwise (when viewed from the bottom). To lower door, rotate washer counterclockwise (when viewed from the bottom). To adjust the flipper mullion: 1 Loosen the screw located on the flipper mullion hinge. Raising/Lowering Door 5 Re-tighten the screw (where applicable), ensuring it is between the spokes of the washer. Screw will not be tight, just insert until it is flush with the hinge. Adjusting Flipper Mullion Screw 2 Adjust flipper mullion height. For proper connection with the flipper mullion guide, there should be a separation about the thickness of a coin (0.060 inches, or 1.5 mm) between the guide and flipper mullion. Screw (where applicable) NOTE If after adjusting doors higher the door makes a popping/clicking sound, remove screw and replace with the longer one supplied in the handle package (select models). Adjusting Flipper Mullion Height 3 Retighten screw. 8
-
 1
1 -
2
-
 3
3 -
 4
4 -
 5
5 -
 6
6 -
 7
7 -
 8
8 -
 9
9 -
 10
10 -
 11
11 -
 12
12 -
 13
13 -
14
-
15
-
16
-
17
-
18
-
19
-
20
-
21
-
22
-
23
-
24
-
25
-
26
-
27
-
28
-
29
 |
 |