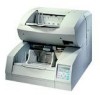
Fujitsu 4099D Operating Guide
Fujitsu 4099D - M VRS Manual
 |
UPC - 097564305894
View all Fujitsu 4099D manuals
Add to My Manuals
Save this manual to your list of manuals |
Fujitsu 4099D manual content summary:
- Fujitsu 4099D | Operating Guide - Page 1
C150-E141-02EN M4099D Image Scanner Operator's Guide - Fujitsu 4099D | Operating Guide - Page 2
M4099D Image Scanner Operator's Guide - Fujitsu 4099D | Operating Guide - Page 3
and replacement cycle of consumables • FCC statement added Specification No. C150-E141-02EN in accordance with the instruction manual, may cause harmful manual may be revised without prior notice. All Rights Reserved, Copyright © 1999, 2000 FUJITSU LIMITED. Printed in Japan. No part of this manual - Fujitsu 4099D | Operating Guide - Page 4
manual or on Fujitsu products to the following addresses: North American contact: FUJITSU FUJITSU CANADA fujitsu.ca/ Asian contact: FUJITSU fujitsu.com.hk/ FUJITSU fujitsu.co.kr/ European contact: FUJITSU COMPUTER (SINGAPORE) PTE. LTD. FUJITSU FUJITSU SYSTEMS BUSINESS (MALAYSIA) BHD. Fujitsu FUJITSU - Fujitsu 4099D | Operating Guide - Page 5
DAMAGES MAY BE CAUSED TO THE USERS OR THE BYSTANDERS. While all efforts have been made to ensure the accuracy of all information in this manual, FUJITSU assumes no liability to any party for any damage caused by errors or omissions or by statements of any kind in this - Fujitsu 4099D | Operating Guide - Page 6
SPECIFICATIONS, and SETUP, BROWSE, AND TEST MODES. Refer to the CD-ROM for the information about the routine operation of the M4099D. The CD-ROM contains OPERATING INSTRUCTION, CLEANING, REPLACEMENT OF PARTS, ADJUSTMENT and TROUBLESHOOTING. The M4099D is very fast and highly functional image scanner - Fujitsu 4099D | Operating Guide - Page 7
result if you do not follow a procedure correctly. CAUTION CAUTION indicates that minor personal injury, loss of data, or damage to the scanner may result if you do not follow a procedure correctly. NOTE NOTE indicates remarks, tips, and other useful supplementary information. The following symbols - Fujitsu 4099D | Operating Guide - Page 8
2-4 K CHAPTER 3 OPERATING INSTRUCTION Turning the Power On 3-1 Basic Operation of the Operator Panel 3-2 K CHAPTER 4 DOCUMENT SPECIFICATION Document Size 4-1 Document Quality 4-2 K CHAPTER 5 SPECIFICATIONS Installation Specifications 5-1 External Dimensions 5-2 Consumables 5-3 Options - Fujitsu 4099D | Operating Guide - Page 9
COMPONENTS CHAPTER 2 INSTALLATION AND CONNECTIONS INSTALLATION AND CONNECTIONS CHAPTER 3 OPERATING INSTRUCTION OPERATING INSTRUCTION CHAPTER 4 DOCUMENT SPECIFICATION DOCUMENT SPECIFICATION CHAPTER 5 SPECIFICATIONS SPECIFICATIONS CHAPTER 6 SETUP, BROWSE, AND TEST MODES SETUP, BROWSE, AND - Fujitsu 4099D | Operating Guide - Page 10
CHAPTER 1 COMPONENTS After unpacking the scanner, confirm that all the components have been received. This chapter describes the components of the scanner, part names, and operator panel arrangement and their function. Checking the Components Units and Assemblies Operator Panel Buzzer - Fujitsu 4099D | Operating Guide - Page 11
shown in the following figure have been received. Mount the stop lever on the stacker of the scanner. If any component is missing, please contact your sales agent. * Stop lever Scanner * Operator's Guide (this manual) and two CD-ROMs Power cable for North America Power cable for Europe or 1-1 - Fujitsu 4099D | Operating Guide - Page 12
Units and Assemblies This section shows the exterior view and assemblies of the scanner. This section also provides names of each part and describes their functions. Units 19 18 17 16 17 15 12 6 13 7 14 4 7 8 1 9 2 10 11 53 4 20 21 22 23 1-2 - Fujitsu 4099D | Operating Guide - Page 13
unit. Opens to access back-side lamp. Document exit tray. Adjustable stopper for shorter length documents. Helps guide documents into stacker. Used to keep documents in the stacker. For use with long documents. Controls supply of line power to the scanner. Power cable connection. Video and RS-232C - Fujitsu 4099D | Operating Guide - Page 14
Assemblies Lower sheet guide assembly Pick roller unit Brake roller Pad Guide plate 1-4 Lamp unit (back side) Lamp Lamp unit (front side) Lamp - Fujitsu 4099D | Operating Guide - Page 15
Operator Panel The operator panel is located at the lower right hand side of the scanner. The panel consists of an LCD (24 character x 2 line), LEDs, and buttons. Arrangement Operator panel LCD 24 characters x 2 lines DATA CHECK POWER F1 MENU F2 ENTER F3 CANCEL 1-5 - Fujitsu 4099D | Operating Guide - Page 16
Setup mode is used for customizing the scanner. Browse mode is used for glancing conditions of the scanner. Test mode is used for testing the scanner offline. Used in setup, browse, Lights when the power is on. Lights when the image buffer contains data. Blinks when an equipment error occurs. LCD - Fujitsu 4099D | Operating Guide - Page 17
Manual Feeding Load documents on the hopper table manually. Feeding The scanner is feeding documents. The second line indicates the number of documents fed per batch. Transferring Data The scanner you must clean or replace the specified part. Optical error: Front Fuse alarm: Front lamp 1-7 - Fujitsu 4099D | Operating Guide - Page 18
Buzzer The scanner has a buzzer to indicate that an error has occurred or an operator panel button is any button is pressed or the power is turned off. Even when a button is pressed, the scanner continues to display the error. Sounds briefly. This sound cannot be disabled by the buzzer setup. 1-8 - Fujitsu 4099D | Operating Guide - Page 19
CHAPTER 2 INSTALLATION AND CONNECTIONS The chapter describes how to install and connect the scanner. Precautions Inspection Cable Connection - Fujitsu 4099D | Operating Guide - Page 20
or cause hardware failures. Do not place the scanner where liquid spills may occur. • Be aware of the static electricity. Be sure that the flooring and the desk are made of materials that do not generate the static electricity. See Chapter 5 SPECIFICATIONS for the information such as the size of - Fujitsu 4099D | Operating Guide - Page 21
Inspection This section describes how to check the labels. Three labels Label A (An example) 2-2 - Fujitsu 4099D | Operating Guide - Page 22
Label B (An example) MODEL M4099D IMAGE SCANNER PART NO. CA04315-B002 AC100-240V SER. NO. DATE 1999-10 1 phase 50/60Hz 2.9/1.5A 65 kgf FUJITSU LIMITED MADE IN JAPAN Label C (An example) MODEL NAME M4099D PART NO. CA04315-B002 MODEL - 0 1 2 3 4 5 6 7 8 9 REV. - 0 1 2 3 4 5 6 7 8 9 - 0 1 2 - Fujitsu 4099D | Operating Guide - Page 23
Cable Connection This section describes how to connect the cables. Connect the cables as follows: Turning the main line switch off Press "O" side of the main line switch to turn the power off. Main line switch Connecting the power cable Connect the power cable to the power inlet of the device and a - Fujitsu 4099D | Operating Guide - Page 24
Connecting the interface cable Connect the video interface, RS-232C interface, or SCSI interface cables and secure them with hooks or screws. Connect the other ends to the host computer. NOTE • SCSI-ID is set to No. 5 at shipment. Refer to Chapter 6 when changing the setting. • No SCSI terminator is - Fujitsu 4099D | Operating Guide - Page 25
CHAPTER 3 OPERATING INSTRUCTION This chapter describes how to turn the power on, and also describes how to operate the operator panel (basic operation). Refer to Reference Guide about information on loading document and opening/closing the upper transport unit. Turning the Power On Basic Operation - Fujitsu 4099D | Operating Guide - Page 26
the Power On This section describes how to turn the power on. Press "I" side of the main line switch located at the back of the scanner. Press the power switch of the operator panel. The power goes on and the green POWER lamp at the operator panel lights. Main line switch - Fujitsu 4099D | Operating Guide - Page 27
Basic Operation of the Operator Panel This section describes basic operation of the operator panel including how to enter the mode selection mode in which you can use setup mode, browse mode, and test mode. Displaying detailed information if an error occurred If an error occurs, the CHECK LED blinks - Fujitsu 4099D | Operating Guide - Page 28
caught. If something is caught in the mechanism, the scanner may be damaged. This function is valid when: Ready is displayed. In details: • hopper table when no paper is loaded on the hopper) is aligned to the pick roller. At the 250-sheet position, for example, the hopper table can load about 250 - Fujitsu 4099D | Operating Guide - Page 29
. The LCD indicates the following message: Reset Consumable Counter? Yes:Enter No:Cancel Yes (press ENTER ): The scanner resets the consumable counter to zero. No (press CANCEL ): The scanner does not reset the consumable counter. In this case, the consumable life alarm recurs when the next sheet is - Fujitsu 4099D | Operating Guide - Page 30
Confirming the number of sheets processed by the scanner The LCD indicates the numbers of sheets scanned during online or in test mode Eight columns of numbers indicate the accumulative number of sheets fed by this scanner. Four columns of numbers indicate the number of sheets fed per hopper. 3-5 - Fujitsu 4099D | Operating Guide - Page 31
are available when: Ready is displayed. In details: • The DATA LED does not light (the scanner contains no data), • The scanning operation is not in progress, • The scanner is not in test mode, and • The scanner is not in setup or browse mode. The function buttons are available even in the setup - Fujitsu 4099D | Operating Guide - Page 32
has the setup mode, browse mode, and test mode to ease operation for customizing the scanner, glancing setup conditions of the scanner, and testing the scanner offline respectively. There are two ways to enter these modes: • Press MENU when the LCD indicates "Ready" or • Turn the power on while - Fujitsu 4099D | Operating Guide - Page 33
In the following way, you can use the test mode in addition to the setup mode and browse mode. To quit these modes, turn the power off. POWER ON with MENU ON T Please wait * Turn off to quit . * : Cursor buttons : Blinking SETUP BROWSE TEST ENTER CANCEL - Fujitsu 4099D | Operating Guide - Page 34
Transition of operator panel status and display The following outlines the transition of status and display of the operator panel. POWER ON POWER ON with MENU ON CANCEL Error occurred Ready (normal mode) F1, F2, F3 MENU CANCEL Shortcut to setup functions Turn power off to quit. Error - Fujitsu 4099D | Operating Guide - Page 35
CHAPTER 4 DOCUMENT SPECIFICATION This chapter describes the document size and document quality of the scanner. Document Size Document Quality - Fujitsu 4099D | Operating Guide - Page 36
Document Size The following figure shows document sizes that the scanner can read. A Feeding Direction B Scanner M4099D Maximum A B 297 (11.7 in) 432 (17 in) Minimum A7 size = 74 (2.9 in) x 105 (4.1 in): Available in both portrait and landscape orientations (Unit : mm) 4-1 - Fujitsu 4099D | Operating Guide - Page 37
and ream weights of paper available for the scanner, and precautions. Paper types of documents The recommended paper types of documents are as follows: NOTE Use the specified paper only. (In rare occasion, double feeding or document damage may occur.) • Fine paper • Plain paper (for example - Fujitsu 4099D | Operating Guide - Page 38
side • Other than rectangle paper When scanning a translucent document, set the density to light mode. To prevent roller smudging, avoid scanning a document filled out in pencil. Clean the roller as often as possible when scanning many document. Once every 1000 sheets is recommended. The chemical - Fujitsu 4099D | Operating Guide - Page 39
NOTE • If carbonless papers are used, clean the roller twice as often as usual. • Documents should be straightened to fit the condition below. More than 30 direction Read surface • When you read curled, wrinkled, or creased documents, documents may not be successfully arranged in the stacker. 4-4 - Fujitsu 4099D | Operating Guide - Page 40
CHAPTER 5 SPECIFICATIONS This chapter describes the installation specifications, external dimensions, consumables, option. Installation Specifications External Dimensions Consumables Options - Fujitsu 4099D | Operating Guide - Page 41
The following table lists the installation specifications of the scanner. Item Specification Dimensions (mm) Weight (kg) Width 590 (23.2 in) Depth 690 (27.2 in) Height 540 (21.3 in) without optional endorser 610 (24.0 in) with optional endorser - Fujitsu 4099D | Operating Guide - Page 42
External Dimensions (unit: mm) 5-2 - Fujitsu 4099D | Operating Guide - Page 43
these items periodically. The consumable counter can be used to check the number of scanned documents. (See page 3-4.) Name Specification Lamp CA04315-0430 Brake roller CA04315-F705 Pick roller unit CA04315-F711 Pad CA04315-G730 Print head CA01023-0701 Service life and remarks 1000 hours - Fujitsu 4099D | Operating Guide - Page 44
Options The following table lists options of this scanner. Name Endorser Specification CA04315-D201 Remark Ink jet printing method • Back-side print • Max. 30 characters Contact your Fujitsu sales agent for more information. 5-4 - Fujitsu 4099D | Operating Guide - Page 45
CHAPTER 6 SETUP, BROWSE, AND TEST MODES This chapter describes the setup, browse, and test modes of the scanner. Setup, Browse, and Test Modes Activating the Setup or Browse Mode Contents of the Setup or Browse Mode Activating the Test Mode Contents of the Test Mode - Fujitsu 4099D | Operating Guide - Page 46
for customizing the scanner for user requirements • Browse mode for glancing setup conditions of the scanner • Test mode for testing the scanner offline There are setup mode Way Functions not available MENU pressed in Ready status IPC-3 mode, Interface, TP_IF baud rate, RS232C baud rate, SCSI - Fujitsu 4099D | Operating Guide - Page 47
Activating the Setup or Browse Mode To activate the setup mode, follow these steps: 1. While the LCD is indicating "Ready", press MENU . The screen appears with "SETUP" blinking. 2. Press ENTER . The initial screen (*) appears. Ready SETUP BROWSE * - Fujitsu 4099D | Operating Guide - Page 48
Mode selection ( MENU pressed in Ready status) There is another mode selection which enables you to execute the user test on the scanner without the host computer. See " Activating the Test Mode" later in this chapter. POWER ON Please wait Ready MENU CANCEL SETUP BROWSE ENTER - Fujitsu 4099D | Operating Guide - Page 49
setup Skew check IPC-3 mode Enables or to be set in the image processing option. Hopper height Paper consumable alarm occurs. Activates or inactivates the buzzer sound when an error occurs. Sets the volume of buzzer or click sound. Sets the contrast of the LCD. Selects the speed of the pick roller - Fujitsu 4099D | Operating Guide - Page 50
, 4800, 9600, or 19200) for the RS-232C interface. Sets the SCSI ID of this scanner. Sets the product ID of this scanner. Enables or disables pre-picking. Sets the period from when paper is loaded manually to when the pick operation starts. Sets the waiting period from when the host computer issues - Fujitsu 4099D | Operating Guide - Page 51
Transition of screens in setup mode This flowchart indicates the transition of screens in setup mode for reference to the setup operation described in the following pages. SETUP BROWSE ENTER CANCEL ENTER CANCEL : Cursor buttons : Blinking Setup mode menu screen - Fujitsu 4099D | Operating Guide - Page 52
, density, resolution, and halftone processing. It is valid when the scanner operates in normal mode through the video or TP (third party) change the resolution. NOTE • The "Settings" screen does not appear when your scanner is not controlled through the video or TP interface. • You cannot use this - Fujitsu 4099D | Operating Guide - Page 53
1. In initial screen, press ENTER . The menu screen (Settings) appears. 2. Press ENTER again. The option list screen indicates the current options with S blinking (blinking indicates "selected"). 3. Press three times. The current resolution 200 blinks. 4. Press - Fujitsu 4099D | Operating Guide - Page 54
SETUP MODE>> menu screen (Settings) appears. NOTE The "Settings" screen does not appear and the "Paper Length Check" screen first appears when your scanner is not controlled through the video or TP interface. 2. When the menu screen indicates "Settings", press . The menu screen (Paper - Fujitsu 4099D | Operating Guide - Page 55
>> menu screen (Settings or Paper Length Check) appears. NOTE The "Settings" screen does not appear and the "Paper Length Check" screen first appears when your scanner is not controlled through the video or TP interface. Settings Paper Length Check 6-10 - Fujitsu 4099D | Operating Guide - Page 56
2. Press . The menu screen (Paper Thickness Check) appears. 3. Press ENTER . The option select screen appears with the current option OFF blinking (blinking indicates "changeable"). 4. Press or . The displayed option changes (ON blinks). 5. Press ENTER to save the change. The LCD - Fujitsu 4099D | Operating Guide - Page 57
adjustment paper. 4. Select thickest paper used for your jobs and put the paper on the hopper. 5. Press ENTER . The "Adjusting!!" message appears. The scanner lifts the hopper, feeds the paper, adjusts the sensing level of the sensor, and saves its value. After adjustment, the sheet is ejected and - Fujitsu 4099D | Operating Guide - Page 58
or Paper Length Check) appears. NOTE The "Settings" screen does not appear and the "Paper Length Check" screen first appears when your scanner is not controlled through the video or TP interface. Settings Paper Length Check 2. Press three times - Fujitsu 4099D | Operating Guide - Page 59
the IPC-3 image processing feature. NOTE You cannot use this function when the setup mode is brought by pressing MENU in the Ready status. LCD display IPC-3 Mode appear and the "Paper Length Check" screen first appears when your scanner is not controlled through the video or TP interface. - Fujitsu 4099D | Operating Guide - Page 60
and light character 4: Light character on 5: Light character on red or similar green or similar background background * 1 to 5 are pattern numbers. NOTE When IPC-3 mode is executed in online status, the reading parameter is valid or invalid (host setting is invalid) as follows: 6-15 - Fujitsu 4099D | Operating Guide - Page 61
X X Density X Line-art/ Photo Halftone X X Valid Invalid DTC X Size X Reading parameter Portrait/ Picking Landscape X X Document r patterns Contrast selection X X X Automatic separation X Valid Invalid Reading parameter Conversion Sharpness Outline Overlay extraction - Fujitsu 4099D | Operating Guide - Page 62
or Paper Length Check) appears. NOTE The "Settings" screen does not appear and the "Paper Length Check" screen first appears when your scanner is not controlled through the video or TP interface. Settings Paper Length Check 2. Press repeatedly until - Fujitsu 4099D | Operating Guide - Page 63
height whenever power is turned on. Ready Paper separation level This function sets the power of the brake roller for stabilizing paper separation in picking documents. LCD display Options Remarks Paper Separation Level Thick, Medium Thick, Normal, Medium Thin, Thin (Default: Normal) Thick - Fujitsu 4099D | Operating Guide - Page 64
(Settings or Paper Length Check) appears. NOTE The "Settings" screen does not appear and the "Paper Length Check" screen first appears when your scanner is not controlled through the video or TP interface. 2. Press repeatedly until "Paper Separation Level" appears in the lower line of the menu - Fujitsu 4099D | Operating Guide - Page 65
or Paper Length Check) appears. NOTE The "Settings" screen does not appear and the "Paper Length Check" screen first appears when your scanner is not controlled through the video or TP interface. Settings Paper Length Check 2. Press repeatedly until - Fujitsu 4099D | Operating Guide - Page 66
5. Press or . The displayed option changes (Blue or Red). 6. When the desired option appears, press ENTER to save the change. The LCD returns to the menu screen (Drop-out Color). 7. Press CANCEL two times. The LCD returns to the Ready screen. Drop-out Color Front: Green Back: Red - Fujitsu 4099D | Operating Guide - Page 67
use. When using fine paper, the standard replacement cycle of pick roller units, brake rollers, and pads is per three hundred thousands of sheets fed. So, we recommend you to set the value to 0300000. LCD display Consumable Counter Options 10000 to 2560000 sheets (Default: 2560000 sheets) Remarks - Fujitsu 4099D | Operating Guide - Page 68
Counter). 6. Press CANCEL two times. The LCD returns to the Ready screen. Consumable Counter 256 0000 sheets Consumable Counter 030 0000 sheets Consumable Counter Ready Buzzer This function enables or disables the buzzer sound when an error occurs. NOTE The buzzer sounds regardless - Fujitsu 4099D | Operating Guide - Page 69
(Settings or Paper Length Check) appears. NOTE The "Settings" screen does not appear and the "Paper Length Check" screen first appears when your scanner is not controlled through the video or TP interface. 2. Press repeatedly until "Buzzer" appears in the lower line of the menu screen. 3. Press - Fujitsu 4099D | Operating Guide - Page 70
or Paper Length Check) appears. NOTE The "Settings" screen does not appear and the "Paper Length Check" screen first appears when your scanner is not controlled through the video or TP interface. Settings Paper Length Check 2. Press repeatedly until - Fujitsu 4099D | Operating Guide - Page 71
>> menu screen (Settings or Paper Length Check) appears. NOTE The "Settings" screen does not appear and the "Paper Length Check" screen first appears when your scanner is not controlled through the video or TP interface. Settings Paper Length Check 6-26 - Fujitsu 4099D | Operating Guide - Page 72
Dark s s u u u u Bright LCD Contrast Dark s s s u u u Bright LCD Contrast Ready Picking speed This function sets the rotational speed of the pick roller. Slow speed is recommended when you use thin or flexible paper which is liable to mis-pick. LCD display Picking Speed Options - Fujitsu 4099D | Operating Guide - Page 73
or Paper Length Check) appears. NOTE The "Settings" screen does not appear and the "Paper Length Check" screen first appears when your scanner is not controlled through the video or TP interface. Settings Paper Length Check 2. Press repeatedly until - Fujitsu 4099D | Operating Guide - Page 74
. Settings NOTE The "Settings" screen does not appear and the "Paper Length Check" screen first appears when your scanner is not controlled through the video or TP interface. Paper Length Check 2. Press repeatedly until "Interface" ap- pears in the - Fujitsu 4099D | Operating Guide - Page 75
>> menu screen (Settings or Paper Length Check) appears. NOTE The "Settings" screen does not appear and the "Paper Length Check" screen first appears when your scanner is not controlled through the video or TP interface. Settings Paper Length Check 6-30 - Fujitsu 4099D | Operating Guide - Page 76
2. Press repeatedly until "TP_IF Baud Rate" appears in the lower line of the menu screen. 3. Press ENTER . The option select screen appears with the current setting 9600 blinking (blinking indicates "changeable"). 4. Press or . The displayed option changes (19200, 2400, 4800 ). 5. When the - Fujitsu 4099D | Operating Guide - Page 77
(Settings or Paper Length Check) appears. NOTE The "Settings" screen does not appear and the "Paper Length Check" screen first appears when your scanner is not controlled through the video or TP interface. 2. Press repeatedly until "RS232C Baud Rate" appears in the lower line of the menu screen - Fujitsu 4099D | Operating Guide - Page 78
or Paper Length Check) appears. NOTE The "Settings" screen does not appear and the "Paper Length Check" screen first appears when your scanner is not controlled through the video or TP interface. Settings Paper Length Check 2. Press repeatedly until - Fujitsu 4099D | Operating Guide - Page 79
setup mode is brought by pressing MENU in the Ready status. LCD display Product ID Options M4099D, M3099G (Default: M4099D) Remarks Model number of this scanner * The model number of this scanner is M4099D. The following is an example of operation when you use this function. 1. In - Fujitsu 4099D | Operating Guide - Page 80
LCD returns to the menu screen (Product ID). 6. To quit the , turn off the power. Product ID Product ID M4099D Product ID M3099G Product ID Pre-pick This function enables or disables pre-picking of paper. LCD display Pre-pick Options On - Fujitsu 4099D | Operating Guide - Page 81
screen (Settings or Paper Length Check) appears. NOTE The "Settings" screen does not appear and the "Paper Length Check" screen first appears when your scanner is not controlled through the video or TP interface. 2. Press repeatedly until "Pre-pick" ap- pears in the lower line of the menu screen - Fujitsu 4099D | Operating Guide - Page 82
start time This function sets the period from when paper is manually put on the hopper to when the pick operation starts. screen does not appear and the "Paper Length Check" screen first appears when your scanner is not controlled through the video or TP interface. 2. Press repeatedly until "Pick - Fujitsu 4099D | Operating Guide - Page 83
. NOTE The "Settings" screen does not appear and the "Paper Length Check" screen first appears when your scanner is not controlled through the video or TP interface. 2. Press repeatedly until "Manual Feed Timeout" appears in the lower line of the menu screen. 3. Press ENTER . The option select - Fujitsu 4099D | Operating Guide - Page 84
ENTER to save the change. The LCD returns to the menu screen (Manual Feed Timeout). 6. Press CANCEL two times. The LCD returns to the Ready screen. Manual Feed Timeout 10 S Manual Feed Timeout Ready Paper pick retry This function sets the pick motor rotation period - Fujitsu 4099D | Operating Guide - Page 85
(Settings or Paper Length Check) appears. NOTE The "Settings" screen does not appear and the "Paper Length Check" screen first appears when your scanner is not controlled through the video or TP interface. 2. Press repeatedly until "Paper Pick retry" appears in the lower line of the menu screen - Fujitsu 4099D | Operating Guide - Page 86
or Paper Length Check) appears. NOTE The "Settings" screen does not appear and the "Paper Length Check" screen first appears when your scanner is not controlled through the video or TP interface. Settings Paper Length Check 2. Press repeatedly until - Fujitsu 4099D | Operating Guide - Page 87
4. Press . The current count setting 4 blinks. 5. Press or . The displayed option changes (1, 2, 3, 4, 5, 6, 7). 6. When the desired value appears, press ENTER to save the change. The LCD returns to the menu screen (Paper Feed retry). 7. Press CANCEL two times. The LCD returns - Fujitsu 4099D | Operating Guide - Page 88
in the Ready status. • You cannot allocate the following functions: Interface, IPC-3 mode, TP_IF Baud Rate, RS232C Baud Rate, SCSI ID, Product you to access the allocated setup function just by pressing the button whenever the scanner is in the Ready state. This function is valid even in the setup - Fujitsu 4099D | Operating Guide - Page 89
2. Press repeatedly until "Function Key" appears in the lower line of the menu screen. 3. Press ENTER . The function key select screen appears with F1 blinking (blinking indicates "selectable"). 4. Press ENTER . The F1 selection screen appears with the current setting Undefined blinking ( - Fujitsu 4099D | Operating Guide - Page 90
or Paper Length Check) appears. NOTE The "Settings" screen does not appear and the "Paper Length Check" screen first appears when your scanner is not controlled through the video or TP interface. Settings Paper Length Check 2. Press repeatedly until - Fujitsu 4099D | Operating Guide - Page 91
3. Press ENTER . The option select screen appears with the current setting OFF blinking (blinking indicates "changeable"). 4. Press or . The displayed option changes (ON blinks). 5. Press ENTER to save the change. The LCD returns to the menu screen (Setup Mode Lock). 6. To quit - Fujitsu 4099D | Operating Guide - Page 92
Activating the Test Mode To activate the test mode: 1. Turning power on with MENU pressed. The LCD indicates "Please wait" then "" with "SETUP" blinking. 2. Press twice. "TEST" blinks (blinking indicates "selectable). 3. Press ENTER . The initial screen (*) appears. - Fujitsu 4099D | Operating Guide - Page 93
Mode selection (power on with MENU pressed) POWER ON with MENU ON T Please wait * Turn off to quit . * : Cursor buttons : Blinking SETUP BROWSE TEST ENTER CANCEL ENTER CANCEL XXXXX ENTER CANCEL SETUP BROWSE TEST - Fujitsu 4099D | Operating Guide - Page 94
ROM revision Sensor status Sensor adjustment +5V voltage check EEPROM edit Image memory capacity Description Scans sheets continuously for checking conditions of paper feeding. Displays the options installed in the scanner. Displays the accumulative number of sheets fed and the accumulative number - Fujitsu 4099D | Operating Guide - Page 95
Settings function in setup mode to modify scanning parameters (scanning mode, paper size/orientation, density, resolution, and halftone processing) for scanning documents. LCD display Offline Feed Test Test items START and SETUP Remarks START: begins the test. SETUP: changes settings of scanning - Fujitsu 4099D | Operating Guide - Page 96
with SETUP blinking (blinking indicates "selectable"). 11. Press . START blinks (blinking indicates "selectable"). 12. Press ENTER . The scanner feeds and scans documents continuously until it detects an error (usually "Hopper empty"). During feeding, the upper line indicates "Feeding!!" and the - Fujitsu 4099D | Operating Guide - Page 97
Options This function displays the options installed in the scanner. LCD display Options Displayed options Endorser, IPC-3D Remarks Endorser: printer that prints back side of documents. IPC-3D: image processing feature (standard installation). * When an option is installed, ON is displayed under - Fujitsu 4099D | Operating Guide - Page 98
life This function displays the accumulative number of sheets fed and the accumulative number of hours during which the lamp is lit since the scanner has been installed. These values are helpful for estimating the life of devices. LCD display Device Life Displayed devices COUNT, LAMP F, and LAMP - Fujitsu 4099D | Operating Guide - Page 99
allows the scanner to switch between line mode and half tone mode in one pass. Automatic start mode ( manual start mode) In this mode the reading operation is activated only by START command. Back-side reading = Back-side scanning Refers to reading the back-side of the document, specifically in - Fujitsu 4099D | Operating Guide - Page 100
These character may be used for collation of the documents and the image data. Equipment Error An error that is not recoverable by operator. Call an authorized maintenance engineer. Error diffusion High-quality halftone (pseudo-grayscale) image production based on black-and-white pixel binarization - Fujitsu 4099D | Operating Guide - Page 101
to reading the front-side of the document, specifically in Duplex reading mode. Halftone processing Used to reproduce photographs which usually contain different shades to display images. These shades are composed of dots resulting in a binary image. Dithering and error diffusion processing are - Fujitsu 4099D | Operating Guide - Page 102
therefore appropriate for scanning text and line art images. Manual Feed mode = Manual Mode Requires the operator to feed each document manually to the hopper table. Mirror image The read image is symmetrically flipped to produce a mirror image of the original detected in the main scanning direction - Fujitsu 4099D | Operating Guide - Page 103
, making it suitable in scanning images such as photographs having gradations. Photo mode = photograph mode A photograph is read properly in this mode. Picking start time The period from the manual insertion of the document until picking starts after the document passes the hopper empty sensor - Fujitsu 4099D | Operating Guide - Page 104
may be shared. Setup mode In this mode, users can set a variety of functions in offline status for customizing the scanner for user requirements. SF1 sensor The document detection sensor. It detects the light that transmits the paper. It also detects the double feed error. Simplex reading mode Only - Fujitsu 4099D | Operating Guide - Page 105
Terminator Devices with SCSI interface are daisy-chained. A resistor that includes terminal circuits needs to be placed at both ends of a cable when devices are daisy-chained. Test mode The mode in which users can test the scanner in offline status. GL-7 - Fujitsu 4099D | Operating Guide - Page 106
Assemblies 1-4 Automatic document feeder (ADF) 1-3 B Basic Operation of the Operator Panel 3-2 Batch counter 3-5 Brake roller 1-3, 1-4, 5-3 Braking the scanner 3-5 Connecting the interface cable 2-5 the power cable 2-4 Consumable counter 3-4, 6-22 Consumable life alarm 3-4 Consumables 5-3 Contents - Fujitsu 4099D | Operating Guide - Page 107
guide 1-3 Hopper height 6-16 Hopper height adjustment 3-3 I IMPORTANT NOTE TO USERS i Input power 5-1 Inspection 2-2 Installation Specifications 5-1 Interface 6-29 Interface cable 2-5 connectors 1-3 IPC weight 4-2 size 6-7 Pattern number 6-15 Pick roller unit 1-3, 1-4, 5-3 Pick start time 6-37 - Fujitsu 4099D | Operating Guide - Page 108
6-25 Consumable counter 6-22 Drop-out color 6-20 Function key 6-43 Hopper height 6-16 Interface 6-29 IPC-3 mode 6-14 LCD contrast 6-26 Manual feed 6-18 Side cover 1-3 Skew check 6-13 Specifications 5-1 Stacker 1-3 Stacker extension 1-3 Stacker guide 1-3 START key 6-43 Satus display, transition of - Fujitsu 4099D | Operating Guide - Page 109
Using the function buttons 3-6 Using the setup, browse, and test modes 3-7 V Video interface 2-5 W Weight 5-1 IN-4 - Fujitsu 4099D | Operating Guide - Page 110
This product sold in Europe conforms to the standards in accordance with EC Directives. The copy of "Declaration of Cnformity" is attached below: - Fujitsu 4099D | Operating Guide - Page 111
-
 1
1 -
 2
2 -
 3
3 -
 4
4 -
 5
5 -
 6
6 -
 7
7 -
8
-
9
-
10
-
11
-
12
-
13
-
14
-
15
-
16
-
17
-
18
-
19
-
20
-
21
-
22
-
23
-
24
-
25
-
26
-
27
-
28
-
29
-
30
-
31
-
32
-
33
-
34
-
35
-
36
-
37
-
38
-
39
-
40
-
41
-
42
-
43
-
44
-
45
-
46
-
47
-
48
-
49
-
50
-
51
-
52
-
53
-
54
-
55
-
56
-
57
-
58
-
59
-
60
-
61
-
62
-
63
-
64
-
65
-
66
-
67
-
68
-
69
-
70
-
71
-
72
-
73
-
74
-
75
-
76
-
77
-
78
-
79
-
80
-
81
-
82
-
83
-
84
-
85
-
86
-
87
-
88
-
89
-
90
-
91
-
92
-
93
-
94
-
95
-
96
-
97
-
98
-
99
-
100
-
101
-
102
-
103
-
104
-
105
-
106
-
107
-
108
-
109
-
110
-
111
 |
 |

C150-E141-02EN
M4099D Image Scanner
Operator's Guide