Garmin Alpha 100 Owner s Manual - Page 8
Fitting the Collar on Your Dog, Enabling Bark Detection, Communication with the Collar, Enter Sleep - tracking system
 |
View all Garmin Alpha 100 manuals
Add to My Manuals
Save this manual to your list of manuals |
Page 8 highlights
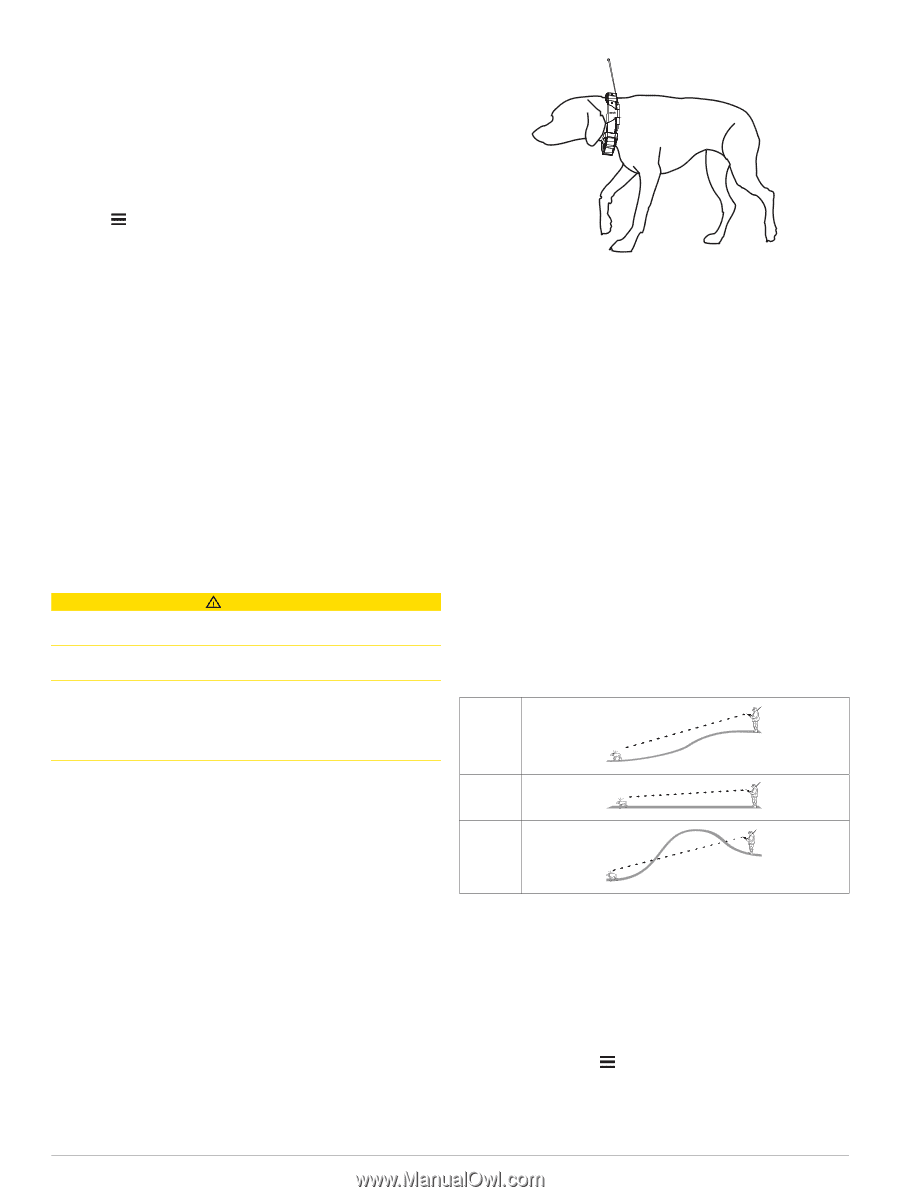
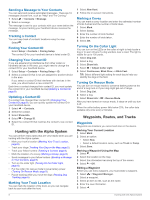
Changing the Dog ID Before you can change the dog ID, the collar must be turned on and within range of the handheld device. If you are experiencing interference from other collars or handheld devices in the area, you might need to change the ID for the dog. 1 Select Dog List. 2 Select a dog. 3 Select Show Info. 4 Select > Change ID. 5 Select an available ID. If another handheld device is tracking this dog, for best results, remove the dog from the device, and use the track and train codes (Adding a Dog Using the Track and Train Codes, page 3) or share wirelessly over ANT+ (Sharing a Dog Wirelessly, page 3) to add the dog again. Setting Dog Alerts You can adjust how the handheld device alerts you to certain actions of the dog. 1 Select Setup > Dogs > Dog Alerts. 2 Select an alert. 3 Select the handheld device action for the specific alert. 4 Repeat steps 2 and 3 as needed. Removing a Dog 1 Select Dog List. 2 Select a dog. 3 Select Remove. Fitting the Collar on Your Dog CAUTION To prevent irritation from the contact points, remove the collar for at least eight hours out of every 24-hour period. This device is not intended for human use. Do not attempt to use on any person. Do not spray the device or collar with harsh chemicals including but not limited to flea or tick spray. Always ensure that any flea or tick spray that is applied to the dog is completely dry before placing the collar on the dog. Small amounts of harsh chemicals can damage the plastic components and collar laminate. In order to effectively train the dog, the collar and device must fit the dog properly. If the collar is too loose or positioned incorrectly, stimulation may be inconsistent. This can delay or prevent successful training. 1 Position the device at the front of the dog's neck, with the status LED facing toward the dog's chin and the contact points against the throat. 2 Tighten the strap so that it is very snug around the dog's neck, and fasten the buckle. NOTE: The collar should fit tightly and should not be able to rotate or slide on the dog's neck. The dog must be able to swallow food and water normally. You should observe your dog's behavior to verify that the collar is not too tight. 3 Wiggle the device to work the contact points through the dog's coat. NOTE: The contact points must have contact with the dog's skin to be effective. 4 If the strap is too long, cut off the excess, leaving at least 8 cm (3 in.) to spare. TIP: You can mark the hole used to fasten the buckle for future reference. Enabling Bark Detection NOTE: This feature is not available in all areas. Select Setup > Dogs > Bark Detection. A barking icon appears on the dog tracking page and the map page. When the dog collar device is active and properly fitted on the dog (Fitting the Collar on Your Dog, page 4), it detects barks automatically. After bark detection is enabled, you can set up a bark alert (Setting Dog Alerts, page 4). Communication with the Collar You should keep an unobstructed line of sight between your handheld device and the dog collar device to produce the best communication signal. To achieve the best line-of-sight conditions, you should move to the highest elevation point in your area (for example, on the top of a hill). Best Good Poor Enter Sleep Mode Before you can turn on sleep mode, you must track your dog's location using the TT 15 mini dog collar device. When connected with the Alpha handheld device, the TT 15 mini dog collar device can be put into sleep mode to conserve the battery when you are not actively tracking your dog. 1 Select Dog List. 2 Select a dog. 3 Select Show Info > > Collar Sleep Mode > Sleep. On the Dog Info page, the Update Rate switches to Sleep Mode. 4 Dog Collar Device Setup
-
 1
1 -
2
-
 3
3 -
 4
4 -
 5
5 -
 6
6 -
 7
7 -
 8
8 -
 9
9 -
 10
10 -
 11
11 -
 12
12 -
 13
13 -
14
-
15
-
16
-
17
-
18
-
19
-
20
-
21
-
22
-
23
-
24
-
25
-
26
 |
 |