Garmin BC 50 with Night Vision Installation Instructions PDF - Page 2
Device Overview, Tools Needed, Installation, Camera Mounting Considerations
 |
View all Garmin BC 50 with Night Vision manuals
Add to My Manuals
Save this manual to your list of manuals |
Page 2 highlights
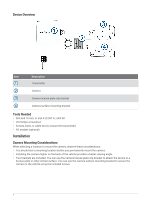
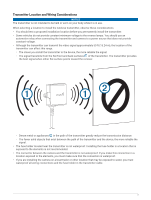
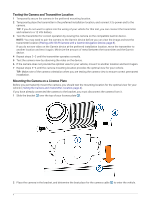
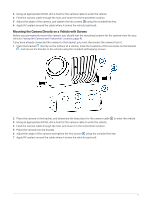
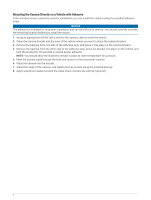
Device Overview Item Description Transmitter Camera Camera license plate clip bracket Camera surface mounting bracket Tools Needed • Drill and 10 mm, or size X (0.397 in.) drill bit • #2 Phillips screwdriver • Screws, bolts, or cable ties (to secure the transmitter) • RV sealant (optional) Installation Camera Mounting Considerations When selecting a location to mount the camera, observe these considerations. • You should test a mounting location before you permanently mount the camera. • Installing the camera higher on the back of the vehicle provides a better viewing angle. • Two brackets are included. You can use the camera license plate clip bracket to attach the device to a license plate or other similar surface. You can use the camera surface mounting bracket to secure the camera to the vehicle using the included screws. 2
-
 1
1 -
 2
2 -
 3
3 -
 4
4 -
 5
5 -
 6
6 -
 7
7 -
 8
8
 |
 |
