Garmin GHP 12 Autopilot System Installation Instructions - Page 20
Manually Adjusting the Settings for a Non-Garmin Drive, Performing Advanced Tuning Procedures
 |
View all Garmin GHP 12 Autopilot System manuals
Add to My Manuals
Save this manual to your list of manuals |
Page 20 highlights
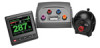
Manually Adjusting the Settings for a Non-Garmin Drive Unit Notice Providing an incorrect drive-unit-voltage, clutch-voltage, or maxcurrent value for your non-Garmin drive unit can damage your drive unit. NOTE: If you adjust any of these values or run any of these tuning procedures, you must re-run the autotune procedure (page 19). 1. Enable Dealer Mode (page 19). 2. From the Heading screen, select Menu > Setup > Dealer Autopilot Configuration > Steering System Setup > Drive Unit Class. 3. Select Other or Solenoid, according to what you set in the dockside wizard. 4. Select an option: • Select Generic Tune to re-run the tuning procedure you completed during the dockside wizard (page 16). • Select Drive Unit Voltageto set the drive-unit voltage according to the specifications provided by your drive-unit manufacturer. • Select Clutch Voltage to set the clutch voltage according to the specifications provided by your drive-unit manufacturer. • Select Drive Unit Max Current to set the drive-unit rated current value according to the specifications provided by your drive-unit manufacturer. • Select Advanced Tuning to perform high-level drive unit adjustments (page 20). • Select Restore Defaultsto reset the non-Garmin drive unit to default values. You must perform the generic tune procedure if you reset your drive unit to the default values. Performing Advanced Tuning Procedures for Non-Garmin Drive Units Notice Perform these procedures only if you completely understand the concepts of drive-unit speed and error tolerance as defined below. Incorrectly setting these values can damage your drive unit, drain your battery at a faster-than-normal rate, or result in poor autopilot performance. For almost every non-Garmin drive-unit installation, the generic tuning procedure performed during the dockside wizard is sufficient to calibrate the drive unit to the GHP 12. Use the advanced tuning procedures only if you would like to make slight adjustments to the performance of the drive unit. Tuning the Speed on a non-Garmin Drive-Unit This setting does not apply to solenoid drive units. The speed of the drive unit determines how quickly it reacts to commands from the autopilot. If you set the speed value too low, the drive unit will appear slow and take a long time to respond to commands from the autopilot. If you set the speed value too high, the drive unit will react too quickly and can force the rudder to the stops at a high rate of speed, potentially damaging the drive unit or rudder stops as well as draining your battery at a faster-than-normal speed. 1. From the Heading screen, select Menu > Setup > Dealer Autopilot Configuration > Steering System Setup > Drive Unit Type > Other > Advanced Tuning > Tune Speed. 2. Center the rudder position, let go of the rudder control, and select Begin. A graph appears. The red line ➊ represents the intended position of the rudder. The blue line ➋ represents the actual position of the rudder. ➊ ➋ 3. Select Tune, and observe the graph. • The intended rudder position (indicated by the red line) moves from +5° to -5° each time you select Tune, and the drive unit steers the rudder accordingly (indicated by the blue line). • If the drive unit speed is configured too slowly, it will react sluggishly. The blue line will draw a large slope ➊ to the red line after you select Tune. ➊ • If the drive unit speed is configured too quickly, it will react immediately and drive hard to the rudder stop. The blue line will draw a hard straight line that hits the red line without a slope ➋ after you select Tune. ➋ • If the drive unit speed is configured correctly, it will react quickly, then ease into the stop. The blue line will draw a straight line with a small slope ➌ as it approaches the red line after you select Tune. ➌ 4. If necessary, select Adjust. 5. Select an option: • Increase the value if the drive unit speed is configured too slowly, and repeat step 3. • Decrease the value if the drive unit speed is configured too quickly, and repeat step 3. 20 GHP 12 Installation Instructions
-
 1
1 -
2
-
3
-
4
-
5
-
6
-
7
-
8
-
9
-
10
-
11
-
12
-
13
-
14
-
 15
15 -
 16
16 -
 17
17 -
 18
18 -
 19
19 -
 20
20 -
 21
21 -
 22
22 -
 23
23 -
 24
24 -
 25
25 -
26
-
27
-
28
-
29
-
30
-
31
-
32
 |
 |
