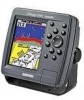
Garmin GPSMAP 198C Owners Manual - Page 99
Installing the GPSMAP 198C Sounder, Mounting the GPS Antenna - sounder antenna
 |
View all Garmin GPSMAP 198C manuals
Add to My Manuals
Save this manual to your list of manuals |
Page 99 highlights
Installing the GPSMAP 198C Sounder The GPSMAP 198C Sounder must be properly installed according to the following instructions to get the best possible performance. To complete the installation, you need the appropriate fasteners and a 1" x 14-thread marine antenna mount available at most marine dealers. Mounting the GPS Antenna The antenna should be mounted in a location that has a clear, unobstructed view of the sky in all directions to ensure the best reception. Avoid mounting the antenna where it is shaded by the boat's superstructure, a radome antenna, or mast. Sailboat users should avoid mounting the antenna high on the mast to prevent inaccurate speed readings caused by excessive heeling. Most marine VHF and LORAN antennas should not seriously degrade the GPS antenna's reception. Never paint the antenna or clean it with harsh solvents. APPENDIX > INSTALLING THE GPSMAP 198C SOUNDER Suggested locations for mounting the external antenna. The Garmin antenna screws directly onto any standard 1" x 14thread antenna mount. If you need to raise the antenna to avoid shading, try using a 1" x 14-thread extension mast available at most marine dealers. NOTE: It is possible to route the coaxial cable either through, or outside the antenna mount. It is possible to remove the BNC connector on the coaxial cable and the coaxial cable shortened to ease installation, however, doing so voids the antenna warranty. If the BNC connector is removed, it must be replaced with a new solder-on or crimp BNC connector. GPSMAP 198C Sounder Owner's Manual 93
-
 1
1 -
2
-
3
-
4
-
5
-
6
-
7
-
8
-
9
-
10
-
11
-
12
-
13
-
14
-
15
-
16
-
17
-
18
-
19
-
20
-
21
-
22
-
23
-
24
-
25
-
26
-
27
-
28
-
29
-
30
-
31
-
32
-
33
-
34
-
35
-
36
-
37
-
38
-
39
-
40
-
41
-
42
-
43
-
44
-
45
-
46
-
47
-
48
-
49
-
50
-
51
-
52
-
53
-
54
-
55
-
56
-
57
-
58
-
59
-
60
-
61
-
62
-
63
-
64
-
65
-
66
-
67
-
68
-
69
-
70
-
71
-
72
-
73
-
74
-
75
-
76
-
77
-
78
-
79
-
80
-
81
-
82
-
83
-
84
-
85
-
86
-
87
-
88
-
89
-
90
-
91
-
92
-
93
-
 94
94 -
 95
95 -
 96
96 -
 97
97 -
 98
98 -
 99
99 -
 100
100 -
 101
101 -
 102
102 -
 103
103 -
 104
104 -
105
-
106
-
107
-
108
-
109
-
110
-
111
-
112
-
113
-
114
-
115
-
116
-
117
-
118
-
119
-
120
-
121
-
122
-
123
-
124
-
125
-
126
 |
 |
