Garmin GPSMAP 498C Owner's Manual
Garmin GPSMAP 498C - Marine GPS Receiver Manual
 |
UPC - 753759052157
View all Garmin GPSMAP 498C manuals
Add to My Manuals
Save this manual to your list of manuals |
Garmin GPSMAP 498C manual content summary:
- Garmin GPSMAP 498C | Owner's Manual - Page 1
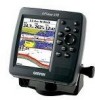
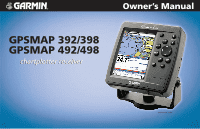
Owner's Manual GPSMAP 392/398 GPSMAP 492/498 GPSMAP 498 shown - Garmin GPSMAP 498C | Owner's Manual - Page 2
of this and other Garmin products. Garmin®, GPSMAP®, AutoLocate® , UltraScroll®, TracBack®, BlueChart®, MapSource®, and BlueChart® g2TM are registered trademarks of Garmin Ltd. or its subsidiaries and may not be used without the express permission of Garmin. September 2006 Part Number 190-00653 - Garmin GPSMAP 498C | Owner's Manual - Page 3
about installing your chartplotter, contact Garmin Product Support or a professional installer. The GPSMAP 392/398/492/498 Sounder is CANet compatible. See the CANet accessory installation instructions for more information. About This Manual To get the most out of your new navigation system, take - Garmin GPSMAP 498C | Owner's Manual - Page 4
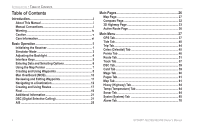
Tab 44 Celes (Celestial) Tab 45 Points Tab 46 Route Tab 51 Track Tab 57 DSC Tab 59 Card Tab 59 Msgs Tab 60 Pages Tab 61 Map Tab 61 Hiway (Highway) Tab 64 Temp (Temperature) Tab 64 Sonar Tab 64 Systm (System) Tab 65 Alarm Tab 70 ii GPSMAP 392/398/492/498 Owner's Manual - Garmin GPSMAP 498C | Owner's Manual - Page 5
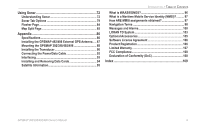
Appendix 86 Specifications 86 Installing the GPSMAP 492/498 External GPS Antenna..... 87 Mounting the GPSMAP 392/398/492/498 88 Installing the Transducer 90 Connecting the Power/Data Cable 92 Interfacing 93 Installing and Removing Data Cards 94 Satellite Information 95 INTRODUCTION > TABLE - Garmin GPSMAP 498C | Owner's Manual - Page 6
GPSMAP 392/398/492/498 only to facilitate, not to replace, the use of authorized government charts. Official government charts and notices to mariners contain all information needed to navigate , please refer to our Web site at http://www.garmin.com/prop65. iv GPSMAP 392/398/492/498 Owner's Manual - Garmin GPSMAP 498C | Owner's Manual - Page 7
and performance of all GPS equipment, including the GPSMAP 392/398/492/498. Although the GPSMAP 392/398/492/498 is a precision navigation device, any navigation device can be misused or misinterpreted and, therefore, become unsafe. Map Data Information: One of the goals of Garmin is to provide - Garmin GPSMAP 498C | Owner's Manual - Page 8
the unit's memory without the need for external power. It is always a good practice to back up important user data by manually recording it or downloading it to a PC (transferring it to MapSource.) Immersing the Unit in Water The GPSMAP 392/398/492/498 is waterproof to IEC Standard 60529 IPX7. It - Garmin GPSMAP 498C | Owner's Manual - Page 9
/492/498, the receiver must be given an opportunity to collect satellite data and establish its present location. To ensure proper initialization, the GPSMAP 392/398/492/498 is shipped from the factory in AutoLocate Mode. Before you initialize, make sure the GPSMAP 392/398/492/498 unit and antenna - Garmin GPSMAP 498C | Owner's Manual - Page 10
to see the data. • Solid signal strength bars-the receiver is ready to use. When the receiver has collected information from at least three satellites, the top of the screen shows either "Ready for Navigation", and the GPSMAP 392/398/492/498 is ready for use. 2 GPSMAP 392/398/492/498 Owner's Manual - Garmin GPSMAP 498C | Owner's Manual - Page 11
turns the GPS receiver off for use indoors or practice. You can perform any of the functions discussed in the following pages in Simulator Mode. Keep in mind that the GPSMAP 392/398/492/498 does not track satellites in Simulator Mode, and this mode should never be used for actual navigation. All the - Garmin GPSMAP 498C | Owner's Manual - Page 12
. 2. Press the POWER key again and the user-defined level of backlighting starts. You can adjust this level by pressing up or down on the ROCKER. If you press POWER one more time, the backlight is at the maximum setting. 3. Press ENTER or QUIT when finished. GPSMAP 392/398/492/498 Owner's Manual - Garmin GPSMAP 498C | Owner's Manual - Page 13
• Press to toggle the display of a main page with or without data fields. • Press and hold to show the Main Page Configuration window. GPSMAP 392/398/492/498 Owner's Manual ��� ���� ��� ��� ���� ���� ���� BASIC OPERATION > INTERFACE KEYS RANGE Down/RANGE Up Keys • From the Map Page, press - Garmin GPSMAP 498C | Owner's Manual - Page 14
start options, and enter data to customize the GPSMAP 392/398/492/498 to fit your requirements. Use the ENTER key and the ROCKER to select options, enter names and numbers in data fields, and start your an on-screen button, and press ENTER. On-screen buttons 6 GPSMAP 392/398/492/498 Owner's Manual - Garmin GPSMAP 498C | Owner's Manual - Page 15
controlled by the ROCKER. You can pan to map locations, mark and edit waypoints and routes, and review position data of on-screen map items and waypoints. When you move the map pointer over a map item, the map, the unit might pause as it loads new map data. GPSMAP 392/398/492/498 Owner's Manual 7 - Garmin GPSMAP 498C | Owner's Manual - Page 16
Review Page ENTER/MARK Key Use the ENTER/MARK key to quickly capture your present location to create a new waypoint. The unit must have acquired at least three satellites to mark your present location. You can also use this option to manually ENTER/MARK. 8 GPSMAP 392/398/492/498 Owner's Manual - Garmin GPSMAP 498C | Owner's Manual - Page 17
and press ENTER/MARK, use the ROCKER to enter a value, and press ENTER/MARK. 6. To manually enter a set of coordinates, highlight the location coordinates, and press ENTER/MARK, use the ROCKER to Highlight OK, and press ENTER/MARK to confirm the changes. GPSMAP 392/398/492/498 Owner's Manual 9 - Garmin GPSMAP 498C | Owner's Manual - Page 18
1. Press and hold NAV/MOB. 2. Press ENTER to begin navigating to the MOB location. 3. To stop navigation to the MOB location, press NAV, highlight Stop Navigation, and press ENTER. 10 To stop navigation, press NAV/MOB highlight Stop Navigation, and press ENTER. GPSMAP 392/398/492/498 Owner's Manual - Garmin GPSMAP 498C | Owner's Manual - Page 19
map or from the waypoint lists in the Main Menu-Points tab. Sub tabs BASIC OPERATION > REVIEWING AND EDITING WAYPOINTS 3. From the Waypoint Edit Page, change the name, symbol, comment, postion the ROCKER to enter a new name, and press ENTER when finished. GPSMAP 392/398/492/498 Owner's Manual 11 - Garmin GPSMAP 498C | Owner's Manual - Page 20
eld, and press ENTER. 2. Use the ROCKER to edit or enter the data. To move to the next character, press right on the ROCKER. 3. process, press QUIT. Navigating to a Destination Using the Nav Key The NAV key provides four ways to navigate to a destination: Go GPSMAP 392/398/492/498 Owner's Manual - Garmin GPSMAP 498C | Owner's Manual - Page 21
Go To Point, and press ENTER. 2. From the Find menu, highlight Waypoints or another menu option, and GPSMAP 392/398/492/498 automatically uses the name of the map item, but the point is not stored in the waypoint list. See page navigating to the waypoint. GPSMAP 392/398/492/498 Owner's Manual 13 - Garmin GPSMAP 498C | Owner's Manual - Page 22
, press ENTER. TracBack Navigation (Navigating a Track) The TracBack function retraces your path to the starting point using the track log automatically stored in the receiver's memory. This feature eliminates track log before you start your current trip. 14 GPSMAP 392/398/492/498 Owner's Manual - Garmin GPSMAP 498C | Owner's Manual - Page 23
track, highlight the name field, and press ENTER. Make your changes and press ENTER. BASIC OPERATION > NAVIGATING TO A DESTINATION To show the track on the Map and 3D Highway Pages, highlight the check box to Total number of points Change color of track line GPSMAP 392/398/492/498 Owner's Manual 15 - Garmin GPSMAP 498C | Owner's Manual - Page 24
to the instructions on page 15. To Follow a Track: 1. Press NAV, highlight Follow Track, and press ENTER. 2. Highlight the track you want to follow, and press ENTER. 3. To stop Follow Track navigation, press NAV, highlight Stop Navigation, and press ENTER. 16 GPSMAP 392/398/492/498 Owner's Manual - Garmin GPSMAP 498C | Owner's Manual - Page 25
and press ENTER. As you add each new waypoint to the route, the data window at the top of the Map Page shows the waypoint/map item 3 and 4 in the Navigating a QUICK NAV Route instructions. 5. When finished, press QUIT twice to return to the Route List Page. GPSMAP 392/398/492/498 Owner's Manual 17 - Garmin GPSMAP 498C | Owner's Manual - Page 26
2. Use the ROCKER to highlight Follow Route, and press ENTER. 3. Highlight Pick From Saved List, and press ENTER. 4. Highlight the route you want to navigate, and press ENTER. To stop navigation of a route: Press NAV, highlight Stop Navigation, and press ENTER. GPSMAP 392/398/492/498 Owner's Manual - Garmin GPSMAP 498C | Owner's Manual - Page 27
Obstructions. If you press FIND while in Pan Mode, the unit centers its search from the location where the map pointer is located. Your location or the map pointer must be within a map outline area to search for BlueChart g2 information. GPSMAP 392/398/492/498 Owner's Manual Find Items List 19 - Garmin GPSMAP 498C | Owner's Manual - Page 28
to spell out the name, or scroll down through the list. (See page 8 for steps on entering a name.) To Find an item from other locations: 1. From the Map Page, use the ." If you press FIND again, "From Anchoring Prohibited" appears as the new find from point. 20 GPSMAP 392/398/492/498 Owner's Manual - Garmin GPSMAP 498C | Owner's Manual - Page 29
up the DSC features on the GPSMAP 392/398/492/498. DSC uses marine VHF radio and GPS technologies to transmit and receive location information. The chartplotter repeats the call properties received from the VHF radio on the chartplotter. The GPSMAP 392/398/492/498 requires input from a DSC-enabled - Garmin GPSMAP 498C | Owner's Manual - Page 30
Identity (MMSI) number. Garmin does not provide MMSI numbers. For more information about Digital Selective Calling and Maritime Mobile Service Identity (MMSI) numbers, refer to page 97 in the "Appendix." Understanding Distress Calls When the GPSMAP 392/398/492/498 receives a distress call from - Garmin GPSMAP 498C | Owner's Manual - Page 31
Review Page. BASIC OPERATION > DSC DSC Call List The DSC Call List shows the 50 most recent calls, even if the unit is left unattended. The Call List shows the most recent call from a vessel. If a second call from the same vessel is received press ENTER. GPSMAP 392/398/492/498 Owner's Manual 23 - Garmin GPSMAP 498C | Owner's Manual - Page 32
key: 1 Press NAV. 2. With Go To MMSI/Name highlighted, press ENTER. To navigate to a position report or distress call using the DSC alert page: 1. Highlight the call on the Call List or Log, and press NAV. 2. With Go To MMSI/Name or DSC highlighted, press ENTER. GPSMAP 392/398/492/498 Owner's Manual - Garmin GPSMAP 498C | Owner's Manual - Page 33
chartplotter information screen On and Off. This also allows you to simulate distress calls and position reports while the unit is in Simulator Mode (see page 3). Simulating calls is helpful for practice before connecting to the real system speed changes. GPSMAP 392/398/492/498 Owner's Manual 25 - Garmin GPSMAP 498C | Owner's Manual - Page 34
the DATA/CNFG key. Press DATA/CNFG to remove the status bar and data fields from the top of any main page. Press and hold DATA/CNFG to customize the Main Pages. Map Page 26 Map Split Page Sonar Page Flasher Page Compass Page 3D Highway Page Active Route Page GPSMAP 392/398/492/498 Owner's Manual - Garmin GPSMAP 498C | Owner's Manual - Page 35
cartography, plotting, and navigational data. When using the unit with optional BlueChart or MapSource data, the Map Page shows Data fields Map item Water Geographic name Position triangle Land Map zoom range Map Page shown Using Built-In Cartography Data GPSMAP 392/398/492/498 Owner's Manual - Garmin GPSMAP 498C | Owner's Manual - Page 36
location to the map pointer is shown in the data window, along with the map pointer's location data, additional information tabs appear. Use the ROCKER to highlight the individual tabs, and show information and options. 3. Press QUIT to exit the review page. GPSMAP 392/398/492/498 Owner's Manual - Garmin GPSMAP 498C | Owner's Manual - Page 37
the new waypoint using the default four-digit name and symbol. For more information about waypoints, see page 8. MAIN PAGES > MAP PAGE Selecting Map Zoom Ranges The Map Page has 28 available g2 or MapSource Data Overzoom, no additional data is available GPSMAP 392/398/492/498 Owner's Manual 29 - Garmin GPSMAP 498C | Owner's Manual - Page 38
data, boat ramps, mile markers, hazards, marinas, campgrounds, area roads, and more. The GPSMAP 492/498 system contains preloaded marine Both units accept preprogrammed data cards and are compatible with the latest BlueChart® g2 series marine cartography. The unit GPSMAP 392/398/492/498 Owner's Manual - Garmin GPSMAP 498C | Owner's Manual - Page 39
options are only available on medium and large sized data fields. Measure Distance-measures the bearing and distance between any two points on the Map Page. Hide/Show Detail-hides and shows map details. GPSMAP 392/398/492/498 Owner's Manual Map pointer coordinates Distance and bearing Map pointer - Garmin GPSMAP 498C | Owner's Manual - Page 40
guidance when traveling at slower speeds and when making frequent directional changes. When you are not navigating to a waypoint, the compass ring shows the current direction of travel but the arrow does . When you start moving, the map pointer is correct. 32 GPSMAP 392/398/492/498 Owner's Manual - Garmin GPSMAP 498C | Owner's Manual - Page 41
awareness while navigating. The line down the middle of the highway represents your course. As you navigate toward a waypoint, the highway moves-indicating the direction you are off course. To stay on course, steer toward the center of the highway. GPSMAP 392/398/492/498 Owner's Manual 33 - Garmin GPSMAP 498C | Owner's Manual - Page 42
the size of the data shown. Refer to page 30 for more information. To zoom in or out on the 3D Highway Page: Press either the RANGE Down or RANGE Up key to increase or decrease the zoom range. Data fields Compass tape Course Present location Zoom range 34 GPSMAP 392/398/492/498 Owner's Manual - Garmin GPSMAP 498C | Owner's Manual - Page 43
available when an optional cartography data card is inserted in the unit. • Setup-selects what waypoints and tracks are shown on the 3D Highway Page. Use the ROCKER and ENTER keys to select or deselect the options. Preview window 3D Highway Page Setup GPSMAP 392/398/492/498 Owner's Manual 35 - Garmin GPSMAP 498C | Owner's Manual - Page 44
information on the Active Route Page, see page 17. Active Route Page Options The Active Route Page Options function the same as the Map Page Options. Refer to pages 17-19 for information on the Use Map, Add Before, and Remove options. Active Route Page 36 GPSMAP 392/398/492/498 Owner's Manual - Garmin GPSMAP 498C | Owner's Manual - Page 45
system, navigation, interface management, and setup menus. The 19 Menu tabs are divided into categories by function. The Main Menu is available from any page in the system, and is accessed by pressing and holding ADJ/MENU. See page 6 for additional instructions on changing settings and entering data - Garmin GPSMAP 498C | Owner's Manual - Page 46
MAIN MENU > GPS TAB Accuracy Receiver status WAAS status Signal strength bars The status field indicates "Ready for Navigation" when the GPSMAP 392/398/492/498 has collected the necessary data from satellites to calculate a fix. The unit then updates the location, date, and time. You can use the sky - Garmin GPSMAP 498C | Owner's Manual - Page 47
ENTER. MAIN MENU > GPS TAB To Disable/Enable WAAS capability: 1. From the GPS tab, press ADJ/MENU. 2. Use the ROCKER to highlight WAAS Off or WAAS On, and press ENTER. GPS Tab Options Highlight WAAS Off, and press ENTER to disable the WAAS capabilities. GPSMAP 392/398/492/498 Owner's Manual 39 - Garmin GPSMAP 498C | Owner's Manual - Page 48
(MLLW) appears as a solid, horizontal line near the bottom of the chart (this line appears only if the tide height range is zero or below). GPSMAP 392/398/492/498 Owner's Manual - Garmin GPSMAP 498C | Owner's Manual - Page 49
minimum levels. The four data fields below the chart indicate select a location closer to a Tide Station. GPSMAP 392/398/492/498 Owner's Manual MAIN MENU > TIDE TAB Select from a list map pointer to a map location, and press ENTER. The Find Near Other Position Page shows a list of Tide Stations near - Garmin GPSMAP 498C | Owner's Manual - Page 50
> TIDE TAB Viewing Tide Information You can change the date to see tide charts for other days, or move the time bar in edge of the tide chart. Move the ROCKER to see tide heights at different times. Tide data shows in a black box when in map pointer mode. 42 GPSMAP 392/398/492/498 Owner's Manual - Garmin GPSMAP 498C | Owner's Manual - Page 51
shown in the local time box. To select the Current Station nearest to your location: 1. Highlight the At field, and press ENTER to open the Find Currents Page. 2. Highlight Current Position, and press ENTER to open the Find Near Current Position Page. GPSMAP 392/398/492/498 Owner's Manual 43 - Garmin GPSMAP 498C | Owner's Manual - Page 52
to move the map pointer to a map location, and press ENTER. The Find Near Map Position Page shows a list of Current Stations near the selected map location the data, choose from Reset Trip, Reset Max Speed, Reset Odometer, or Reset All, and press ENTER. 44 GPSMAP 392/398/492/498 Owner's Manual - Garmin GPSMAP 498C | Owner's Manual - Page 53
light color. You can show this data for your present location, a location from the map, or a Find item location. You can use today's data, or select a different date and time zone for that location. See page 68 for more information on setting time zones. GPSMAP 392/398/492/498 Owner's Manual 45 - Garmin GPSMAP 498C | Owner's Manual - Page 54
and time: From the Celes tab, press ADJ/MENU, use the ROCKER to highlight Use Current Date and Time, and press ENTER. 46 Points Tab GPSMAP 392/398/492/498 Owner's Manual - Garmin GPSMAP 498C | Owner's Manual - Page 55
in memory. From the User list, you can review, edit, rename or delete individual waypoints, or delete -allows you to create a waypoint. (See page 8 for creating a waypoint) • computer using an optional PC cable and interface software or record them manually. GPSMAP 392/398/492/498 Owner's Manual 47 - Garmin GPSMAP 498C | Owner's Manual - Page 56
steps 2 and 3 until the name appears. Press ENTER when you see the name. 5. Highlight the name on the list, and press ENTER again to review the waypoint. When finished, highlight OK, and press ENTER. To ENTER. 3. Press ENTER to delete the selected waypoint. 48 GPSMAP 392/398/492/498 Owner's Manual - Garmin GPSMAP 498C | Owner's Manual - Page 57
Another Proximity Waypoint" message appears. Because the unit only alerts for one of the overlap points, use caution when navigating in these areas. If your boat enters an alarm circle overlap, you are only alerted to the closest proximity waypoint. GPSMAP 392/398/492/498 Owner's Manual 49 - Garmin GPSMAP 498C | Owner's Manual - Page 58
Points tab, highlight the Proximity sub tab. 2. Press ADJ/MENU, and select New Waypoint. The Find screen appears. Highlight Waypoints, and press ENTER. 3. To select a waypoint from the list, use the • Delete All-removes all waypoints from proximity list. 50 GPSMAP 392/398/492/498 Owner's Manual - Garmin GPSMAP 498C | Owner's Manual - Page 59
a descriptive name for each route. After you create a route, you can start using it for navigation with the NAV key. You follow the route in the same sequence as it was originally created, or the Route List and press NAV, the name automatically appears. GPSMAP 392/398/492/498 Owner's Manual 51 - Garmin GPSMAP 498C | Owner's Manual - Page 60
enter a custom route name: 1. From the Route Review Page, highlight the route you want to change, and press ENTER. 2. Press ADJ/MENU, and use the ROCKER to select Edit Route Name. Press ENTER. 3. Use the ROCKER to enter a name, and press ENTER when finished. 52 GPSMAP 392/398/492/498 Owner's Manual - Garmin GPSMAP 498C | Owner's Manual - Page 61
are Use Map, Add Before, Remove, and Plan. Use Map-allows you to review and modify the route shown for each point (waypoint or map item) on a map page. Use the map pointer to insert a new route point on a route leg, or review the waypoint, or map item. GPSMAP 392/398/492/498 Owner's Manual 53 - Garmin GPSMAP 498C | Owner's Manual - Page 62
the Route Review Page, press ADJ/MENU, highlight Use Map, and press ENTER. 2. Use the map pointer to highlight the waypoint to move, and press ADJ/MENU. 3. Highlight Move, and press ENTER. 4. Move the map pointer to the new map location, and press ENTER. 54 GPSMAP 392/398/492/498 Owner's Manual - Garmin GPSMAP 498C | Owner's Manual - Page 63
end of the route: 1. From either the Route Review or Active Route Pages, use the ROCKER to highlight Highlight Add Before, and press ENTER. 3. From the Find menu, highlight Waypoints, and press ENTER. (You can See page 48 for searching for waypoints by name.) GPSMAP 392/398/492/498 Owner's Manual 55 - Garmin GPSMAP 498C | Owner's Manual - Page 64
and press ENTER. Plan-the Route Review and Active Route Pages also show Planning Data Fields NOTE: Fuel flow rates on your unit are measured in units per hour. System setting manual performance specifications) and note of the units of measure (gallons, liters.) GPSMAP 392/398/492/498 Owner's Manual - Garmin GPSMAP 498C | Owner's Manual - Page 65
log, define how it is recorded, or save track log data for future use. The Track Logs Page also provides an indicator active track log and allows you to clear the track memory. See page 14 for TracBack information. The Track tab is divided in GPSMAP 392/398/492/498 Owner's Manual Active Track Tab 57 - Garmin GPSMAP 498C | Owner's Manual - Page 66
track log is continuously recorded, wrapping through the available memory (replacing the oldest track data with new data). • Interval-defines the frequency at which the track plots are recorded. Three . • Delete All-deletes all saved track logs from memory. 58 GPSMAP 392/398/492/498 Owner's Manual - Garmin GPSMAP 498C | Owner's Manual - Page 67
From Card, and press ENTER to combine the selected items with existing GPS data. Highlight Replace From Card, and press ENTER to overwrite all selected items on your GPS. 4. A Transfer Complete message appears after the data is transferred. Press QUIT. GPSMAP 392/398/492/498 Owner's Manual 59 - Garmin GPSMAP 498C | Owner's Manual - Page 68
Tab The Message tab on the Main Menu shows a list of messages generated by your GPSMAP 392/398/492/498. Use the ROCKER to scroll through the entire list of messages on the Log tab. To a message. Press ENTER to view detailed information about that message. 60 GPSMAP 392/398/492/498 Owner's Manual - Garmin GPSMAP 498C | Owner's Manual - Page 69
boxes for BlueChart/MapSource data on or off. • Symbol Set-NOAA, International: controls the navaid symbol data. • Warn Depth-shows the spot sounding below the set value in red. This field is only available when Warn Depth is selected in the Spot Soundings field. GPSMAP 392/398/492/498 Owner's Manual - Garmin GPSMAP 498C | Owner's Manual - Page 70
unaffected by this setting. • Waypoints, Active Route, Tide Stations, Services, Saved Tracks, Track Log, and Lat/Lon Grid-Auto, Off, On, Off: toggles the black/white line that points to the current navigation point. • Course Line-Auto, Off, 120 ft-800 mi: sets GPSMAP 392/398/492/498 Owner's Manual - Garmin GPSMAP 498C | Owner's Manual - Page 71
scroll up, down, left, and right, or press ADJ/MENU and choose a scroll option. NOTE: The Advanced Map information is only available when you have a data card with additional map data, such as BlueChart g2, installed in the unit. GPSMAP 392/398/492/498 Owner's Manual 63 - Garmin GPSMAP 498C | Owner's Manual - Page 72
requires input from a temperature transducer/sensor or from a connected NMEA device that provides temperature data. The most recent temperature transducer connected. Refer to the "Using Sonar" section on page 72 for more information on sonar setup options. 64 GPSMAP 392/398/492/498 Owner's Manual - Garmin GPSMAP 498C | Owner's Manual - Page 73
and sunset information. GPSMAP 392/398/492/498 Owner's Manual MAIN MENU > SYSTM (SYSTEM) TAB • System Mode-sets Normal or Simulator Mode. The Setup button allows you to simulate navigation. • Set Position*-sets your location while in Simulator Mode. See page 3 for additional instructions. • Track - Garmin GPSMAP 498C | Owner's Manual - Page 74
changes the coordinate system. Only change see page 103. NOTE: The Units tab settings affects how navigation information appears on the GPSMAP 392/398/492/498 navigation documentation you are using, use the default WGS 84 datum for best overall performance. 66 GPSMAP 392/398/492/498 Owner's Manual - Garmin GPSMAP 498C | Owner's Manual - Page 75
north heading references based on the variation you enter. MAIN MENU > SYSTM (SYSTEM) TAB To enter a user-defined magnetic variation: 1. With the Heading your unit and external references, such as a magnetic compass. GPSMAP 392/398/492/498 Owner's Manual Manually enter a magnetic variation. - Garmin GPSMAP 498C | Owner's Manual - Page 76
• Garmin Remote Sonar-required for use with the GSD 22, GSD 21, or GSD 20. • NMEA In/NMEA Out-supports the input/output of standard NMEA 0183 data, and sonar NMEA input support for the DPT, MTW and VHW sentences. • None-provides no interfacing capabilities. 68 GPSMAP 392/398/492/498 Owner's Manual - Garmin GPSMAP 498C | Owner's Manual - Page 77
ENTER. MAIN MENU > UNITS TAB To select a transfer mode: 1. Use the ROCKER to select Garmin Data Transfer in the Serial Data Format field. 2. Highlight the Transfer Mode field, and press ENTER. 3. Use the ROCKER the number of Lat/Lon output precision digits. GPSMAP 392/398/492/498 Owner's Manual 69 - Garmin GPSMAP 498C | Owner's Manual - Page 78
when the GPS position accuracy falls outside the user-set value. Nav Sub Tab • Anchor Drag-sets an alarm to sound when you have exceeded a specified drift distance. Enter a value in the distance field, and use the control field to turn the alarm on and off. 70 GPSMAP 392/398/492/498 Owner's Manual - Garmin GPSMAP 498C | Owner's Manual - Page 79
off. Sonar Sub Tab You must be receiving sonar data for these functions to work. See "Using Sonar" on page 72 for and off. • Water Temperature-sets an alarm to sound when the transducer reports a temperature either above, below, inside, or outside the speci GPSMAP 392/398/492/498 Owner's Manual 71 - Garmin GPSMAP 498C | Owner's Manual - Page 80
USING SONAR > SONAR PAGE USING SONAR This section covers the additional sonar options for the GPSMAP 398/498 when used with a transducer and the GPSMAP 392/492 when used with a GSD 22, GSD 21, GSD 20 and tranducer. Read the Installation Instructions to properly install the GSD 22, GSD 21, or GSD 20 - Garmin GPSMAP 498C | Owner's Manual - Page 81
boat. At a 30-foot depth, the wide beam covers the area of approximately a 20-foot circle. GPSMAP 392/398/492/498 Owner's Manual USING SONAR > SONAR PAGE Understanding the Sonar Display One of the first things to understand about sonar is that the transducer sends a beam down to the bottom of the - Garmin GPSMAP 498C | Owner's Manual - Page 82
you want to see on-screen fish in a fish shape. Sonar Page The Sonar Page is where your GPSMAP 392/398/492/498 becomes a powerful fishfinder your boat. Items appear as they pass under the transducer. The most recent data is shown on the right side of the screen. GPSMAP 392/398/492/498 Owner's Manual - Garmin GPSMAP 498C | Owner's Manual - Page 83
and their current settings appears, with the selected option highlighted. GPSMAP 392/398/492/498 Owner's Manual USING SONAR > SONAR PAGE 2. Press up or down on . You can also set the gain manually. To see more detail on the screen, increase the receiver sensitivity by selecting a higher gain. If - Garmin GPSMAP 498C | Owner's Manual - Page 84
way at the bottom of the range and reads Off. Frequency-only appears when using a dual frequency transducer. This allows you to choose a sonar operation frequency. You can choose 200 kHz, 50 kHz or Dual way at the top of the range and reads Off. 76 GPSMAP 392/398/492/498 Owner's Manual - Garmin GPSMAP 498C | Owner's Manual - Page 85
the scrolling data. Split When Zoomed-turns this option on or off. If you turn on Zoom, then this setting splits the screen. Swap Split-available on a split Sonar Page when you are using dual frequency. This switches on which side the frequencies appear. GPSMAP 392/398/492/498 Owner's Manual 77 - Garmin GPSMAP 498C | Owner's Manual - Page 86
does not show any new sonar data until the standard Sonar Page is resumed. You can see a discontinuity from where the sonar information stops to where it starts again. Data window Map pointer To mark an Pointer, and press ENTER. Show Map Pointer Option 78 GPSMAP 392/398/492/498 Owner's Manual - Garmin GPSMAP 498C | Owner's Manual - Page 87
Press QUIT to return to the Sonar Page or a previous page. Keel Offset: Transducer at Surface Enter (+) a positive number to show depth from bottom of keel. Keel Offset: Transducer at Bottom of Keel. Enter a (-) negative number to show depth from surface. GPSMAP 392/398/492/498 Owner's Manual 79 - Garmin GPSMAP 498C | Owner's Manual - Page 88
in sonar data presentation and is the Scroll rate (see page 76) with transducer/sensor. Calibration is required to ensure that the Water Speed shown on your unit is accurate. The unit automatically uses GPS ground speed for comparison on the calibration. If a GPS GPSMAP 392/398/492/498 Owner's Manual - Garmin GPSMAP 498C | Owner's Manual - Page 89
Both the top GPS ground speed and problem with the speed sensor, or if a speed senor is not installed , a "Water Speed Sensor Is Not Working" message appears at the bottom of the screen. Check the connections of the speed sensor cables return data. GPSMAP 392/398/492/498 Owner's Manual 81 - Garmin GPSMAP 498C | Owner's Manual - Page 90
unit automatically shows this information, only if it is received from the transducer. • Color Scheme-sets the colors for the Sonar bottom. Transducer Coverage The area covered by the transmitted sound waves is determined by the cone angle of the transducer and GPSMAP 392/398/492/498 Owner's Manual - Garmin GPSMAP 498C | Owner's Manual - Page 91
in thermoclines or even hiding near structures. See-Thru technology allows the transducer to see through thermoclines and locate fish. This image is in the Classic Black color scheme Thick whiteline: Hard bottom Whiteline On Whiteline Off GPSMAP 392/398/492/498 Owner's Manual Thermocline 83 - Garmin GPSMAP 498C | Owner's Manual - Page 92
Gain, Frequency, and Scroll settings. See page 79 for information about these you can better understand what you see on the Flasher Page. Remember, the screen and fish inside the transducer beam can be any color and the beam. Red being the center most part, orange the area around, and green the - Garmin GPSMAP 498C | Owner's Manual - Page 93
divided into two main areas, the Map and the Sonar. This page only appears if the unit is receiving sonar information. Refer to page 27 for information on the Map and page 74 for the Sonar information. Flasher Page Without Data Fields GPSMAP 392/398/492/498 Owner's Manual Map Split Page 85 - Garmin GPSMAP 498C | Owner's Manual - Page 94
fications Physical Specifications Size: (Internal Antenna) 6.2" H x 6.30" W x 3.14" D (15.7 cm x 16.0 cm x 8.0 cm) (External Antenna) 6.2" H x 6.30" Program. Power Source: 10-33 V DC Usage: 14 watts max. at 13.8 vDC Fuse: AGC/3 AG-3 Amp Sonar Sounder Power: 500 GPSMAP 392/398/492/498 Owner's Manual - Garmin GPSMAP 498C | Owner's Manual - Page 95
1" x 14-thread marine antenna mount available at most marine dealers. The GPSMAP 492/498 with internal antennas do not require this installation. To acquire satellites, install the unit with a clear view of the sky. Mounting the GPS Antenna (External Antenna Units Only) The antenna should be mounted - Garmin GPSMAP 498C | Owner's Manual - Page 96
to allow connection of the antenna (external antenna only), power/data cables. • The mounting surface should be heavy enough to support the unit and protect it from excessive vibration and shock. • For GPSMAP 392/398/492/498 unit's with the built-in internal antenna, should be mounted in a location - Garmin GPSMAP 498C | Owner's Manual - Page 97
(see unit dimensions on page 86) and leave 1.25" (32 mm) clearance below the data card slot for inserting or removing data cards. A Flush Mount Template is provided in the package. Use the instructions on the template to complete the flush mount installation. GPSMAP 392/398/492/498 Owner's Manual - Garmin GPSMAP 498C | Owner's Manual - Page 98
. This transducer provides good allaround performance. A 80/200 kHz dual beam 40°/14° cone angle, temperature sensing, transom mount transducer is included in the GPSMAP 398 (with transducer) package. This transducer provides good all-around performance. 90 GPSMAP 392/398/492/498 Owner's Manual - Garmin GPSMAP 498C | Owner's Manual - Page 99
-turbulent) water for optimal performance. Apply marine sealant to all screw threads to prevent water from seeping into the transom. �� Mount the transducer parallel with the water surface. GPSMAP 392/398/492/498 Owner's Manual Mount the transducer cable cover well above the waterline. Make sure - Garmin GPSMAP 498C | Owner's Manual - Page 100
power/data cable connects the GPSMAP 392/398/492/498 to a DC supply and provides interface capabilities for connecting external devices. The color code in the diagram below indicates the appropriate harness connections. Replacement fuse is a AGC/3AG - 3 Amp fuse. NOTE: During a typical installation - Garmin GPSMAP 498C | Owner's Manual - Page 101
sentences. APPENDIX > INTERFACING You can download a copy of Garmin's proprietary communication protocol on the Help and Support section of our Web site at www.garmin.com. Complete information regarding NMEA format is available for purchase at www.nmea.org GPSMAP 392/398/492/498 Owner's Manual 93 - Garmin GPSMAP 498C | Owner's Manual - Page 102
INSTALLING AND REMOVING DATA CARDS Installing and Removing Data Cards The GPSMAP 392/398/492/498 uses optional Garmin marine BlueChart g2 and MapSource data cards to show digital charts and maps on-screen. Data cards are installed in the card slot located at the bottom right of the unit. Data cards - Garmin GPSMAP 498C | Owner's Manual - Page 103
applied to that satellite. Date, Time, and Current Location The GPS gets date and time information from the satellite's on-board atomic clock. When the GPS receiver has achieved a GPS location, the current location appears in the selected location format. GPSMAP 392/398/492/498 Owner's Manual 95 - Garmin GPSMAP 498C | Owner's Manual - Page 104
the accuracy to less than that provided by GPS satellites alone. For this reason, when you enable WAAS on your Garmin GPS receiver, the receiver automatically uses the method that achieves the best accuracy. For more information, go to http://gps.faa.gov. 96 GPSMAP 392/398/492/498 Owner's Manual - Garmin GPSMAP 498C | Owner's Manual - Page 105
radio with the FCC (Form 605). Garmin does not supply this number. How service is limited to registering recreational vessels only. To receive Station license contact: http://wireless.fcc.gov/marine/ fctsht14.html. If your vessel requires under review by GPSMAP 392/398/492/498 Owner's Manual 97 - Garmin GPSMAP 498C | Owner's Manual - Page 106
the next waypoint in a route. DOP (Dilution of Precision)-reflects the quality of the GPS signals and satellite geometry. Elevation-height above mean sea level (MSL). ETA (Estimate Time of Arrival)-the you are off course in either direction, left or right. GPSMAP 392/398/492/498 Owner's Manual - Garmin GPSMAP 498C | Owner's Manual - Page 107
See also "Odometer." GPSMAP 392/398/492/498 Owner's Manual APPENDIX > NAVIGATION GPSMAP 392/398/492/498 is receiving speed readings from a transducer or NMEA device. Water Temp-the water temperature. This field is only active if the GPSMAP 392/398/492/498 is receiving speed readings from a transducer - Garmin GPSMAP 498C | Owner's Manual - Page 108
't Write User Card, Data Card May Be Full-error reading card; remove and reinsert. Contact your dealer or Garmin Product Support if the problem persists. Can't Write User Card, Data Card Is Read-Only-the data card in your unit contains data copy protection. Database Error-internal problem with the - Garmin GPSMAP 498C | Owner's Manual - Page 109
has been reached. Simulating Operation-the unit is in Simulator Mode. Do not use for normal navigation. Sonar Failed, Unit Needs Repair-there is an internal problem with the unit. Contact your dealer or Garmin Product Support to have the unit serviced. GPSMAP 392/398/492/498 Owner's Manual 101 - Garmin GPSMAP 498C | Owner's Manual - Page 110
the transducer cable is removed while the unit is on, reconnect and cycle power. Transfer Complete-the unit has finished uploading or downloading information to the connected device. User Card Not Found, Please Insert Card-attempted to transfer user data without a data card containing user data being - Garmin GPSMAP 498C | Owner's Manual - Page 111
. Position coordinates can show as TDs, and all navigation functions can be used as if the unit was actually receiving LORAN signals. Change to Loran TD from the Units tab on the Main Menu. GPSMAP 392/398/492/498 Owner's Manual Using the LORAN TD Format When creating new waypoints using LORAN - Garmin GPSMAP 498C | Owner's Manual - Page 112
LORAN TD SYSTEM The LORAN TD coordinates accordingly. Remember that the GPS is not relying on the LORAN signal for navigation and actually converts the TD coordinate to at the Garmin Web site (www.garmin.com/manuals/LoranTDPositionHandbook_ Manual.pdf.) 104 GPSMAP 392/398/492/498 Owner's Manual - Garmin GPSMAP 498C | Owner's Manual - Page 113
with either Garmin BlueChart or Fishing Hot Spots map data. A/C Adapter-powers the unit using a standard AC house current. PC Interface Cable with Vehicle Power Adapter-connects the GPSMAP 392/398/492/498 to a vehicle's electrical system on one end, and a PC, beacon receiver, marine autopilot, or - Garmin GPSMAP 498C | Owner's Manual - Page 114
392/398/492/498) in case your GPSMAP 392/398/492/498 needs service. Keep the original sales receipt, or a photocopy, in a safe place. Serial Number Contact Garmin Contact Garmin if you have any questions while using your GPSMAP 392/398/492/498. In the USA contact Garmin Product Support by phone - Garmin GPSMAP 498C | Owner's Manual - Page 115
. To obtain warranty service, contact your local Garmin authorized dealer or call Garmin Product Support for shipping instructions and an RMA tracking number. The unit should be securely packed with the tracking number clearly written on GPSMAP 392/398/492/498 Owner's Manual APPENDIX > LIMITED - Garmin GPSMAP 498C | Owner's Manual - Page 116
that to which the receiver is connected. 108 • Consult the dealer or an experienced radio/TV technician for help. The GPSMAP 392/398/492/498 does not contain any userserviceable parts. Repairs should only be made by an authorized Garmin service center. Unauthorized repairs or modifications could - Garmin GPSMAP 498C | Owner's Manual - Page 117
62 GPSMAP 392/398/492/498 Owner's Manual D data cards 94 data entry garmin data transfer 68 go to 13 distress call 24 position report 24 GPS tab 37 options 39 H hard bottom 84 heading line 62 Highway Page, 3D 33 options 35 highway tab 64 I initializing 1 installation 87 interface keys 5 interfacing - Garmin GPSMAP 498C | Owner's Manual - Page 118
72 specifications 86 speed filter 65 split when zoomed 77 storage vi strongest sonar returns 73 surface clutter 74 swap split 77 system information 65 system tab 65 T temperature 82 temperature graph 77 temperature scale 64 temperature tab 63 thermoclines 83 GPSMAP 392/398/492/498 Owner's Manual - Garmin GPSMAP 498C | Owner's Manual - Page 119
57 saved 57 track up 62 transducer 82, 90 transducer type 80 trip planning 56 trip reviewing 11 underwater 78 waypoint lists proximity 49 user 47 weakest returns 73 whiteline 76, 83 wide beam 72 wiring installation 92 Z zoom 77 Zoom keys 5 zoom settings 29 GPSMAP 392/398/492/498 Owner's Manual - Garmin GPSMAP 498C | Owner's Manual - Page 120
- Garmin GPSMAP 498C | Owner's Manual - Page 121
- Garmin GPSMAP 498C | Owner's Manual - Page 122
latest free software updates (excluding map data) throughout the life of your Garmin products, visit the Garmin Web site at www.garmin.com. © Copyright 2006 Garmin Ltd. or its subsidiaries Garmin International, Inc. 1200 East 151st Street, Olathe, Kansas 66062, USA Garmin (Europe) Ltd. Unit 5, The
-
 1
1 -
 2
2 -
 3
3 -
 4
4 -
 5
5 -
 6
6 -
 7
7 -
8
-
9
-
10
-
11
-
12
-
13
-
14
-
15
-
16
-
17
-
18
-
19
-
20
-
21
-
22
-
23
-
24
-
25
-
26
-
27
-
28
-
29
-
30
-
31
-
32
-
33
-
34
-
35
-
36
-
37
-
38
-
39
-
40
-
41
-
42
-
43
-
44
-
45
-
46
-
47
-
48
-
49
-
50
-
51
-
52
-
53
-
54
-
55
-
56
-
57
-
58
-
59
-
60
-
61
-
62
-
63
-
64
-
65
-
66
-
67
-
68
-
69
-
70
-
71
-
72
-
73
-
74
-
75
-
76
-
77
-
78
-
79
-
80
-
81
-
82
-
83
-
84
-
85
-
86
-
87
-
88
-
89
-
90
-
91
-
92
-
93
-
94
-
95
-
96
-
97
-
98
-
99
-
100
-
101
-
102
-
103
-
104
-
105
-
106
-
107
-
108
-
109
-
110
-
111
-
112
-
113
-
114
-
115
-
116
-
117
-
118
-
119
-
120
-
121
-
122
 |
 |
Owner’s Manual
GPSMAP
392/398
GPSMAP 492/498
GPSMAP 498 shown