Garmin Oregon 750t Owner s Manual Web - Page 11
Marking and Starting Navigation to a Man
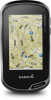 |
View all Garmin Oregon 750t manuals
Add to My Manuals
Save this manual to your list of manuals |
Page 11 highlights
• Select and to zoom in and out of the map. • Select a location on the map (represented by a pin), and select the information bar at the top of the screen to view information about the selected location. navigating on water. It can help you navigate back to the course line when you go off-course to avoid obstacles or hazards. To enable the course pointer, from the app drawer, select Setup > Heading > Go To Line (Pointer) > Course (CDI). Navigating Using TracBack® While navigating, you can navigate back to the beginning of your activity. This can be helpful when finding your way back to camp or the trail head. 1 From the app drawer, select Activity History > Current Activity > > TracBack. The map displays your route with a magenta line, start point, and end point. 2 Navigate using the map or the compass. Finding a Location Near Another Location 1 From an activity screen, select > > Search Near. 2 Select an option. 3 Select a location. Optional Maps You can use additional maps with the device, such as BirdsEye satellite imagery, BlueChart® g2, and City Navigator® detailed maps. Detailed maps may contain additional points of interest, such as restaurants or marine services. For more information, go to http://buy.garmin.com or contact your Garmin dealer. Finding an Address You can use optional City Navigator maps to search for addresses (Optional Maps, page 7). 1 From the app drawer, select Where To? > Addresses. 2 Select the country or state, if necessary. 3 Enter the city or postal code. NOTE: Not all map data provides postal code searching. 4 Select the city. 5 Enter the house number. 6 Enter the street. Navigating with the Compass When navigating to a destination, points to your destination, regardless of the direction you are moving. 1 Begin navigating to a destination (Navigating to a Destination, page 6). 2 From the app drawer, select Compass. 3 Turn until points toward the top of the compass, and continue moving in that direction to the destination. Calibrating the Compass NOTICE Calibrate the electronic compass outdoors. To improve heading accuracy, do not stand near objects that influence magnetic fields, such as vehicles, buildings, and overhead power lines. Your device was already calibrated at the factory, and the device uses automatic calibration by default. If you experience irregular compass behavior, for example, after moving long distances or after extreme temperature changes, you can manually calibrate the compass. 1 From the app drawer, select Compass. 2 Select > Calibrate Compass > Start. 3 Follow the on-screen instructions. Course Pointer The course pointer is most useful when you are navigating to your destination in a straight line, such as when you are Course line pointer. Indicates the direction of the desired course line À from your starting point to your next waypoint. Course deviation indicator (CDI). Indicates the location of the Á desired course line in relation to your location. If the CDI is aligned with the course line pointer, you are on course. Course deviation distance. The dots indicate your distance off  course. The distance represented by each dot is indicated by the scale in the upper-right corner. To-and-from indicator. Indicates whether you are headed to or from à the next waypoint. Marking and Starting Navigation to a Man Overboard Location You can save a man overboard (MOB) location, and automatically start navigation back to it. 1 From the app drawer, select Man Overboard > Start. The map opens showing the route to the MOB location. The default appearance of the route is a magenta line. 2 Navigate using the map (Navigating with the Map, page 6) or compass (Navigating with the Compass, page 7). Navigating with Sight 'N Go You can point the device at an object in the distance with the compass direction locked in, project the object as a waypoint, and navigate using the object as a reference point. 1 From the app drawer, select Sight 'N Go. 2 Point the device at an object. 3 Select Lock Direction > Set Course. 4 Navigate using the compass. Elevation Plot By default, the elevation plot displays the elevation over the distance traveled. The top chart displays the full track, and the bottom chart can display a portion of the track. You can touch any point on either chart to view details about that point. You can customize the elevation settings (Altimeter Settings, page 13). Navigating to a Point on the Elevation Plot 1 From the app drawer, select Altimeter. 2 Select an individual point on the plot. 3 Select . 4 Select View Map. 5 Navigate using the map (Navigating with the Map, page 6) or compass (Navigating with the Compass, page 7). Changing the Plot Type You can change the elevation plot to display pressure and elevation over time or distance. 1 From the app drawer, select Altimeter. 2 Select > Altimeter Setup > Plot Type Navigation 7
-
 1
1 -
2
-
3
-
4
-
5
-
 6
6 -
 7
7 -
 8
8 -
 9
9 -
 10
10 -
 11
11 -
 12
12 -
 13
13 -
 14
14 -
 15
15 -
 16
16 -
17
-
18
-
19
-
20
-
21
-
22
-
23
-
24
 |
 |
