Garmin Reactor 40 Kicker Autopilot Reactor 40 Kicker Suzuki Adapter Installati - Page 2
Reactor, Kicker Suzuki, Adapter - manual
 |
View all Garmin Reactor 40 Kicker Autopilot manuals
Add to My Manuals
Save this manual to your list of manuals |
Page 2 highlights
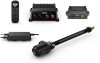
Reactor™ 40 Kicker Suzuki™Adapter Installation Instructions Getting Started CAUTION You must refer to the important safety information in the Garmin® Reactor™ 40 Kicker Installation Instructions before installing and using this product. To use a Garmin Reactor 40 Kicker autopilot system with select Suzuki™ motors, you must also install components provided in this kit. For proper installation, you must use these instructions along with the instructions provided in the autopilot corepack. NOTE: For the best results, the autopilot system should be installed by a knowledgeable marine installer familiar with your motor. 7 With the narrow end of the nut facing towards the bracket, screw the nut onto the end of the threaded rod. 8 Using a 15 mm (19/32 in.) wrench, tighten the nut to secure the linkage arm to the bracket. Installing the Motor Bracket on the Motor The assembled bracket and linkage arm must be installed between the tiller arm and steering mount on the motor. 1 Remove the bolts that secure the tiller arm to the steering mount . Installing the Steering Actuator NOTE: To help understand how the steering actuator installs on your particular motor, you can view installation photographs online. Go to www.garmin.com/manuals/reactorkicker. 1 Following the instructions provided in the Reactor 40 Kicker corepack, prepare the motor and install the steering actuator in the tilt tube. 2 Assemble the motor bracket and steering linkage arm (Assembling the Motor Bracket and Linkage Arm, page 2). 3 Install the motor bracket and steering linkage arm onto the motor (Installing the Motor Bracket on the Motor, page 2). 4 Connect the other end of the steering linkage arm to the steering actuator (Connecting the Linkage Arm to the Steering Actuator, page 2). Assembling the Motor Bracket and Linkage Arm Because Kicker motors create excessive vibration under use, you must apply a humidity-cured ethyl-based thread-locking compound, such as LOCTITE® 435 to the threads on the motor bracket, the bushing, and the nut in this assembly. You must follow the directions on the product and allow for proper curing time before assembling and installing the bracket. 1 Locate the motor bracket included with this adapter kit and the linkage parts included with the kicker corepack. 2 Place the assembled bracket and linkage arm against the tiller arm, aligning the holes on the bracket with the holes on the tiller arm. 3 Using the bolts you removed in the first step, secure the tiller arm and bracket to the steering mount. Connecting the Linkage Arm to the Steering Actuator After you connect the linkage arm to your kicker motor tiller arm using the appropriate bracket, you must connect it to the steering actuator. 1 Screw the linkage pin into the end of the steering actuator rod, and secure it with the lock nut . 2 With the wrench flats on the bushing pointing away from the bracket, screw the bushing onto the threaded rod on the bracket. 3 Using an 11 mm (7/16 in.) wrench, tighten the bushing onto the bracket. 4 Place a nylon washer over the bushing on the bracket. 5 With the notched end of the linkage arm facing away from the bracket, place the linkage arm over the bushing on the bracket. 6 Place the other nylon washer over the bushing on the bracket. 2 Referring to the diagram, install the spacer , washers , and linkage arm onto the linkage pin. NOTE: You can install an additional black spacer (included) on the linkage pin if needed to help level the linkage arm. 3 Push the R-pin through the hole on the linkage pin to secure the linkage arm. Installing the Throttle Actuator NOTE: To help understand how the throttle actuator installs on your particular motor manifold, you can view installation photographs online. Go to www.garmin.com/manuals /reactorkicker. 1 Consult the Reactor 40 Kicker Throttle Actuator Installation Instructions provided in the corepack to understand the mounting and connection requirements of the throttle actuator. 2 Using the parts in this adapter kit, assemble the carburetor linkage (Assembling the Carburetor Linkage, page 3). 2 Installation Instructions
-
 1
1 -
 2
2 -
 3
3 -
 4
4 -
 5
5 -
 6
6 -
 7
7 -
 8
8 -
9
-
10
-
11
-
12
-
13
-
14
-
15
-
16
-
17
-
18
-
19
-
20
-
21
-
22
-
23
-
24
-
25
-
26
-
27
-
28
-
29
-
30
-
31
-
32
-
33
-
34
-
35
-
36
-
37
-
38
-
39
-
40
 |
 |
