Garmin StreetPilot III Deluxe Owner's Manual
Garmin StreetPilot III Deluxe Manual
 |
View all Garmin StreetPilot III Deluxe manuals
Add to My Manuals
Save this manual to your list of manuals |
Garmin StreetPilot III Deluxe manual content summary:
- Garmin StreetPilot III Deluxe | Owner's Manual - Page 1
StreetPilot™ III portable GPS with auto-routing and voice owner's manual and reference guide - Garmin StreetPilot III Deluxe | Owner's Manual - Page 2
as expressly provided herein, no part of this manual may be reproduced, copied, transmitted, disseminated, Garmin web site (www.garmin.com) for current updates and supplemental information concerning the use and operation of this and other Garmin products. Garmin®, AutoLocate®, StreetPilot - Garmin StreetPilot III Deluxe | Owner's Manual - Page 3
and highways. When a card with MapSource City Navigator maps is in the unit, the StreetPilot III provides turn-by-turn guidance down to residential street-level detail. About This Manual Make sure you take the time to read the Quick Reference Guide first to get acquainted with the basic features - Garmin StreetPilot III Deluxe | Owner's Manual - Page 4
Page 37 Sky View and Signal Strength Bars . . . . 37 Receiver Status 38 'Poor Satellite Reception' Menu 39 Accuracy 39 GPS Information Page Options 40 Map Source Information Page 41 System Information Page 41 System Setup Pages 41 'General' Tab 43 'Guidance' Tab 44 'Routing' Tab - Garmin StreetPilot III Deluxe | Owner's Manual - Page 5
and used in accordance with the instructions, may cause harmful interference to receiver is connected. • Consult the dealer or an experienced radio/TV technician for help. The StreetPilot III does not contain any user-serviceable parts. Repairs should only be made by an authorized Garmin service - Garmin StreetPilot III Deluxe | Owner's Manual - Page 6
to airbag safety precautions contained in the vehicle owner's manual. Do not mount the StreetPilot III in a place where the driver or passengers are likely to impact it in an accident or collision. The mounting hardware provided by Garmin is not warranted against collision damage or the consequences - Garmin StreetPilot III Deluxe | Owner's Manual - Page 7
SHOULD NOT BE USED TO DETERMINE GROUND PROXIMITY FOR AIRCRAFT NAVIGATION. CAUTION: Use the StreetPilot III at your own risk. To reduce the risk of unsafe operation, carefully review and understand all aspects of this Owner's Manual-and thoroughly practice operation using the simulator mode prior to - Garmin StreetPilot III Deluxe | Owner's Manual - Page 8
Agreement BY USING THE STREETPILOT III, YOU AGREE TO BE BOUND BY THE TERMS AND CONDITIONS OF THE FOLLOWING SOFTWARE LICENSE AGREEMENT. PLEASE READ THIS AGREEMENT CAREFULLY. Garmin grants you a limited license to use the software embedded in this device (the "Software") in binary executable form - Garmin StreetPilot III Deluxe | Owner's Manual - Page 9
REMEDY FOR ANY BREACH OF WARRANTY. To obtain warranty service, call your Garmin dealer, or call Garmin Customer Service at one of the numbers to the right for shipping instructions and an RMA tracking number. The unit should be securely packaged with the tracking number clearly marked on the outside - Garmin StreetPilot III Deluxe | Owner's Manual - Page 10
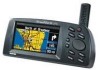
StreetPilot III Description Power/Data Connector (Back Side) Connections for Power, Ground, Serial Data In and Serial Data Out. 16-Color LCD unit. 8 Cartridge Door (Bottom) Insert programmed card for increased map detail and information lookup capability. Power/Backlight Key Press and hold to - Garmin StreetPilot III Deluxe | Owner's Manual - Page 11
Red Bulb Symbol) - Press and hold to turn the StreetPilot III on and off. Press momentarily while power is on to map or selected as a destination. MENU - Displays a menu of options for the current page. Press twice to display System Setup options. ROUTE - Displays a pop-up window of route navigation - Garmin StreetPilot III Deluxe | Owner's Manual - Page 12
Introduction Installing the Batteries Battery Installation The StreetPilot III uses six (6) AA batteries, which are installed . To conserve battery life you can switch to Battery Saver mode (see page 43, under 'GPS Mode') or you can use the Vehicle Power Cable. When the battery power falls below a - Garmin StreetPilot III Deluxe | Owner's Manual - Page 13
features and data entry procedures are referred to throughout this manual. Cursor- A highlighted area on the screen which can use the UP/DOWN portion of the ROCKER KEYPAD. Default- A system-selected format, built into the operating software or the unit's memory, that will be followed unless the user - Garmin StreetPilot III Deluxe | Owner's Manual - Page 14
Unit Pages at a Glance All of the information needed to operate the StreetPilot III is found on 'pages'-display screens. There are three main pages, the Map, Trip Information, and Current Route. A fourth screen is available during navigation, the Next Turn page. Press the PAGE or QUIT key to switch - Garmin StreetPilot III Deluxe | Owner's Manual - Page 15
Go Vehicle Speed Distance to Go Time to Go Driving Instructions The Map page is the main operating page of the StreetPilot III. It graphically shows you map details, your current location, and marks your route to a destination with a magenta colored route line. It tells you what direction to go or - Garmin StreetPilot III Deluxe | Owner's Manual - Page 16
are navigating a route. Your vehicle speed can be displayed in miles per hour or kilometers per hour. When you are not driving on roads that are present in the maps, you may see a circle drawn around the position pointer. This is the 'accuracy circle'. The StreetPilot III uses both map resolution - Garmin StreetPilot III Deluxe | Owner's Manual - Page 17
appear when the pointer is placed on the object.) This feature applies to everything displayed on the map except route lines and track log data. When a waypoint name is highlighted, you can review information about the waypoint, list waypoint options, or execute a 'Route to It' directly from the - Garmin StreetPilot III Deluxe | Owner's Manual - Page 18
briefly. A 'Waypoint Created' page will appear, with an auto-assigned name (3-digit number) for the waypoint. 2. You can delete the waypoint, show it on the map, or Route to It. Select the desired option and press ENTER. Once you are finished with panning, you can quickly remove the panning arrow and - Garmin StreetPilot III Deluxe | Owner's Manual - Page 19
preference window appears. Select Faster Time, Shorter Distance, or Off Road, and press ENTER. The StreetPilot III will route you to the selected destination using turn-byturn navigation and voice prompting. Reference Map Page Once you have marked a waypoint, you can route to it, show it on the - Garmin StreetPilot III Deluxe | Owner's Manual - Page 20
options are described in more detail below. Show Full Screen Map (or) Show Map and Nav Info- 'Show Full Screen Map' removes all screen information for the largest possible map display. 'Show Map and Nav Info' shows the map and the navigation information for the current layout. Use Indoors (or) Use - Garmin StreetPilot III Deluxe | Owner's Manual - Page 21
to next turn, vehicle speed, distance to next turn, time to next turn, and driving instructions in text format. Wide map shows the map on three quarters of the screen, the remaining quarter displays navigation information (direction to next turn, vehicle speed, distance to next turn, time to next - Garmin StreetPilot III Deluxe | Owner's Manual - Page 22
of the screen. A 'North' indicator is displayed on the map when in the 'Track Up' mode. Color Mode- Select between Day, Night, or Automatic for best this option will automatically adjust the map scale to show both your current location and the next item you are navigating to. Line Options Track Log- - Garmin StreetPilot III Deluxe | Owner's Manual - Page 23
being navigated, it shows for ten seconds. The top-view map is oriented to the inbound direction for the turn. Map navigating a route, set to appear only when the SPEAK key is pressed, or both. See the System Setup on page 44 for instructions on configuring the Next Turn page. When not navigating - Garmin StreetPilot III Deluxe | Owner's Manual - Page 24
Direction of Turn Driving Instructions Time to Go Scroll Bar Use the Scroll Bar to view past or future turns and directions on the Current Route page. Distance to Go When the StreetPilot III is navigating a Route, the Current Route page is displayed between the Map page and the Trip Information - Garmin StreetPilot III Deluxe | Owner's Manual - Page 25
It is often desirable to view the Next Turn page from the Current Route page. To view the Next Turn Page from the Current Route Page: 1. With the Current Route page displayed, highlight the turn you want to see and press ENTER. 2. Press ENTER or QUIT when done looking at the next turn. You can - Garmin StreetPilot III Deluxe | Owner's Manual - Page 26
the Trip Information page: Be certain to reset the Trip Computer before beginning a trip (instructions on resetting are on page 25). If you make frequent stops, leave the StreetPilot III powered on and receiving satellites. This will allow the unit to accurately measure elapsed time during the trip - Garmin StreetPilot III Deluxe | Owner's Manual - Page 27
the Trip Computer was last reset. Time of Day - Shown to the right of the odometer. Total Time - The total length of time that the StreetPilot III has been tracking your location, since the Trip Computer was last reset. This is always equal to Driving Time plus Stopped Time. To reset the - Garmin StreetPilot III Deluxe | Owner's Manual - Page 28
Map page. Marking Your Location as a Waypoint It is useful to mark a location, so that you can drive to it again later. These locations are called 'Waypoints'. The StreetPilot III Map - Shows the waypoint on the Map page. Route To It - Tells the unit that you want to navigate to that waypoint. 26 - Garmin StreetPilot III Deluxe | Owner's Manual - Page 29
that are included in the StreetPilot III basemap. In addition, if you are using City Navigator or MetroGuide (optional) map data, you can search for Find Nearest lists (nearest businesses, cities, waypoints and exits) update continuously. The yellow highlight can be introduced by pressing ENTER or - Garmin StreetPilot III Deluxe | Owner's Manual - Page 30
Navigator Europe). 28 To find a nearest item: 1. Highlight the item you want from the nearest list. 2. Press ENTER to display the information page for the item. Finding a Waypoint Waypoints that you have created and stored in the StreetPilot III can view it on the map ('Show Map') or 'Route to It' - Garmin StreetPilot III Deluxe | Owner's Manual - Page 31
for that exit. This page contains the exit description at the top of the page and a list of services near that exit at the bottom. You can show the exit on the map ('Show on Map') or save it as a waypoint ('Save as Waypoint'). 7. Use the ROCKER KEYPAD to highlight an item from - Garmin StreetPilot III Deluxe | Owner's Manual - Page 32
You must have a data card in the StreetPilot III with MapSource City Navigator or MetroGuide map data to search for points of interest, otherwise to display a list of the points of interest first for that type. 4. Follow instructions on pages 27-28 to find a point of interest by name or nearest. - Garmin StreetPilot III Deluxe | Owner's Manual - Page 33
be using MapSource City Navigator (included) or MetroGuide (optional) data which provides this type of map information, otherwise these options list. Find the street you want following the instructions for finding an item by name on page 27 of this manual. 5. With the desired street selected, press - Garmin StreetPilot III Deluxe | Owner's Manual - Page 34
list, etc. The most recently reviewed item is at the top of each map, or route to it. Make your selection and press ENTER. Using the Routes Menu The Routes menu gives you seven options to manage the StreetPilot III or Resume - Stops the route being navigated (or simulated), or resumes a stopped - Garmin StreetPilot III Deluxe | Owner's Manual - Page 35
The Find Destination window appears. 2. Follow the instructions given on pages 27-32 to select a 'Ask Me My Preference' setting under the System Setup Routing tab). 4. From the Route Preference Route Map appears in the lower left-hand corner of the Map page. The unit is now ready to navigate the - Garmin StreetPilot III Deluxe | Owner's Manual - Page 36
'Ask Me My Preference' setting under the System Setup Routing tab). 3. From the Route Map page, while the route is being redrawn. The unit is now ready to navigate the newly altered route. Note that the StreetPilot III will remember the detour each time the route is recalculated (whether manually - Garmin StreetPilot III Deluxe | Owner's Manual - Page 37
and allow the route to be recalculated to reflect the change. Reference Using the Routes Menu You can add a via point using either the map ('Use Map') or the 'Find' option in order to add an intermediary location to your route. You can also remove the last via point entered, using - Garmin StreetPilot III Deluxe | Owner's Manual - Page 38
exist in the StreetPilot III. You can also GPS Info page - Visual reference of GPS receiver functions MapSource Info page - Displays version and map name(s) for any MapSource CD-ROM data stored on an installed cartridge System Info page - Displays the unit software version and unit ID number. System - Garmin StreetPilot III Deluxe | Owner's Manual - Page 39
navigation (solid signal strength bar). Once a fix has been calculated, the StreetPilot III will then update your Map' tab page under 'Map Setup'), causing the top of the sky view to align to your current track heading. Reference GPS Information Page A hollow bar (number 17) indicates the receiver - Garmin StreetPilot III Deluxe | Owner's Manual - Page 40
from available satellites but has not collected enough data to calculate a position fix. 'GPS is Off' tells you the unit is being used indoors and cannot be used for navigation. 38 Receiver Status As soon as the StreetPilot III has collected the necessary data to calculate a fix, the status field will - Garmin StreetPilot III Deluxe | Owner's Manual - Page 41
an insufficient number of satellites are received to determine a position fix), a message will appear, prompting you to update your approximate location or turn off the GPS for indoor use. Updating your approximate location will ensure that the StreetPilot III is searching for the correct satellites - Garmin StreetPilot III Deluxe | Owner's Manual - Page 42
the StreetPilot III is acquiring satellites or navigating within a two-dimensional position. By default, 2D navigation will attempt to use the last known elevation. If the elevation shown is off by several hundred feet (or more), manually entering your approximate elevation will enable the receiver - Garmin StreetPilot III Deluxe | Owner's Manual - Page 43
for the MapSource data that you want displayed on the map. System Information Page The System Info window shows the unit software version and unit ID number. System Setup Pages Much as the GPS Info, MapSource Info and System Info pages, the System Setup pages can be accessed by pressing the MENU - Garmin StreetPilot III Deluxe | Owner's Manual - Page 44
in time, you may desire to restore the default System Setup settings of the StreetPilot III. This can be done by selecting the option called 3 for other file tabs. The file tab headings and System Setup functions are: General - GPS Mode, Units, Voice, Battery Type, Attention Tone and Keypress Tone - Garmin StreetPilot III Deluxe | Owner's Manual - Page 45
System Setup file tab item. 'General' Tab GPS Mode - Allows you to choose between three operating modes: • Normal: with the GPS receiver On. • Battery Saver: with a less frequent satellite signal updating process to conserve battery power. • GPS Off: allows you to operate the StreetPilot III indoors - Garmin StreetPilot III Deluxe | Owner's Manual - Page 46
Reference System Setup The 'Off Road' option is useful if you stop somewhere on your trip where there are no roads (scenic area, etc.) and you still want to navigate (via a straight line) using the StreetPilot III. Remember that a route with 'Shorter Distance' selected will be shorter in distance - Garmin StreetPilot III Deluxe | Owner's Manual - Page 47
your route to be a direct line from you to your destination. This may be useful outside of detailed map coverage areas. Calculation Method - Allows you to control how thoroughly the StreetPilot III searches for the perfect route. There is a trade-off here between the length of time it takes to - Garmin StreetPilot III Deluxe | Owner's Manual - Page 48
System Setup Routes can be calculated for emergency-type vehicles. U-turns can be avoided when planning your route. Calculate Routes for - Lets you take full advantage of the routing information built into the City Navigator maps : if checked, the StreetPilot III will avoid routing you through - Garmin StreetPilot III Deluxe | Owner's Manual - Page 49
). Refer to the instructions for setting UTC Time Offset on page 59. Daylight Savings - Can be turned On, Off, or set to Automatic. Time, Date, Sunrise and Sunset - Determined by the satellite information being received; cannot be changed. 'Safety' Tab The StreetPilot III is equipped with a 'Safe - Garmin StreetPilot III Deluxe | Owner's Manual - Page 50
System Setup Press the 'Clear Track' button on the Track Log page to clear all of the stored track points. One or more languages are pre-installed in the StreetPilot III. You can download additional languages from our web site at: "http://www.garmin they are stored in the map. See pages 60-61 for - Garmin StreetPilot III Deluxe | Owner's Manual - Page 51
a Garmin DGPS beacon receiver and automatically scan/tune beacon frequencies. • NMEA: supports the input/output of standard NMEA 0183 version 2.30 data. • Text Out: supports a standardized, fixed-column ASCII output with data for position, track, speed, etc. • RTCM In: allows Differential GPS (DGPS - Garmin StreetPilot III Deluxe | Owner's Manual - Page 52
including 'None'). To select an input/output interface format: 1. With the System Setup on the screen, select the file tab for 'Interface' and and press ENTER again. 5. For Garmin DGPS and RTCM In/NMEA Out, the 'Beacon' field may be set to 'Scan' or 'Manual'. If 'Manual' is selected, enter the beacon - Garmin StreetPilot III Deluxe | Owner's Manual - Page 53
The StreetPilot III is portable, allowing you to easily carry the unit from vehicle to vehicle or take it with you once you reach your destination. A Dash Mount kit consisting of a mounting bracket, mounting base, required hardware and adhesive pads is included with the StreetPilot III. You - Garmin StreetPilot III Deluxe | Owner's Manual - Page 54
Appendix A Vehicle Installation NOTE: Allow the permanent adhesive to set 24 hours before using the dash mount. If permanent adhesive is later removed, use rubbing alcohol to clean any adhesive residue. Repositionable adhesive should only be used on clean, dust-free surfaces. Installing the - Garmin StreetPilot III Deluxe | Owner's Manual - Page 55
tab snap in place. 3. Secure the GPS unit in the bracket by tightening the locking knob on the top of the mounting bracket. Attaching the External Speaker System with 12VDC Adapter to the StreetPilot III 1. Locate the power connector on the rear of the StreetPilot III (behind the rubber weather cap - Garmin StreetPilot III Deluxe | Owner's Manual - Page 56
Slide the locking lever to the right (lock) to secure the bracket assembly to the base. Adjusting the Mounting Bracket's Viewing Angle 1. Tilt the StreetPilot III forwards or backwards by pressing and holding down on the adjustment button on the back side of the bracket assembly (see figure at left - Garmin StreetPilot III Deluxe | Owner's Manual - Page 57
other compatible device using the supplied PC Interface Cable with RS-232 Serial Port Connector. The StreetPilot III can be connected to a vehicle's electrical system and a PC, beacon receiver, marine autopilot, or other compatible device using the optional PC Interface Cable with Cigarette Lighter - Garmin StreetPilot III Deluxe | Owner's Manual - Page 58
the PC Interface Cable, or with the USB Data Card Programmer. • MapSource Software CD-ROMs MapSource offers several other detailed mapping options that are compatible with the StreetPilot III and cover various parts of the world, including City Navigator, MetroGuide, Roads & Rec, WorldMap and Topo. - Garmin StreetPilot III Deluxe | Owner's Manual - Page 59
PC, beacon receiver, marine autopilot or other compatible device (see page 55). • Carrying Case With storage for data cartridges. • StreetPilot III Training Video Guides you through the use of your StreetPilot III the fast and easy way. Appendix C Optional Accessories Handheld/Portable Antenna USB - Garmin StreetPilot III Deluxe | Owner's Manual - Page 60
back up important user data by manually recording it or downloading it to a PC (transferring it to MapSource). Water Immersion The StreetPilot III is waterproof to IEC Standard . To resolve problems that cannot be remedied using this guide, Contact Garmin Customer Service in the U.S.A. at 913-397-8200, - Garmin StreetPilot III Deluxe | Owner's Manual - Page 61
III does the necessary "offset" calculations to convert from UTC (Coordinated Universal Time) to selected local time zone. To select a time zone: 1. Press MENU twice to select the Main Menu, then use the ROCKER KEYPAD to select "System StreetPilot III, you'll need to enter the time offset manually. - Garmin StreetPilot III Deluxe | Owner's Manual - Page 62
an information page. 60 Using Diacritical Marks The StreetPilot III supports diacritical marks commonly used in many European languages. includes E or Ë in the name, simply enter "E" or whichever diacritic version appears and proceed to the next character in the name. As you continue - Garmin StreetPilot III Deluxe | Owner's Manual - Page 63
a waypoint name to this location. Keep in mind that, although diacritical marks appear when using the FIND key, they are not supported in most other StreetPilot III functions. Therefore, Västerås, Sweden will appear as "VASTERAS" when saved as a waypoint. To save a city or point of interest as - Garmin StreetPilot III Deluxe | Owner's Manual - Page 64
FIND key, and the StreetPilot III will automatically plan a route and provide turn-by-turn directions to that location. You may also view the address, phone number and map location of services or points of interest. Be aware that, depending on the City Navigator version, not all areas are covered - Garmin StreetPilot III Deluxe | Owner's Manual - Page 65
to your GPS unit! Appendix G Using MapSource and Data Cards The supplied USB Programmer allows you to quickly download City Navigator maps using your PC. Refer to the USB Programmer User's Manual and Reference Guide for additional instructions. Insert the data card into the StreetPilot III with the - Garmin StreetPilot III Deluxe | Owner's Manual - Page 66
H Messages 64 Messages The StreetPilot III uses an on-screen message system to alert you to unit software has been completed. Database Error - A waypoint or route failed to store in memory. If the problem persists, return the unit to Garmin for service. Detail Maps Don't Support Routing - The maps - Garmin StreetPilot III Deluxe | Owner's Manual - Page 67
- return it to Garmin for service. Route Memory is Full - Route memory is full and no more routes can be saved or added (from another GPS unit or a PC destinations) and can only be navigated in an off-road, or point-to-point fashion. Note that the StreetPilot III only supports up to 100 user-specified - Garmin StreetPilot III Deluxe | Owner's Manual - Page 68
on Data Card - The data card contains more maps than the unit software can process. Track Memory is Full - Track log memory is full. No additional track log data can be stored without deleting old data to create - Garmin StreetPilot III Deluxe | Owner's Manual - Page 69
(635 g) 3.4"W x 1.8"H (8.6 x 4.5 cm), (305 x 160 pixels), high-contrast, 16-color backlit LCD Detachable with standard BNC-type connector 5° to 158°F (-15° to 70°C)1 Performance Receiver: Acquisition Time: Update Rate: GPS Accuracy Position: Velocity: Differential-ready 12 parallel channel Warm - Garmin StreetPilot III Deluxe | Owner's Manual - Page 70
DGPS Accuracy Position: Velocity: Dynamics: Interfaces: Data Storage Life: Map Storage: 3-5 meters (10-16 feet), 95% typical2 0.05 StreetPilot III may exceed the usable range of some batteries. Alkaline batteries can rupture at high temperatures. 2. With optional Garmin GBR 21/23 Beacon Receiver - Garmin StreetPilot III Deluxe | Owner's Manual - Page 71
13-15 Driving Instructions 14, 21-23, 44 DGPS Interface Settings 49 E Editing Waypoints 26 Entering Data 11 External Power 24, 53, 55 Exits 29 F FCC Compliance 3 Features 8, 9, 11 Field 11 File Tabs 19-20, 42-50 Find 9, 27-32 Full Screen Map 13, 18 G GPS Information Page 36-40 GPS Mode 43 Guidance - Garmin StreetPilot III Deluxe | Owner's Manual - Page 72
Navigation /Off 9 Power/Backlight/Contrast Key 9 70 Q QUIT Key 9 R Receiver Status 38 Recently Found Places 32 Reset Trip Computer 25 Restore Settings 42 Signal Strength Bars 37 Software License Agreement 6 Software Version 41 Specifications 67-68 Storage 58 System Info Page 41 System Setup 41-50 T - Garmin StreetPilot III Deluxe | Owner's Manual - Page 73
- Garmin StreetPilot III Deluxe | Owner's Manual - Page 74
For the latest free software updates throughout the life of your Garmin products, visit the Garmin web site at www.garmin.com. © Copyright 2002-2003 Garmin Ltd. or its subsidiaries Garmin International, Inc. 1200 E 151st Street, Olathe, KS 66062 U.S.A. Garmin (Europe) Ltd. Unit 5, The Quadrangle,
-
 1
1 -
 2
2 -
 3
3 -
 4
4 -
 5
5 -
 6
6 -
 7
7 -
8
-
9
-
10
-
11
-
12
-
13
-
14
-
15
-
16
-
17
-
18
-
19
-
20
-
21
-
22
-
23
-
24
-
25
-
26
-
27
-
28
-
29
-
30
-
31
-
32
-
33
-
34
-
35
-
36
-
37
-
38
-
39
-
40
-
41
-
42
-
43
-
44
-
45
-
46
-
47
-
48
-
49
-
50
-
51
-
52
-
53
-
54
-
55
-
56
-
57
-
58
-
59
-
60
-
61
-
62
-
63
-
64
-
65
-
66
-
67
-
68
-
69
-
70
-
71
-
72
-
73
-
74
 |
 |

owner’s
manual
and
reference
guide
portable GPS with
auto-routing and voice
StreetPilot
™
III