Garmin Varia Rearview Radar Owners Manual - Page 7
Varia RTL and RDU Specifications, Radar Detection, Taillight Modes and Intensity, Charging
 |
View all Garmin Varia Rearview Radar manuals
Add to My Manuals
Save this manual to your list of manuals |
Page 7 highlights
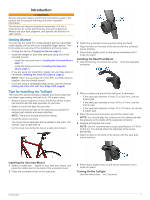
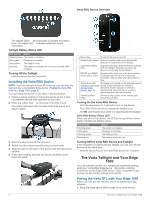
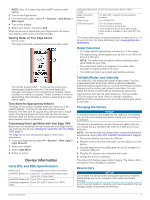
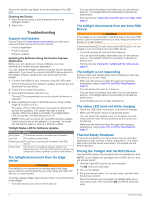
NOTE: Stay 10 m away from other ANT+® sensors while pairing. 2 Turn on the Edge device. 3 From the home screen, select > Sensors > Add Sensor > Bike Lights. 4 Turn on the taillight. 5 Select your sensor, and select Add. When the sensor is paired with your Edge device, the status icon appears solid on the connections page. Viewing Radar on Your Edge Device Go for a ride. The radar information appears on the active data screen. Charging temperature range Radio frequency/ protocol Water rating LED luminous flux From 0º to 45ºC (from 32º to 113ºF) 2.4 GHz ANT+ wireless communications protocol IEC 60529 IPX7* 5 lm (no threat detected) 13 lm (maximum threat level) 16 lm (maximum threat level, flash mode) Flash mode is available on the Varia RTL 500 only. *The device withstands incidental exposure to water of up to 1 m for up to 30 min. For more information, go to www.garmin.com /waterrating. Radar Detection • The radar detects approaching vehicles up to 140 m away. • The approaching vehicle speed must be from 10 to 160 km/h (from 6 to 99 mph). NOTE: The radar does not detect vehicles traveling at the same speed as your bike. • The radar beam width is 40 degrees. It provides radar coverage for typical bends in the road. • The radar can detect up to eight approaching vehicles. The vehicle position LED moves up the column as a À vehicle gets closer to your bike. The threat level LED Á changes color based on the potential level of threat. Green indicates no vehicle is detected. Amber indicates a vehicle is approaching. Red indicates a vehicle is advancing at a high rate of speed. Tone Alerts for Approaching Vehicles The Edge device beeps if audible tones are turned on in the system settings. Your device has alert tones for several features. The alert tone for approaching vehicles has a unique sound. The device beeps one time when the first vehicle is detected. After the threat is cleared, the device beeps again when another vehicle is detected. Customizing Varia Light Mode with Your Edge 1000 Before you can customize the light mode with your Edge device, you must pair the devices (Pairing the Varia RTL with Your Edge 1000, page 2). The Edge device has settings that apply to other Varia accessories. 1 From your Edge device, select > Sensors > Bike Lights > Light Network. 2 Select your taillight. 3 Select Light Mode. 4 Select an option. Device Information Varia RTL and RDU Specifications Battery type Rechargeable, built-in lithium-ion battery Varia RTL Battery life Up to 5 hr. in constant illumination mode Up to 8 hr. in flash mode Varia RDU Battery life Up to 10 hr., typical usage Operating temperature From -20º to 60ºC (from -4º to 140ºF) range Taillight Modes and Intensity The Varia RTL 500 default light mode is flash mode. The four middle LEDs flash at all times. When a vehicle is detected, additional LEDs progressively turn on and the flashing increases frequency as the vehicle gets closer to your bike. You can switch the device to solid mode by pressing the device key. The Varia RTL 501 has the solid mode only. The two middle LEDs are solid at all times. When a vehicle is detected, additional LEDs progressively turn on as the vehicle gets closer to your bike. Charging the Device NOTICE To prevent corrosion, thoroughly dry the USB port, the weather cap, and the surrounding area before charging or connecting to a computer. The device is powered by a built-in lithium-ion battery that you can charge using a standard wall outlet or a USB port on your computer. NOTE: The device does not charge when outside the approved temperature range (Varia RTL and RDU Specifications, page 3). 1 Pull up the weather cap from the USB port. 2 Plug the small end of the USB cable into the USB port on the device. 3 Plug the large end of the USB cable into an AC adapter or a computer USB port. 4 Plug the AC adapter into a standard wall outlet. 5 Charge the device completely. The status LED flashes green while charging. The status LED is solid green when charging is complete. Device Care NOTICE Do not store the device where prolonged exposure to extreme temperatures can occur, because it can cause permanent damage. Avoid chemical cleaners, solvents, and insect repellents that can damage plastic components and finishes. Device Information 3
-
 1
1 -
 2
2 -
 3
3 -
 4
4 -
 5
5 -
 6
6 -
 7
7 -
 8
8 -
 9
9 -
 10
10 -
 11
11 -
 12
12
 |
 |
