Garmin nuviCam LMTHD Owners Manual - Page 6
Using the On-Screen Buttons, Entering and Exiting Sleep Mode, Adjusting the Volume, Adjusting - mount
 |
View all Garmin nuviCam LMTHD manuals
Add to My Manuals
Save this manual to your list of manuals |
Page 6 highlights
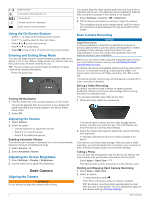
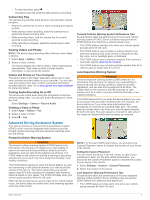
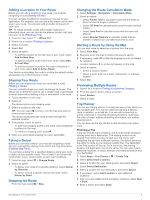
Battery status Connected to Smartphone Link Temperature Unread myGarmin™ messages Dash camera recording status Using the On-Screen Buttons • Select to return to the previous menu screen. • Hold to quickly return to the main menu. • Select or to see more choices. • Hold or to scroll faster. • Select to see a menu of options for the current screen. Entering and Exiting Sleep Mode You can use sleep mode to conserve battery power when your device is not in use. While in sleep mode, your device uses very little power and can wake instantly for use. TIP: You can charge your device faster by putting it in sleep mode while charging the battery. Press the power key . À Turning Off the Device 1 Hold the power key until a prompt appears on the screen. The prompt appears after five seconds. If you release the power key before the prompt appears, the device enters sleep mode. 2 Select Off. Adjusting the Volume 1 Select Volume. 2 Select an option: • Use the slider bar to adjust the volume. • Select to mute the device. • Select for additional options. Enabling Automatic Volume Your device can increase or decrease the volume automatically based on the level of background noise. 1 Select Volume > . 2 Select Automatic Volume. Adjusting the Screen Brightness 1 Select Settings > Display > Brightness. 2 Use the slider bar to adjust the brightness. Dash Camera Aligning the Camera WARNING Do not attempt to align the camera while driving. You should align the dash camera each time you mount the or reposition the device. The advanced driver assistance features may not perform properly if the camera is not aligned. 1 Select Settings > Camera > > Alignment. 2 Tilt the device and rotate the camera to align the camera. The crosshairs should point straight ahead, and the horizon line should be centered between the top and bottom of the screen. Dash Camera Recording NOTICE Legal Restrictions In some jurisdictions it could be considered an invasion of privacy rights to take or publicly display photographs or videos of people or their vehicles using this product. It is your responsibility to know and comply with applicable laws and rights to privacy in your jurisdiction. Before you can record video using the integrated dash camera, you must install a camera memory card (Installing the Dash Camera Memory Card). By default, the device immediately starts recording video when it turns on. It continues recording, overwriting the oldest, nonsaved video until it turns off. While recording, the LED is solid red. The device records continuously until the device is turned off or video recording is disabled. Saving a Video Recording By default, the device uses a sensor to detect possible accidental collisions and saves video footage before, during, and after the detected event. You can also manually save video at any time. 1 While recording, select the camera key . À The device saves a photo and the video footage before, during, and after you select the key. The LED flashes red while the device is saving video footage. 2 Select the camera key again to extend the saved recording time (optional). A message indicates the amount of video footage to be saved. The memory card has limited storage. After you save a video recording, you should transfer the recording to your computer or other external storage location for permanent storage. Taking a Photo You can take still photographs with this device. By default, the device stores time and location information with the photo. Select Apps > Dash Cam > . The device takes a photo and saves it to the memory card. Starting and Stopping Dash Camera Recording 1 Select Apps > Dash Cam. 2 Select an option: • To stop recording, select . The LED is solid green while recording is stopped. TIP: By default, recording starts automatically the next time you turn on the device. You can disable this option in the camera settings (Camera Settings). 2 Dash Camera
-
 1
1 -
 2
2 -
 3
3 -
 4
4 -
 5
5 -
 6
6 -
 7
7 -
 8
8 -
 9
9 -
 10
10 -
 11
11 -
 12
12 -
13
-
14
-
15
-
16
-
17
-
18
-
19
-
20
-
21
-
22
-
23
-
24
-
25
-
26
-
27
-
28
 |
 |