Garmin zumo 390LM Owner's Manual - Page 11
About Exit Services, Avoiding Road Features, About Custom Avoidances
 |
View all Garmin zumo 390LM manuals
Add to My Manuals
Save this manual to your list of manuals |
Page 11 highlights
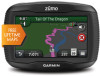
As you travel, the device guides you to the destination with voice prompts, arrows on the map, and directions at the top of the map. If you depart from the original route, the device recalculates the route and provides new directions. A data field displaying the current speed limit may appear as you travel on major roadways. About Exit Services While you navigate a route, you can find gas, food, lodging, and restrooms near upcoming exits. Services are listed under tabs by category. Gas Food Lodging Restrooms Using the Navigation Map 1 From the main menu, select View Map. 2 If the zoom controls are hidden, select the map to display the zoom controls. 3 Select the map. 4 Select an option: • To zoom in or out, select or . • To rotate the map view, select . • To switch between North Up and 3-D views, select . • To add or remove map layers, select . • To view specific categories, select . • To center the map on your current location, select . • To view shortcuts for map and navigation features, select . Adding a Point to a Route Before you can add a point, you must be navigating a route. 1 From the map, select > Where To?. 2 Search for a location. 3 Select a location. 4 Select Go!. 5 Select Add to Active Route. Skipping a Point in Your Route If you decide not to go to the next point in your route, you can skip the point. This prevents the device from attempting to route you back to the missed point. This feature is not available if the next point is your final destination. From the map, select > Skip. Taking a Detour While navigating a route, you can use detours to avoid obstacles ahead of you, such as construction zones. While navigating, select > Detour. Stopping the Route From the map, select . Using Suggested Routes Before you can use this feature, you must save at least one location and enable the travel history feature (page 16). Using the myTrends™ feature, your device predicts your destination based on your travel history, the day of the week, and the time of day. After you have driven to a saved location several times, the location may appear in the navigation bar on the map, along with the estimated time of travel, and traffic information. Select the navigation bar to view a suggested route to the location. Finding Exit Services 1 From the map, select > Exit Services. 2 Use the arrows to select an upcoming exit. 3 Select an exit service tab. 4 Select a point of interest. Navigating to an Exit 1 From the map, select > Exit Services > . 2 Select Go!. Avoiding Road Features 1 Select Settings > Navigation > Avoidances. 2 Select the road features to avoid on your routes, and select Save. About Custom Avoidances Custom avoidances allow you to avoid specific areas and sections of road. You can enable and disable custom avoidances as needed. Avoiding an Area 1 Select Settings > Navigation > Custom Avoidances. 2 If necessary, select Add Avoidances. 3 Select Add Avoid Area. 4 Select the upper-left corner of the area to avoid, and select Next. 5 Select the lower-right corner of the area to avoid, and select Next. The selected area is shaded on the map. 6 Select Done. Avoiding a Road 1 Select Settings > Navigation > Custom Avoidances. 2 Select Add Avoid Road. 3 Select the starting point of the section of road to avoid, and select Next. 4 Select the ending point of the road section, and select Next. 5 Select Done. Disabling a Custom Avoidance You can disable a custom avoidance without deleting it. 1 Select Settings > Navigation > Custom Avoidances. 2 Select an avoidance. 3 Select > Disable. Deleting Custom Avoidances 1 Select Settings > Navigation > Custom Avoidances. 2 Select an option: • To delete all custom avoidances, select . • To delete one custom avoidance, select the avoidance, and select > Delete. Navigation 7
-
 1
1 -
2
-
3
-
4
-
5
-
 6
6 -
 7
7 -
 8
8 -
 9
9 -
 10
10 -
 11
11 -
 12
12 -
 13
13 -
 14
14 -
 15
15 -
 16
16 -
17
-
18
-
19
-
20
-
21
-
22
-
23
-
24
 |
 |
