Gastroback 41006 User Manual - Page 17
ATTENTION, IMPORTANT, ATTENTION: If the motor slows down or stucks turn the appliance off imme,
 |
View all Gastroback 41006 manuals
Add to My Manuals
Save this manual to your list of manuals |
Page 17 highlights
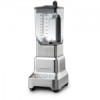
liquids. Ensure not to burn yourself on the blender jug, overrunning, spurt out or hot steam. ATTENTION: If you are working with hot ingredients first take off the inner lid and cover the opening with a towel to release excess pressure and steam. IMPORTANT: Ensure the blender jug is properly locked on the motorblock and stands securely. The unit does not work if the blender jug is not in proper position on the motorblock. 3. Place one hand on top of the lid. Press the Power button on the far left of the control panel to turn the blender on and into operational mode. The Power button will illuminate and flash in red and all functions will illuminate blue. 4. Select the required function (blend, smoothie or ice auto pulse) by pressing the corresponding function button. The blender will start to operate. The Power button will illuminate and flash in red and the selected function button will illuminate in blue. Note: The function can be changed at any time during the blending process. Each time a new function is selected its button will illuminate and the previous button illumination will go out. Note: All functions are pre-programmed and are designed to run for a specific time. This will avoid over processing. The Blend function will automatically stop the appliance after 2 minutes and turn the appliance in operational mode afterwards. The Smoothie and Ice Auto Pulse function turn the appliance off and into operational mode after 1 minute. If you need to process the ingredients for a longer time press the desired function button again. ATTENTION: If the motor slows down or stucks turn the appliance off immediately to avoid overheating (see ›Trouble shooting‹). Note: As a safety feature, the unit automatically shuts off if the blades become stuck. Unplug the cord and clear carefully the blockade and allow the motor to rest for one minute before turning the appliance back on. For ice-crushing the ingredients that require short bursts of power, select the ice auto pulse button. The blender will start to operate and the ice auto pulse button will illuminate in blue. The power button will continue to flash in red. Note: The Smoothie function has a unique processing technique that blends the denser ingredients at a lower function, then increases as ingredients thicken. This may happen several times while blending smoothies. 5.The appliance will be set into operational mode automatically after the pre-programmed time has passed. Turn the appliance ›Off‹ (all buttons illuminations will go out) when the operation is finished. Note: Operate the blender only for the appropriate amount of time required - do not over process. To stop blending at any time, press the Power button or the selected function. All functions will illuminate blue and the Power button will flash in red. The appliance is set into the operational mode. Note: Pressing the Power button again will turn the appliance ›Off‹ and all illuminations will go out. 6. As soon as the motor stops moving you can take the blender jug off the motorblock holding on to the handle. Take off the lid to check the consistency of the food or to push down the food from the sides of the blender jug. You can fill in more ingredients through the refill aperture. Turn the inner lid and lift it (refer to ›Disassemble the blender jug‹). After adding the 55
-
 1
1 -
2
-
3
-
4
-
5
-
6
-
7
-
8
-
9
-
10
-
11
-
 12
12 -
 13
13 -
 14
14 -
 15
15 -
 16
16 -
 17
17 -
 18
18 -
 19
19 -
 20
20 -
 21
21 -
 22
22 -
23
-
24
-
25
-
26
-
27
-
28
-
29
-
30
-
31
-
32
-
33
-
34
 |
 |
