Gateway E-9525R Gateway E-9525R Server User Guide - Page 49
Caution, Push the release clips 1 in the direction shown in the illustration, then lift the assembly
 |
View all Gateway E-9525R manuals
Add to My Manuals
Save this manual to your list of manuals |
Page 49 highlights
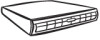
www.gateway.com 4 Push the release clips (1) in the direction shown in the illustration, then lift the assembly (2) out of the chassis. Caution Do not touch the contacts on the bottom part of the expansion card. Touching the contacts can cause electrostatic damage to the card. 5 Place the PCI riser assembly on a stable, static-free surface, then open the card lock (3) and remove the card (4). 5 3 4 6 If you are not replacing the card, install a slot cover (5) on the back of the riser card assembly. 7 If you are replacing the riser card, continue with the next step. - OR If you are replacing the PCI card, go to Step 10. 43
-
 1
1 -
2
-
3
-
4
-
5
-
6
-
7
-
8
-
9
-
10
-
11
-
12
-
13
-
14
-
15
-
16
-
17
-
18
-
19
-
20
-
21
-
22
-
23
-
24
-
25
-
26
-
27
-
28
-
29
-
30
-
31
-
32
-
33
-
34
-
35
-
36
-
37
-
38
-
39
-
40
-
41
-
42
-
43
-
 44
44 -
 45
45 -
 46
46 -
 47
47 -
 48
48 -
 49
49 -
 50
50 -
 51
51 -
 52
52 -
 53
53 -
 54
54 -
55
-
56
-
57
-
58
-
59
-
60
-
61
-
62
-
63
-
64
-
65
-
66
-
67
-
68
-
69
-
70
-
71
-
72
-
73
-
74
-
75
-
76
-
77
-
78
-
79
-
80
-
81
-
82
-
83
-
84
-
85
-
86
-
87
-
88
-
89
-
90
-
91
-
92
-
93
-
94
-
95
-
96
-
97
-
98
-
99
-
100
-
101
-
102
-
103
-
104
-
105
-
106
-
107
-
108
-
109
-
110
-
111
-
112
-
113
-
114
-
115
-
116
-
117
-
118
-
119
-
120
 |
 |

www.gateway.com
43
4
Push the release clips (1) in the direction shown in the illustration, then lift the assembly
(2) out of the chassis.
5
Place the PCI riser assembly on a stable, static-free surface, then open the card lock (3) and
remove the card (4).
6
If you are not replacing the card, install a slot cover (5) on the back of the riser card assembly.
7
If you are replacing the riser card, continue with the next step.
- OR -
If you are replacing the PCI card, go to
Step 10
.
Caution
Do not touch the contacts on the bottom part of the expansion card. Touching
the contacts can cause electrostatic damage to the card.
3
4
5