GE 25902EE1 User Guide - Page 1
GE 25902EE1 - Edge Cordless Phone Manual
 |
UPC - 633758003926
View all GE 25902EE1 manuals
Add to My Manuals
Save this manual to your list of manuals |
Page 1 highlights
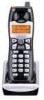
Model 25952 Series 5.8 GHz Cordless Handset Speakerphone Answering System User's Guide Your new GE telephone system is EXPANDABLE up to a total of 4 handsets (by purchase of optional Model 25902 handset with charge cradle) Equipment Approval Information Youtrelephonequipmenist approvedforconnectiotnothe Public5witchedTelephonNeetworkand isincompliancweith parts15and68,FCCRubsandRegulationasndtheTechnicaRl equiremenftosr TelephonTeerminaEl quipmenptublishedbyACTA 1 Notificationto the LocaTl elephonCe ompany Onthebottomof thisequipmenist a bbelindicatinga,mongotherinformationth, eUSnumber andRingeEr quivalencNeumbe{rRENfo) rtheequipmenYt oumust,uponrequestp, rovidethis informatiotnoyourtelephonecompany TheRENis usefuilndeterminintghenumbeor f deviceysoumayconnectoyourtelephonleineand stillhaveallofthesedevicersingwhenyourtelephonenumbeirscalledInmostbut notalllareas, thesumoftheRENsofalldevicesconnectetdoonelineshouldnotexceed5 Tobecertainofthe numbeor f deviceysoumayconnecto yourlineasdeterminebdythe REN,yosuhouldcontactyour localtelephonecompany Aplugandjackusedto connecthisequipmenttothe premmewsiringandtelephonenetworkmust complywith theapplicableFCCPort68rubsandrequiremenatsdoptedby theACTAA. compliant tebphonecordandmodulapr lugisprovidedwiththisproductI.t isdesignetdobeconnectetdo a compatiblme odulajrackthatisalsocompliantSeeinstallationinstructionfsordetails Notes •Thisequipmenmt aynot beusedoncoinsen/iceprovidedbythetelephonecompany • Partylinesaresubjectostatetariffsa, ndthereforey,oumaynotbeabletouseyourown telephonequipmenift youareona partyline Checkwithyour localtelephonceompany. • Noticemustbegiventothetelephonecompanyuponpermanendtisconnectioonfyour telephonefromyourline • Ifyourhomehasspeciallwy iredabrmequipmenctonnectetdo thetelephoneline,ensurethe instollafioonf thisproducdt oesnot disableyouralarmequipmenItfyouhavequestionasbout whatwilldisableabrmequipmenct,onsulyt ourtelephonecompanyora qualifiedinstallec USNumberislocatedonthe cabinebt ottom RENNumbeirs locatedonthecabinebt ottom 2 Rightsof theTelephonCe ompany Shouldyourequipmenctausetroubleonyourlinewhichmayharmthetelephonneetworkt,he telephonceompanyshall,wherperacticablen,otifyyouthattemporarydiscontinuancoef service mayberequiredWherepriornoticeisnot practicablaendthecircumstancewsarrantsuch actiont,hetelephonecompanymaytemporarildyiscontinuseerviceimmediatelyIn. caseofsuch temporardyiscontinuancteh,etelephonecompanymust:I1)promptlynotifyyouof suchtemporary discontinuanc(e2;1affordyoutheopportunittyocorrecthesituationa;nd(5)informyouof your rightto bringa compbintotheCommissiopnursuantto proceduressetforthinSubparEt of Part 68,FCCRulesandRegulations Thetelephonceompanymaymakechangeisn itscommunicationfascilitiese, quipmenot,perations orprocedurewsheresuchactionisrequiredintheoperationofits businesasndnot inconsistent withFCCRubsandRegulationIsfthesechangeasreexpectetdo affectheuseor performancoef yourtelephonequipmenth, etebphonecompanmy ustgiveyouadequatenoticei,nwritingt,o allowyouto maintainuninterruptesdervice Thomson Inc. Hodel25952 000017254(Rev0 DamE) I_OMSON 10330NorthMeridianStreet IndianapoliIsN,46290 © 2007ThomsonInc 0®02 Printedin Chino _ THOMSON _ Trademark(®s) Registered Marco(sR) egistrado(s) Interference Information ThisdevicecompbswithParti5 ofthe FOgRulesO. perationissubjecto thefollowingtwo conditions(:1)Thisdevicemaynot causeharmfuilnterferencea;nd(2)Thisdevicemustacceptany interferencreeceivedin, cludinginterferenctehatmaycauseundesireodperation. Thisequipmenhtasbeentestedandfoundto complywiththelimitsforaClassBdigitadl evice, pursuantto Part15ofthe Fat RubsTheselimitsaredesignedtoprovidereasonablperotection againstharmfulinterferencien a msidentbilnstallation Thiesquipmengteneratesu,sesa, ndcanradiateradiofrequenceynergyand,if not installedand usedinaccordancweiththe instructionsm, aycauseharmfuilnterferencteo radiocommunications Nowevetrh, ereisnoguaranteethatinterferencweill notoccurinoparticularinstallation Privacoyf Communicatiomnsaynotbeensuredwhenusingthisproduct if thisequipmendtoescauseharmfulinterferencteo radioor televisionreceptionw,hichcanbe @terminedbyturningtheequipmenot ffandon,theuserisencouragetdo try tocorrecthe interferencbeyoneor moreofthefollowingmeasures: • Reorienotr relocatethereceivingantenna(thatis,theantennafor radioor tebvisionthatis "receivingth" e interference) • Reorienotr relocateandincreasetheseparationbetweenthetelecommunicatioenqsuipment and receivinagntenna • Connecthetelecommunicatioenqsuipmenitntoanoutbt ona circuitdifferentfromthatto whichthereceivingantennaisconnected. Ifthesemeasuredsonoteliminatetheinterferencep,leaseconsulytourdealeror anexperienced radio/televisiotenchnicianforadditionasluggestionAslsot,he FederaCl ommunicatioCnsommission hasprepareda helpfubl ooklet",NowToIdentifyandResolvRe adio/TIVnterferencPeroblem_sT. his bookbtisavailablefromthe US.GovernmenPtrintingOfficeW, ashingtonD,C.20/402Pleasespecify stocknumbe0r 04-000-00395w-ahenorderingcopies NoticeT: hechangeosr modificationnsotexpressalypprovedbythepartyresponsibbforcompliance couldvoidtheuser'sauthorityto operatetheequipment Hearing Aid Compatibility (HAC) ThistelephonesystemmeetsFCCstandardsfor HearingAid Compatibility Licensing LicensedunderUSPatent6,927,009 FCC RF Radiation Exposure Statement Thisequipmenct omplieswithFCCRFradiationexposurelimitssetforthforan uncontrolled environmentThisequipmenst houldbeinstalledandoperatedwitho minimumdistanceof 20 centimetersbetweenthe radiatorandyourbodyThistransmittermustnot becodocatedor operatedinconjunctionwithanyotherantennaor transmittec Forbodywornoperationt,hisphonehasbeentestedandmeetsthe FCCRFexposureguidelines whenusedwiththe beltdipsuppliedwiththisproductUseof otheraccessoriems aynot ensure compliancewith FCCRFexposureguidelines. A WARNING:TO PREVENT FIRE OR ELECTRICAL SHOCK HAZARD, DO NOT EXPOSETHIS PRODUCT TO RAIN OR MOISTURE, THE LIGHTNING FLASH AND ARROW HEAD WITHIN THE TRIANGLE IS A WARNFNG SIGN ALERTING YOU OF "DANGEROUS VOLTAGE" INSIDE THE PRODUCT CAUTION: TO REDUCE THE RISKOF ELE[;I HICSHOCK, Dg NOT REMOVE COVER {OR BACK}¸ NO USER SERVICEABLE pARTS INSIDE REFER SERVICING TO QUALIFIED SERVICE PERSONNEL¸ THE EXCLAMATION POINT WITHIN THE TRIANGLE IS A WARNING SIGN ALERTING YOU OF IMPORTANT INSTRUCTIONS ACCOMPANYING THE PRODUCT¸ SEE MARKING ON BOTTOM / BACK OF PRODUCT Introduction CAUTION: When using telephone equipment, there ere basic _ sIMafPeOtyRiTnAstNruTcStiAonFsETYthIaNtSTshRoUuCldTIOalNwSaypsrovbideefodllowwiethd,thRisefperrotdouctht e and save them for future reference, IMPORTANT: Because cordless phones operate on electricity, you should have at least one phone in your home that isn't cordless, in case the power in your home goes out, Before You Begin Pa rts Checklist iforsgs2xxmodel) Makesureyour packageincludesthe items shown here. Base Nandset battery puck comB;tatr_ent cover _Do OQ_m _OG _ _ _j_ @Nandset Wall mount Telephone AC power Belt bracket line cord adaptor clip For Model 25952xx2them will be ONEadditional handset, charge cradle, belt clip, battery pack and cover than shown above For Model 25952xx3therewill be TWO additional handsets,chargecradles, belt clips, battery packs and covers than shown above. For Model 25952xx4therewill be THREEadditional handsets,charge cradles,belt clips, battery packs and coversthan shown above. Telephone Jack Requirements Touse this phone,you needan RJIIC type modular telephone jack, which might look like the one pictured here,installedin your home. Ifyou don't have a modularjaek, call your local phone companyto find out how to get one installed. Installation Wa,p, te Modular _ I telephon_ line jack o _J Digital Security System Yourcordless phoneusesa digital securitysystemto protect against false ringing, unauthorizedaccess,and charges to your phoneline. INSTALLATION NOTE: Some cordless telephones operate at frequencies that may cause or receive interference with nearby TVs, microwave ovens, and VCRs. To minimize or prevent such interference, the base of the cordless telephone should not be placed near or on top of a TV, microwave ovens, or VCR. If such interference continues, move the cordless telephone farther away from these appliances. Certain other communications devices may also use the 5.8 GHz / 900 MHz frequency for communication, and, if not properly set, these devices may interfere with each other and/or your new telephone. If you are concerned with interference, please refer to the owner's manual for these devices on how to properly set channels to avoid interference. Typical devices that may use the 5.8 GHz frequency for communication include wireless audio/video senders, wireless computer networks, multi-handset cordless telephone systems, and some long-range cordless telephone systems. Important Installation Guidelines • Avoid sourcesof noise and heat, such as motors,fluorescent lighting,microwave ovens,heating appliancesand direct sunlight. • Avoid amas of excessivedust, moisture and bw temperatum • Avoid other cordlesstebphones or persona(computers • Neverinstalltelephone wiring during a lightning storm. • Neverinstalltelephonejacks inwet locations unlessthe jack is specifically designedfor wet locations • Nevertouch non-insulated telephone wires ar terminals, unlessthe telephone line has beendisconnected at the network interface • Usecaution when installing or modifyingtelephone lines Handset Layout display TALK/CALLBACK (button) X CALLERID-_ VOLUME(_)X (button) redial format/trans (format/transfer button) repeat )button) erase *EXll )button) mute/menu (buttonl SPEAKER (button) CALLER IDVOW M E (-_ ) (button) mum button} chan/delete (button) skip (button) #PAUSE/ringer (button) flash/answerer/ call waiting (button} Base Layout Ring To Answer day/check hour min (button) (button) (minute button) _ skip MESSAGES (indicator)- PLAY/STOP (button) memo _ repeat" )button) erase )button) announce (button) page (button} charge/in use (-/+) )indicator) )buttons) anson/off )answereron/off do not disturb )button) button) Installing the Phone Installing the Handset Battery NOTE: You must connect the handset battery before use. CAUTION: To reduce the risk of fire or personal injury, use only _ tmhoedTehl o5m-2s5o2n2,Inwch, iachpprisovceodmpNaitcibkleel-Mweitthal thHisydurindiet, (Ni-MH} buttery 1 Locate battery and battery door which are packagedtogether insidea pbstic bag and are separate from the handset 2, Locate the battery compartment on the back of the handset 3. Plugthe battery pack cord into the jack inside the compartment. PLEASEREGISTER shows inthe display NOTE:To ensure proper battery installation, the connector is keyed and con be inserted only one way. [ l/ battery II I ill pack" I f t _. black wire ow. red wire 4 Insert the battery pack. 5 Closethe battery compartment by pushing the door up until it snaps into place. Base Station t Choosean area near an electricaloutlet and a telephone wall jack (RJttC}, and place your cordlesstelephone on a level surface,such as a desktop or tabletop, or 2. Plugone end of the telephone (inecord into the TELUNEjack at the back af the base and the other end into a modularjack 3 Plugthe AC power converter into the electrical outlet and the DCconnector into the jack at the back of the base a Placethe handset in the basecradle Thecharge/in use indicator turns on, verifying the battery,ischarging The unit will take 20 seconds to registerand verify its security code.READYshows in the display NOTE: In case of a power failure, the handsets may display UNAVAILABLE when the TALK/CALL BACK button is pressed. You must then place all handsets on the main bose cradle for 20 seconds to re-register. 5 Allow the phone to charge far 16 hours prior to first use If you don't properlycharge the phone,battery performance is compromised CAUTION: To reduce risk of personal injury, fire, or damage ,_ uTsheis opnolywetrhead5a-2p7to3r2 ipsoiwnteerndaeddapttoor beliscteodrreicntltyheouriseenrt'astegduidien. a vertical or floor mount position. Wall Mounting 1. Turnthe baseoven 2. Attach the wall mounting pedestalby first insertingthe tabs on the open edge of the pedestalinto the slotson the lower portion of the bottom of the base Thenpush down and snapthe pedestalinto p(aee. 3. Slipthe mounting holes(on the back of the base}over the wall plate posts,and slide the unit down into place MJoIIplate not included) NOTE: If desired, gather the extra telephone line end power adaptor cord and store inside the wall mounting pedestal. Answering System Setup Thissectionshows you how to set up },ouranswering systemto receiveincoming calls. Beforeyou beginthe set up process,you mustturn on the answering system • Pressthe ans on/off button to turn the answering systemON and OFF. TheMESSAGEiSndicator lightswhen the answering systemis ON.The indicator NOTE: The answering system displays "- -" when it is OFF. Setting the Voice Prompt Language Thedefault voice prompt language is English. Tochange the answering system'svoice prompt language, pressand hold the skip button for two seconds The unit announces "SELECCIONADEOSPANOL("Spanish selected) NOTE: To change to English, press and hold the skip button again for 2 seconds, The unit announces "ENGLISH SELECTED". NOTE: In remote access mode, the system follows the selected language. The voice prompt language cannot be switched remotely, Voice Time/Day Stamp 1 Makesurethe answering systemis ON 2. Pressand hold the day/check button on the baseto set the day of the week. 3 Pressand hold the hour button on the baseto set the hour {am. or pmj. Example: 12AM,1AM,or 12PM,1PM. 4 Pressand hold the rain button on the baseto set the minute Thetime advancesin 5-minute intervals,or tap and releaseto advancein iminute intervals. Speaker Volume Usethe speaker volume 1-/ +1buttons to adjust speaker volume on the base to a comfortable level. L1 is the minimum speaker volume and L8 is the maximum. Recording the Outgoing Announcement Forbest resultswhen recording,you should be about nine inches from the microphone, andeliminate as much background noise as possible 1 Makesurethe answering systemis ON 2. Pressand hold the announce button on the base 3 Beginspeaking after you hear the beep 4 Releasethe button when you finish your announcement. NOTE:If you choose not to record an outgoing announcement, a default announcement plays instead. To return to the default announcement after you have recorded your own outgoing announcement, pressthe announce button and release it when you hear the beep. Sample Outgoing Announcement "H!, THISIS(USEYOURNAMEHERE)I, CAN'TANSWERTHEPHONERIGHTNOW,50 PLEASELEAVEYOURNAME,NUMBERANDA BRIEFMESSAGEAFTERTHETONEA, ND I'LLGETBACKTOYOU. THANKS." Reviewing the Announcement Pressand releasethe announce button to review your outgoing announcement Rings to Answer Usethe RINGSTOANSWERswitch on the back of the baseta setthe number of times you want the phoneto ring beforethe answering systemanswers the call Youmay choose3 rings, 5 rings,or TOLLSAVER{%1 NOTE:If you select Toll Saver (TS)the unit answers after the 3rd ring if there ARE new messages, OR the unit answers after the 5th ring if there ARE NO new messages. Handset Setup Thereare nine programmable menus available: Language,Handset Name,Area Code, RingerON/OFF,RingerTone,VIPRingTone,Tone/Pulse,Transferand DefauRSetting. Duringprogramming,you may pressthe mute/menu button at any time to go to the nex_option. Toexit the menu,keepthe previoussetting and return to the standby mode,pressthe *EXIT/tonebutton. Display Language i.Pressthe mute/menu button until _ 1ENG2FRA3ESPshows in the display 1ENGis the defau(t (ENGstands for EnglishFRAstands for French.ESPstandsfor Spanish) 2 Usethe CALLER@-VOLUME(-_ or-,- ) button or the touch-tone pad on the handset to enter your selection 3 Pressmute/menu again to save Handset Name i,Pressthe mute/menu button until ENTERNAMEshows in the display 2 Usethe touch-tone pad to enter the name (up to 15 characters) More than one letter is stored in each of the number keys For exampb, ta enter the name Bill Smith, pressthe 2 key twice for the letter B. Pressthe a key 3 times for the letter k Pressthe 5 key 3 times for the letter L Wait for one second. Pressthe 5 key 3 times for the second letter L Pressthe 1 key to insert a space between the Land the S.Pressthe 7 key4 times for the letter S; pressthe 6 key once for the letter M; pressthe 4 key 3 times for the letter I; pressthe 8 key for the letter T; pressthe a NOTE:If you make a mistake, use the chan/delete button to backspace and delete one character at a time, 3. Pressmute/menu again to save. NOTE:If no name is entered, REAOYshows in the display. Local Area Code 1. Pressthe mute/menu button until AREACODE- - - shows in the display. - - - is the default 2.Usethe touch-tone pad on the handsetto enter your three digit oma code 3 Pressmute/menu again to save NOTE:If you make a mistake, press the chon/delete button to erase a wrong number. Ringer ON/OFF 1 Pressthe mute/menu button until RINGER _1 ON shows in the display 1ON is the default 2 Usethe CALLERID-VOLUME(,_ or-, ) button or the touch-tone pad on the handset ta scroll to 1ON or 2 OFF 3 Pressmute/menu to save. NOTE:If you turn the ringer off, RINGER OFF shows on the display. Ringer Tone Youcan choosefrom i0 nngtones L Pressthe mute/menu button until RINGERTONE _ 01 showsin the display 01 is the default. 2. Usethe CALLER@-VOWME (-_or.- ) button or the touch-tone padon the handset to select from O1ta 10 3 Pressmute/menu to save. VIP Ring Tone Thisfeature a(Iowsyou to assign a specific ring tone to a number stored in Memory It is recommended that you store a Calbr ID record into Memoryfor this purpose 1 Pressthe mute/menu button until VIPRINGTONEshowsin the display 2 Pressthe desiredmemory Iocatbn (0through 9) if there is a number stored in the selected memory location, VIPRT _ DEFAULTshowsinthe display. 3. PressCALLER}D-VOLUME(-_ or.- )on the handsetto selectfrom 01to 10 or DEFAULTto use ring tone set inthe RingerToneMenu or SILENTto silence ringe_ 4 Pressmute/menu to save Tone/Pulse 1. Pressthe mute/menu button until }, 1 TONE 2 PULSEshows in the dispby. 1 TONEis the default. 2. Usethe CALLERID-VOLUME (-_or.- ) button or the touch-tone padon the handset to scrollto 1 TONEor 2 PULSE 3 Pressmute/menu to save Transfer ON/OFF In order to use the Ca(ITransfer feature (applicableONLYwith additional handsets), you must havethe TransferON/OFFset to ONthrough the menu af the transferring handset L Pressthe mute/menu button until TRANSFER_1OFFshows in the display. 2. Usethe CALLERID-VOLUME(-- or-- ) button or the touch tone pad on the handset and select 2ON. 3 Pressmute/menu again to save Default Setting Youmay return handset settings to the factory default setup using this menu. 1 Pressthe mute/menu button until DEFAULT_ NO shows inthe display NO is the default 2 Usethe CALLERID-VOLUME(-,or- )buttononthehandsettoscro((toYESorNO NOTE: If you choose YES,all settings in the programmable menu return to the factory defaults, 3 Pressmute/menu to save. Cordless Phone Basics Charge/In Use Indicator Thephoneis ONwhen the charge/in useindicatoron the baseis lit Thehandsetvisual ringerand baseindicatorflashwhen you receivea call Answering a Call 1. When the phone rings,pick up the handset and pressthe TALK/CALLBACKor SPEAKERbutton 2 When finished, pressthe TALK/CALLBACKor SPEAKEbRutton again or place the handset on the basecradle to hang up Making a Call 1 Pick up the handsetand pressthe TALK/CALLBACKor SPEAKEbRutton Wait for the dial tone Thecall timer starts counting minutes and secondsin the display 2. Dial a telephone number. 3. When finished, pressthe TALK/CALLBACKor SPEAKEbRutton again or place the handset on the basecradle to hang up. NOTE: In case of power failure, the handset may display UNAVAILABLE when the TALK/CALL BACK or SPEAKERbutton is pressed. You must then place the handset on the main base for 20 seconds to reset the unit. Pre-dialing i.Makesure the phone is OFF{not in TALKmode} 2 Dial a tebphone number (the number you dial shows inthe display) NOTE: If you make o mistake dialing the number, use the chon/ delete button to backspace and erase the wrong number, and enter the correct number. 3. Pressthe TALK/CALLBACKor SPEAKERbutton on that handset. Thenumber automaticofly dialsand the call timer starts counting the minutes and secondsinthe display. 4 When finished, pressthe TALK/CALLBACKor SPEAKEbRutton again to hang up NOTE : You may enter up to 32 pre-diol digits. Redial While the phoneis ON {in TALKor SPEAKERPHONmEade},pressthe redialbutton to redialthe last number you dialed(upto 32 digits). - ORWhile the phoneis OFF(instandby mode),pressthe redial button and then the TALK/CALLBACKor SPEAKERbutton to redial the last numben Flash Usethe flash/answemr/ca, waiting button to activate custom ca,ing servicessuch as call waiting, which are availablethrough your heal phonecompany. TIP: Do not use the TALK/CALL BACK button to activate custom calling services such as coil waiting or you'll hang up the phone. Channel Button While talking on the phone, it may be necessaryfor you to manua(lychange the channel to improve receptionand reducenoise or static on the line Pressand release the chan/delete button to move to the next clearchannel Exit Pressthe *EXF/tone button to cancel any command you initiated. Page This featum assistsin locating a misplaced handset. Pressthe page button on the base.Thehandset beeps continuouslyfor about 2 minutes until you pressthe TALK/CALLBACKor SPEAKEbRutton on the handset or the page button on the base. NOTE:You may still page the handset when the ringer is off. Do Not Disturb This feature al(ows you to turn off handset ringers for all handsets registered with the base unit. The answerer speaker will be silenced when the unit is receiving incoming messages. Pressthe do not disturb button on the base. Handsetwill display DONOTDISTURB NOTE: If DO NOT DISTURB is activated during on incoming ring, it will only be effective from the next incoming call, Ringer ON/OFF Shortcut Apart from the setting inthe main menu,there is a shortcut to setthe ringer Makesure the phone isOFF(not in talk mode}. 1 Pressthe #PAUSE/nngebr utton to go to the RINGERON/OFFmenu RINGER_ 1ON shows in the display. 1ONis the defoult. 2. Usethe CALLERID-VOLUME(-_or- )button or the touch-tone padonthe handsetto scroll to 1ON,or 2 OFF 3 Pressthe #PAUSE/nngebr utton to save your selection.Youwill hear a confirmation tone. Volume When the phone isON (in TALKor SPEAKERPHONmEode) pressthe CALLERID-VOLUME ( -- or.- ) button to adjust the listeninglevel.Choosefrom fivevolume settings. VOL1is the lowest volume and VOL5 is the highest vdume NOTE:The phone will automatically reset VOL 5 to VOL 4 after you hang up, Mute Usemute during a phoneconversationto speakprivately and affdine with a third party 1 Pressthe mute/menu button MUTEshows in the disp(ay The party an the telephone will not hear you 2. Pressthe mute/menu button when finished. Switching between the Speakerphone and Handset L If you are using the handsetearpiece andwant to switch to the speakerphone,press the SPEAKEbRutton, you can then pressSPEAKEbRutton again to end conversation 2. If you are using the speakerphoneand want to switch to the handset earpiece,press the TALK/CALLBACKbutton, you can then pressthe TALK/CALLBACKbutton again ta end conversation, Temporary Tone This feature is usefulonly if you have pulse(rotary}service TemporaryToneDialing enables pulse(rotary,,s)ervice phoneusersta accesstouch tone servicesoffered by banks,credit card companies,etc, Forexample,when you call your bank you may need to enter your bankaccount numbenTemporarilyswitching to touch tone mode allows you to sendyour number L Dial the telephone number and wait for the lineto connect. 2. When your call is answered,pressthe *EXIT/tonebutton on the handset to temporarily changefrom pulse dialing to tone dialing 3 Follow the automated instructionsto get the informatbn you need 4 Hang up the handset andthe phoneautomatica(ly returns to pulse (rotary) dialing mode. Call Tra nsfer (applicable only with additional handsets) Duringan externalcall, youmay transfer the external call to another handset NOTE:The transfer feature MUST be set to ON, this can be done through each handset's setup menu function, Transfer ON/OFF. i.Pressthe format/trans button on the originating handset. TRANSFERRINsGhows in the display A(Iregisteredhandsetswill be paged 2 Pressthe format/trans button or TALK/CALLBACKon receiving handsetto answer call NOTE:To cancel the call transfer, you may press *EXIT/tone button or the format/trans button on the originating handset. NOTE: If there is no answer within 2 minutes after transferring the call, then the handsets will be rung back (callback). If no handset answers within 30 seconds, then the external call will be automatically dropped. Caller ID (CID) IMPORTANT:In order to use this unit's Caller ID features, you must subscribe to either the standard Name/Number Caller ID Service or Coil Waiting Caller ID Service, To know who is calling while you are on the phone, you must subscribe to Call Waiting Caller ID Service. This unit receivesand displaysinformation transmitted byyour local phonecompany. This information can includethe phonenumber,date, andtime; or the name,phone number,date, and time. FRED.PAGErCallerID name 317 555wl 2341- Caller lD phone number _O;L3S pM l#/_._O REZT CALL" O_ _ Cafler ID record number Time Date Caller status; NEWor REPT Call Waiting Caller ID Providedyeu subscribeto CallWaiting Caller ID servicefrom your phone company;if you receivean incoming call and you are already on the phone,a beep indicatesthe presenceof a CallWaiting call on the line. Onlythe handset that is in use at the time of the call will display and store the CallWaiting Caller ID information. • When you hear the call waiting beepin the handsetreceiver,pressthe flash/answerer/ call waiting button to put the current call on hold and answer the incoming call Press flash/answerer/callwaiting againto return to the original call. Receiving CID Records When you receivea call,the CallerID information istransmitted betweenthe first and second ring. TheCaller ID information appears on the displaywhile the phonerings, giving you a chance to monitor the information and decidewhether or not to answer thecalL Storing CID Records (In CID Memory) Ifyou are not athome or cannot answer,your telephone's CallerID memory storesthe data for the 40 most recent calls you receivedsoyou can seewho called while you were unavailable.When the alst call is received,the oldestCaller ID record(1stcall} is automatically deleted Youmay review the storedinformation at any time Cal)sreceivedsinceyour last review show as NEW in the display Callsthat have not been previouslyreviewed but were receivedfrom the same number morethan once show as REPTin the display Reviewing CID Records Ascalls are receivedand stored, the displayis updated to let ),,ouknow how man),,calls havebeen received Toscroll CIDrecords: i,Makesure the phone is OFF(not intalk mode). 2. Pressthe CALLERID-VOLUME( ,_) button to review the newest CIDrecord. 3. Pressthe CALLERID-VOLUME(., } button to review the oldestCIDrecord first. Dialing a CID Number i.Makesure the phone is OFF(not inTALKmade). 2. Usethe CALLERID-VOLUME(-- or.- )button to display the desiredrecord 3. Pressthe TALK/CALLBACKor SPEAKEbRutton. The number dials automatically. NOTE:Depending on (a) how the incoming caller's phone number is formatted when it is received, and (b) whether or not you previously pre-progrommed your local area code into the set up menu, you may need to adjust the format of the incoming caller's stored phone number before making the cell, press the format/trans button to adjust the number, and try again Availableformats inJude: Eleven digits Ten digits Seven digits long distance code "1 " +3-digit area code +7-digit telephone numbe_ 3-digit area code + 7-digit telephone numbe_ 7-digit telephone numbe_ 1-317-5S5-8888 317-5S5-8888 $55-8888
-
 1
1 -
 2
2
 |
 |
