GE 28118BE1 User Guide - Page 11
Installing the Phone - model
 |
UPC - 044319703436
View all GE 28118BE1 manuals
Add to My Manuals
Save this manual to your list of manuals |
Page 11 highlights
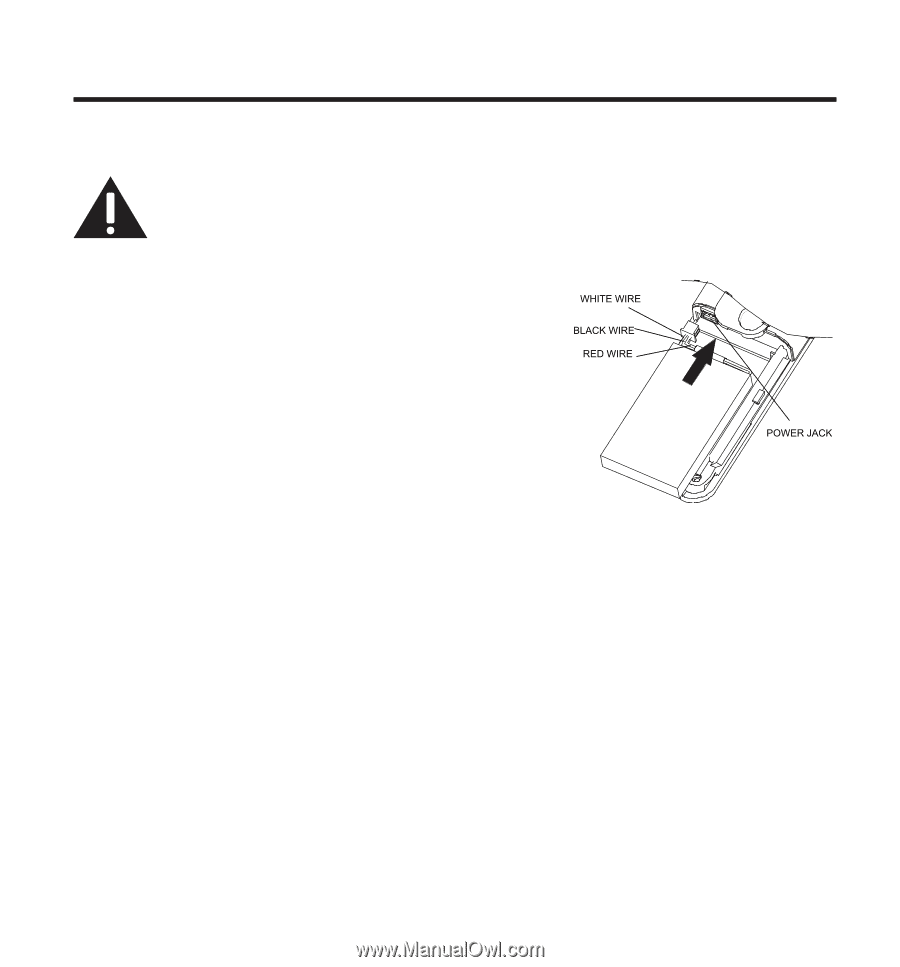
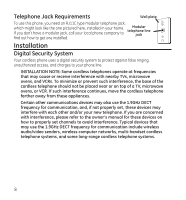
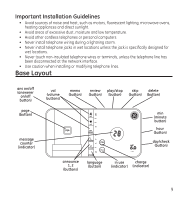
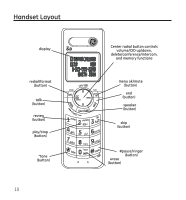
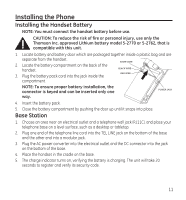
Installing the Phone Installing the Handset Battery NOTE: You must connect the handset battery before use. CAUTION: To reduce the risk of fire or personal injury, use only the Thomson Inc. approved Lithium battery model 5-2770 or 5-2762, that is compatible with this unit. 1. Locate battery and battery door which are packaged together inside a plastic bag and are separate from the handset. 2. Locate the battery compartment on the back of the handset. 3. Plug the battery pack cord into the jack inside the compartment. NOTE: To ensure proper battery installation, the connector is keyed and can be inserted only one way. 4. Insert the battery pack. 5. Close the battery compartment by pushing the door up until it snaps into place. Base Station 1. Choose an area near an electrical outlet and a telephone wall jack (RJ11C), and place your telephone base on a level surface, such as a desktop or tabletop. 2. Plug one end of the telephone line cord into the TEL LINE jack on the bottom of the base and the other end into a modular jack. 3. Plug the AC power converter into the electrical outlet and the DC connector into the jack on the bottom of the base. 4. Place the handset in the cradle on the base. 5. The charge indicator turns on, verifying the battery is charging. The unit will take 20 seconds to register and verify its security code. 11
-
 1
1 -
2
-
3
-
4
-
5
-
 6
6 -
 7
7 -
 8
8 -
 9
9 -
 10
10 -
 11
11 -
 12
12 -
 13
13 -
 14
14 -
 15
15 -
 16
16 -
17
-
18
-
19
-
20
-
21
-
22
-
23
-
24
-
25
-
26
-
27
-
28
-
29
-
30
-
31
-
32
-
33
-
34
-
35
-
36
-
37
-
38
-
39
-
40
-
41
-
42
-
43
-
44
-
45
-
46
-
47
-
48
-
49
-
50
-
51
-
52
-
53
-
54
-
55
-
56
-
57
-
58
-
59
-
60
-
61
-
62
-
63
-
64
-
65
-
66
-
67
-
68
-
69
-
70
-
71
-
72
-
73
-
74
-
75
-
76
-
77
-
78
-
79
-
80
-
81
-
82
-
83
-
84
-
85
-
86
-
87
-
88
-
89
-
90
-
91
-
92
-
93
-
94
-
95
-
96
-
97
-
98
-
99
-
100
-
101
-
102
-
103
-
104
 |
 |