GE 5150-W Installation Instructions - Page 2
Step 2 - Wiring, Step 3 - Testing, Step 1 - Mounting, Specifications - shock sensor 2 wire
 |
UPC - 046188068517
View all GE 5150-W manuals
Add to My Manuals
Save this manual to your list of manuals |
Page 2 highlights
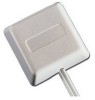
Step 1 - Mounting To maximize range, mount the 5150 Series shock sensor approximately 1" out from any side of the frame. 1" 1" Sensors mount with industrial grade acrylic tape specifically formulated to resist the effects of sunlight and extreme temperature changes after application. For best adhesion: • Glass must be clean and dry. With a clean cloth, apply a 50/50 solution of isopropyl alcohol and water to remove residue. • The ideal mounting temperature is 70° to 100°F (21° to 38°C). Application at glass temperatures below 50°F (10°C) is not recommended because the adhesive may become too firm to adhere readily. Once the tape is applied, however, low temperatures do not effect bonding. • Bond strength depends on how much surface contact develops. Press the sensor firmly to the glass. Firm application pressure develops better adhesion and thus improves the bond. Step 2 - Wiring The 5150 is a two wire device. It draws no power from the loop. The sensor generates its own power by converting the shock energy of the break into electricity using a piezo transducer. All 5150 Series shock sensors are non-polarity sensitive. The alarm output operates without respect to polarity and wires directly into the closed loop. When wiring multiple sensors in series, be aware that resistance is additive. The value of the end-ofline resistor may have to be adjusted when a large quantity of sensors are in series. Sentrol recommends a maximum of 10 sensors in series. The 5150 does not require a processor. Do not wire the sensor into fast response loops-false alarms will result. Step 3 - Testing The 5150 sensor is tested by rapping the glass with the handle of a large screwdriver. Test at likely points of attack - near door and window latches and the lower points where it can be kicked in. This is an accurate test of the sensor since the energy output from a glass break is typically at least 50% more that the energy output from the hardest rap test. In Sentrol's experience, a screwdriver handle rap provides an excellent test of sensor operation with little risk of damaging the glass. Connect an ohmmeter across the sensor leads. Resistance is typically 14 ohms (13-24 ohms is acceptable and within specification). Resistance should increase to one Meg ohm as the sensor is tripped from the shock generated by the rap. Hold there for 1 to 10 seconds. To ensure proper operation and detection, test the sensor at least once a year. Specifications Resistance: Typical (normally closed 24 ohms maximum Alarm (open 1 Meg ohm minimum Time open on alarm 1-10 seconds (5 sec. Nominal) Maximum loop voltage ...15 V DC Maximum loop current ...15 mA Power consumption Self-generating on alarm Lightning suppression 400 W for 1 msec pulse Temperature ...0° to 120°F (-18° to 50°C) Sensitivity ...Factory set Mounting method Field proven acrylic tape Size ...1.25" W x 1.25" L x 0.37" D Lead ...22 gauge, 2 wire zip cord Colors ...White, Mahogany brown SENTROL , inc corporate headquarters 12345 SW Leveton Dr., Tualatin, OR 97062 Tel.: 503.692.4052 Fax: 503.691.7566 http://www.sentrol.com U.S. & Canada: 800.547.2556 Technical Service: 800.648.7424 Faxback: 800.483.2495 Sentrol, Inc. reserves the right to change specifications without notice. ©1996 Sentrol, Inc. G-2718-01096 13462 Rev B
-
 1
1 -
 2
2
 |
 |
