GE APE08AK Owners Manual - Page 6
Using the portable air conditioner.
 |
UPC - 084691160175
View all GE APE08AK manuals
Add to My Manuals
Save this manual to your list of manuals |
Page 6 highlights
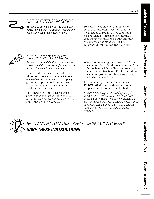
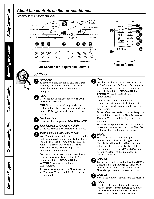
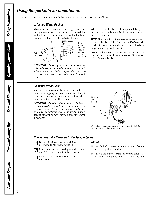
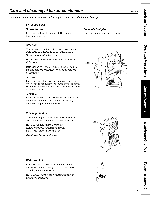
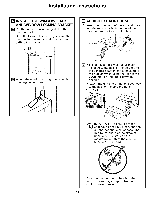
Usingthe portable air conditioner. Always make sure the water bucket is locked into place on the portable air conditioner. Using the Water Bucket Make sure the drain com_ector is capped and in the up position. \._]_en the bucket is removed, the unit will shut ot1_ Erupt' and replace the bucket, making sure that it is flfllv seared in the trait. Drain connector in up and capped Water position for water bucketuse. \._]_en the water bucket is flfll, a signal will beep and the display will show E4 tmtil the water bucket has been emptied. NOTE: The tim will continue to operate even when the water bucket is flfll. However; the Cooling or Dry Inode will not work until the water bucket has been emi)tied and replaced correctly. To emi)ty the water bucket betore it is fifll, turn the Ulfit off and wait for three nfilmtes fin" all water to collect into the bucket. IMPORTANTWhen using the water bucket to remove collected water,make sure that the drain connector is in the up position and that it is capped, flit is not in the up position water will drain from the connector onto the floor Using the Drain Hose \,V_ter can be automatically emptied into a floor drain by tmcal)ping the drain connector; tilting it down and connecting the drain hose. Roum the Tilt down drain hose straight to a floor drain. and connect Cap IMPORTANT'. When the drain connector is tilted down hose to the water will drain through the connector. Make sure drain. the hose is connected and that # is led straight to a floor drain. Never tilt the drain connector down with # capped because draining water will cause the un# to malfunction. When tilting the drain connectordown, always uncapit, attacb tbe drain hose and lead it straight to a floor drain. How to Insert the Batteries in the Remote Control ] Remove the batte_ 3' cover by sliding it according to the arrow direction. ] Insert new batteries, making sm'e that the (+) and (-) of battery are installed correcflx; ] Reattach the coxer by sliding it back into position. NOTES: iJi::Use 2 "_%" (1.5 volt) alkaline batteries. Do not use recha_geable batteries. _: Remove the batteries fl'om the remote control if the svsteln is not going to be used fin" a long dine.
-
 1
1 -
 2
2 -
 3
3 -
 4
4 -
 5
5 -
 6
6 -
 7
7 -
 8
8 -
 9
9 -
 10
10 -
 11
11 -
 12
12 -
13
-
14
-
15
-
16
 |
 |