GE APE08AK Owners Manual - Page 9
Installation, Instructions
 |
UPC - 084691160175
View all GE APE08AK manuals
Add to My Manuals
Save this manual to your list of manuals |
Page 9 highlights
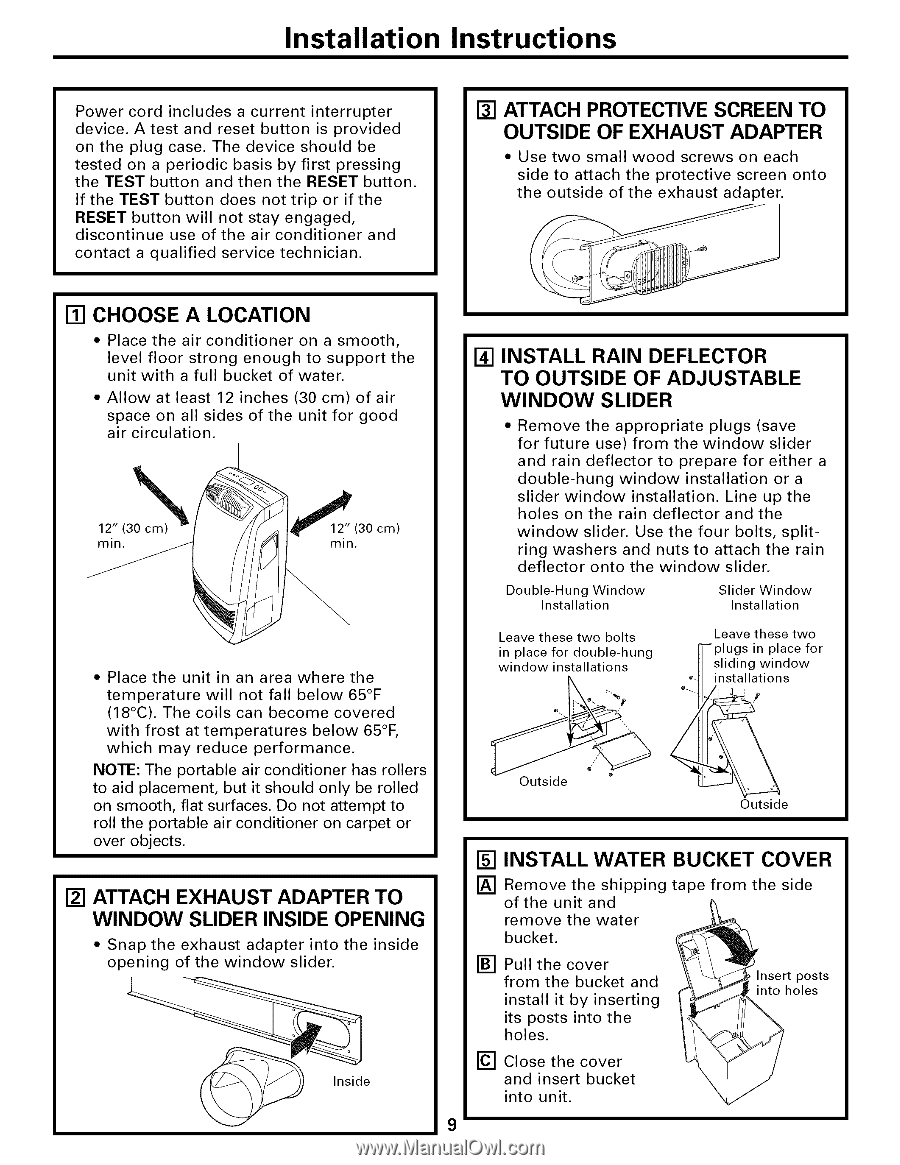
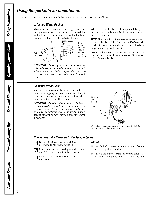
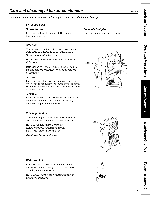
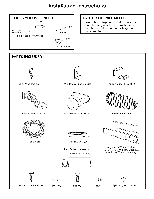
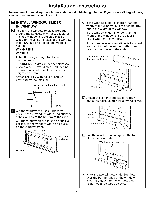
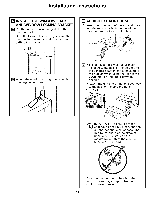
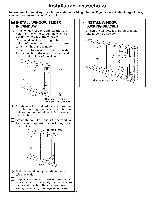
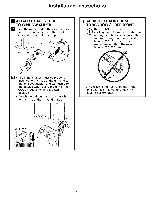
Installation Instructions Power cord includes a current interrupter device. A test and reset button is provided on the plug case. The device should be tested on a periodic basis by first pressing the TEST button and then the RESET button. If the TEST button does not trip or if the RESET button will not stay engaged, discontinue use of the air conditioner and contact a qualified service technician. [] CHOOSE A LOCATION • Place the air conditioner on a smooth, level floor strong enough to support the unit with a full bucket of water. • Allow at least 12 inches (30 cm) of air space on all sides of the unit for good air circulation. 12" (30_c)m min. i(30 cm) min. • Place the unit in an area where the temperature will not fall below 65°F (18°C). The coils can become covered with frost at temperatures below 65°F, which may reduce performance. NOTE: The portable air conditioner has rollers to aid placement, but it should only be rolled on smooth, flat surfaces. Do not attempt to roll the portable air conditioner on carpet or over objects. [] ATTACH EXHAUST ADAPTER TO WINDOW SLIDER INSIDE OPENING • Snap the exhaust adapter into the inside opening of the window slider. Inside [] ATTACH PROTECTIVE SCREEN TO OUTSIDE OF EXHAUST ADAPTER • Use two small wood screws on each side to attach the protective screen onto the outside of the exhaust adapter. [] INSTALL RAIN DEFLECTOR TO OUTSIDE OF ADJUSTABLE WINDOW SLIDER • Remove the appropriate plugs (save for future use) from the window slider and rain deflector to prepare for either a double-hung window installation or a slider window installation. Line up the holes on the rain deflector and the window slider. Use the four bolts, splitring washers and nuts to attach the rain deflector onto the window slider. Double-Hung Window Installation Slider Window Installation Leave these two bolts in place for double-hung window installations Leave these two in place for sliding window installations Outside Outside [] INSTALL WATER BUCKET COVER [] Remove the shipping of the unit and remove the water bucket. [] Pull the cover from the bucket and install it by inserting its posts into the holes. [] Close the cover and insert bucket into unit. tape from the side into holes
-
 1
1 -
2
-
3
-
 4
4 -
 5
5 -
 6
6 -
 7
7 -
 8
8 -
 9
9 -
 10
10 -
 11
11 -
 12
12 -
 13
13 -
 14
14 -
15
-
16
 |
 |