GE GFDS170GHWW Use and Care Manual - Page 13
Move Strike Bracket Cont., Reinstall Door Assembly
 |
View all GE GFDS170GHWW manuals
Add to My Manuals
Save this manual to your list of manuals |
Page 13 highlights
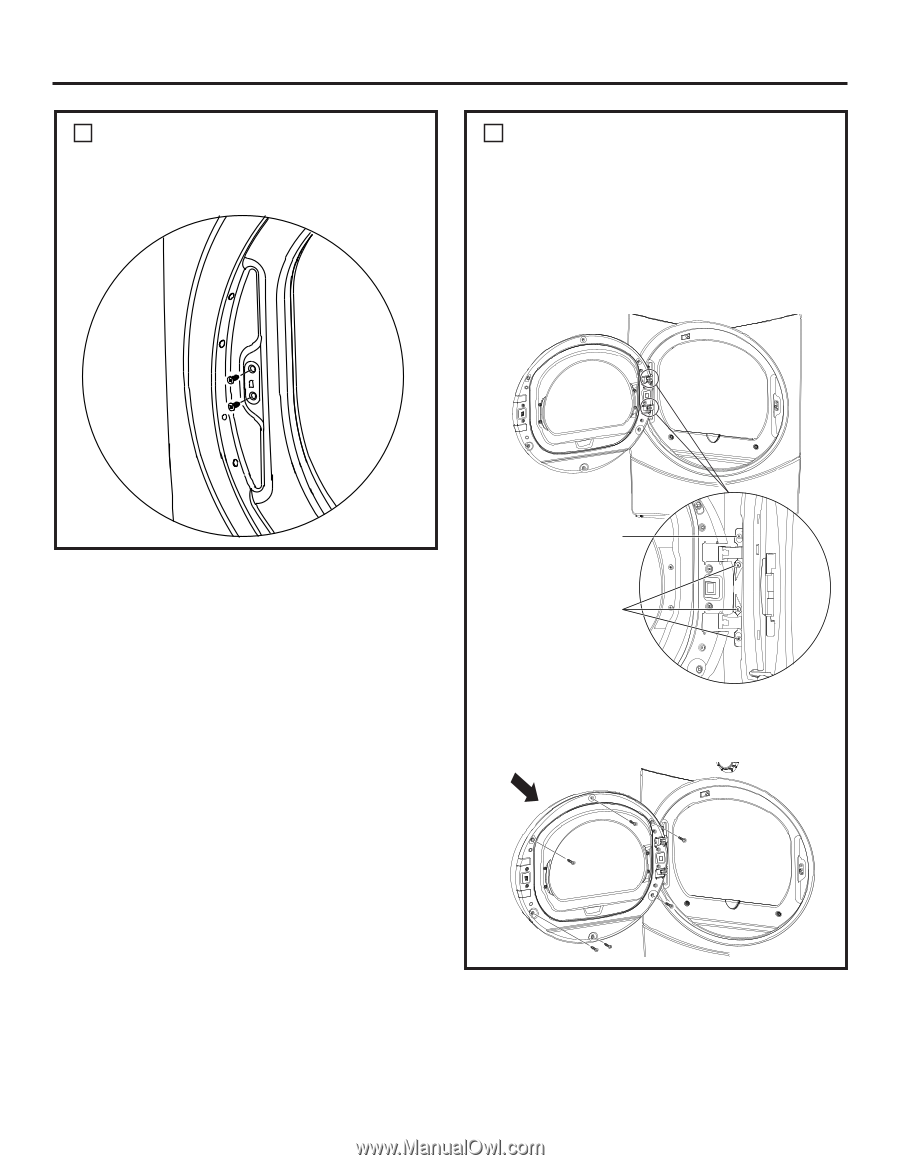
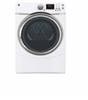
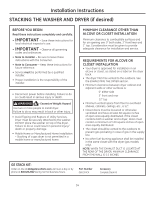
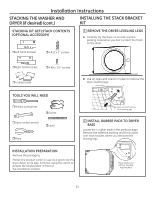
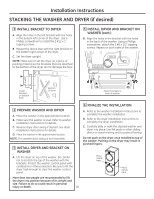
Installation Instructions 5 MOVE STRIKE BRACKET (cont.) B. Switch the strike bracket and its cover to the opposite side by removing the screws. Reinstall both on the opposite side. 6 REINSTALL DOOR ASSEMBLY A. Install the door on the dryer. To ease this step, the hinge has keyholes that allow a partially fastened screw to be used as a hook. Partially fasten a screw to the uppermost screw hole. Hook the door on the partially fastened screw. Fasten the hinge by installing the other 3 screws and tightening the partially fastened screw above. First partially install top hinge screw in dryer and hang door from it Then secure with all screws B. Align the outer ring in the door and fasten the 6 tapping screws located around the perimeter of the door outlining the gasket. 13
-
 1
1 -
2
-
3
-
4
-
5
-
6
-
7
-
 8
8 -
 9
9 -
 10
10 -
 11
11 -
 12
12 -
 13
13 -
 14
14 -
 15
15 -
 16
16 -
 17
17 -
 18
18 -
19
-
20
-
21
-
22
-
23
-
24
-
25
-
26
-
27
-
28
-
29
-
30
-
31
-
32
-
33
-
34
-
35
-
36
-
37
-
38
-
39
-
40
-
41
-
42
-
43
-
44
 |
 |