GE GFDS170GHWW Use and Care Manual - Page 15
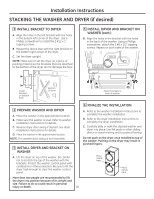
Stacking The Washer And, Dryer If Desired Cont., Installing The Stack Bracket
 |
View all GE GFDS170GHWW manuals
Add to My Manuals
Save this manual to your list of manuals |
Page 15 highlights
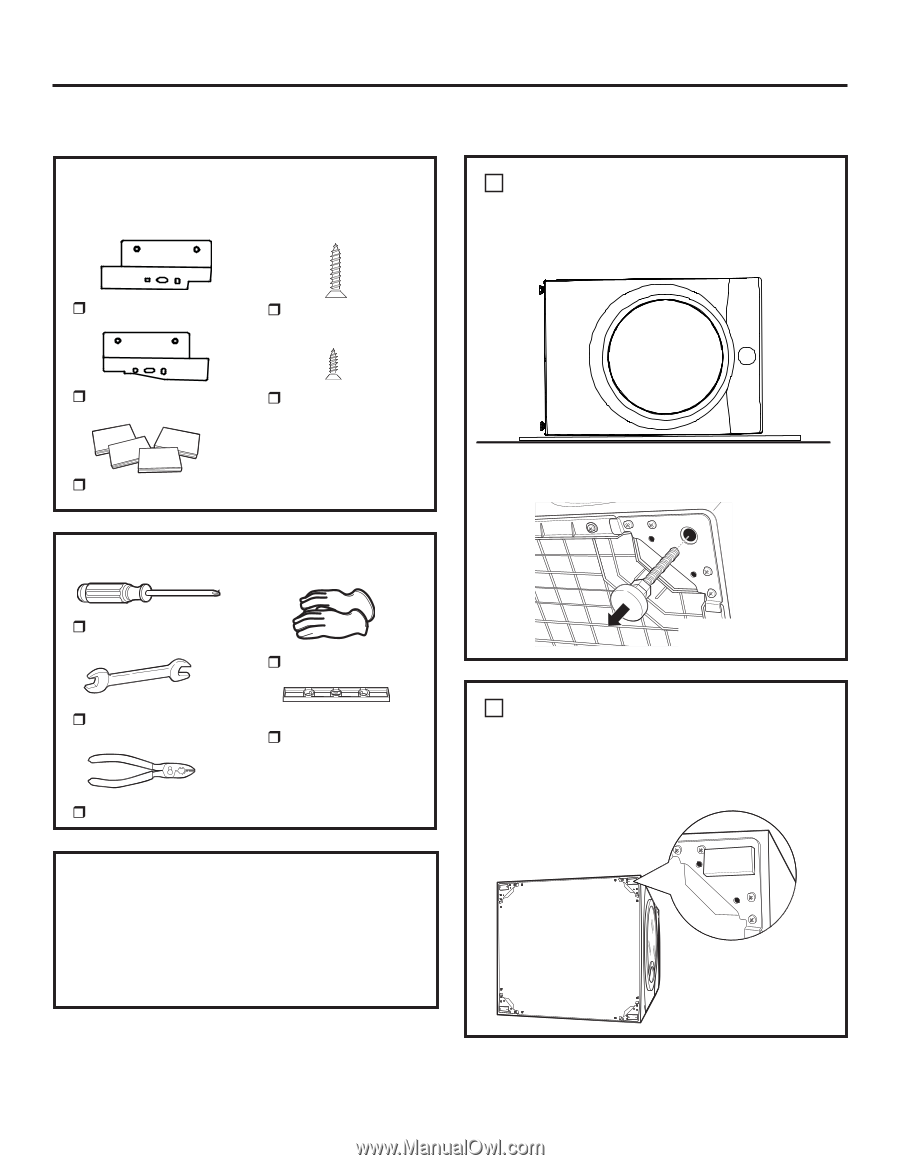
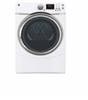
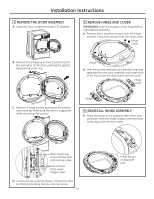
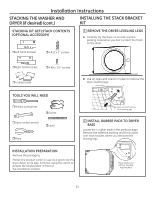
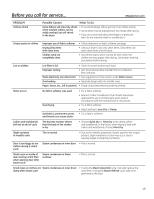
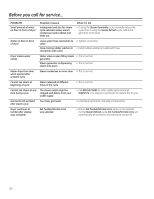
Installation Instructions STACKING THE WASHER AND DRYER (if desired) (cont.) INSTALLING THE STACK BRACKET KIT STACKING KIT GEFLSTACK CONTENTS (OPTIONAL ACCESSORY) 1 REMOVE THE DRYER LEVELING LEGS A. Carefully lay the dryer on its side. Use the packing material so you don't scratch the finish on the dryer. ˆLeft hand bracket ˆ4 #12 x 1" screws ˆRight hand bracket ˆ4 #8 x 1/2" screws ˆ 4 rubber pads B. Use an open-end wrench or pliers to remove the dryer leveling legs. TOOLS YOU WILL NEED ˆPhillips screwdriver ˆ Gloves ˆOpen-ended wrench ˆ Level ˆ Pliers Back out and remove all 4 leveling legs 2 INSTALL RUBBER PADS TO DRYER BASE Locate the 4 rubber pads in the parts package. Remove the adhesive backing and firmly place over each bracket where you removed the leveling legs. INSTALLATION PREPARATION Remove the packaging. Flatten the product carton to use as a pad to lay the dryer down on its side. Continue using the carton to protect the finished floor in front of the installation location. Place pads over all four leveling leg brackets 15
-
 1
1 -
2
-
3
-
4
-
5
-
6
-
7
-
8
-
9
-
 10
10 -
 11
11 -
 12
12 -
 13
13 -
 14
14 -
 15
15 -
 16
16 -
 17
17 -
 18
18 -
 19
19 -
 20
20 -
21
-
22
-
23
-
24
-
25
-
26
-
27
-
28
-
29
-
30
-
31
-
32
-
33
-
34
-
35
-
36
-
37
-
38
-
39
-
40
-
41
-
42
-
43
-
44
 |
 |