GE GSL25JFXLB Use and Care Manual - Page 6
About the controls on the refrigerator - refrigerator model
 |
UPC - 084691177968
View all GE GSL25JFXLB manuals
Add to My Manuals
Save this manual to your list of manuals |
Page 6 highlights
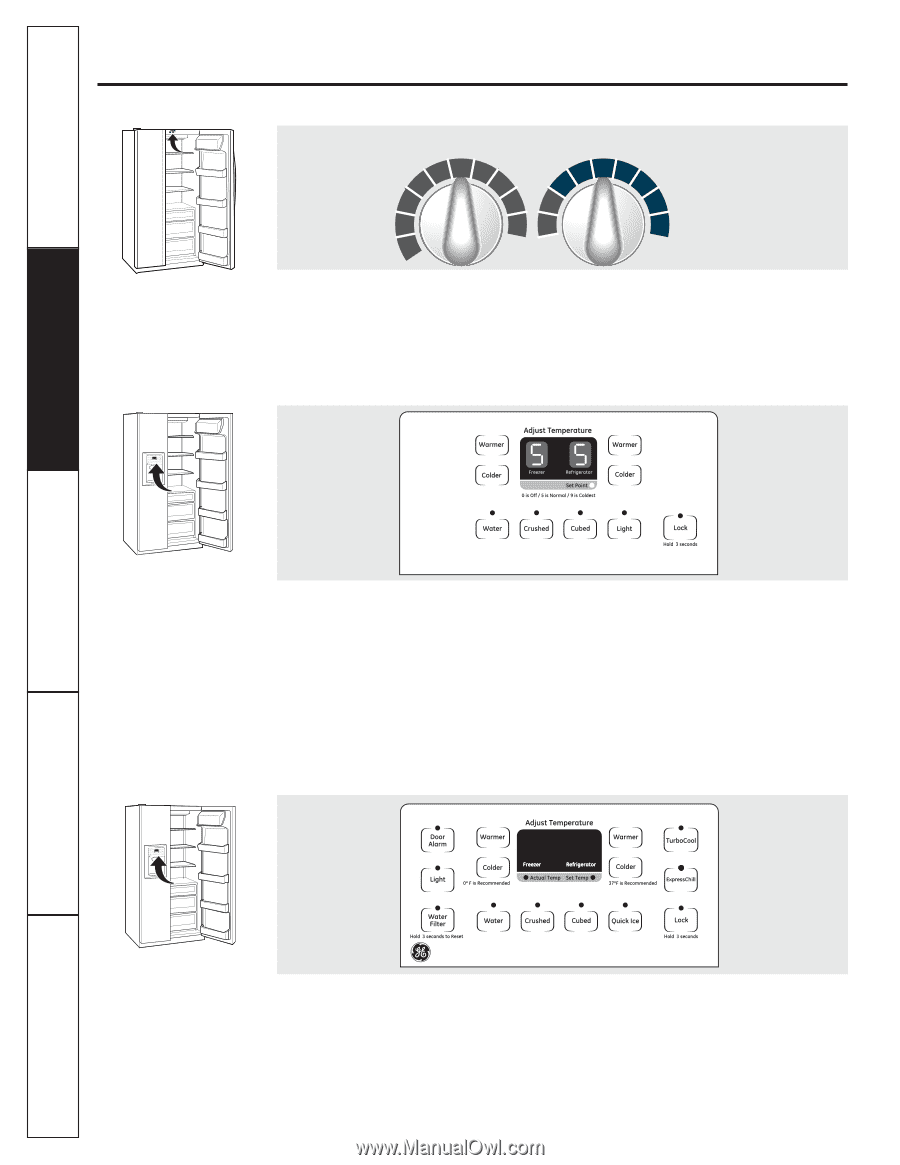
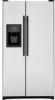
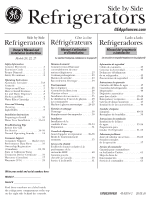
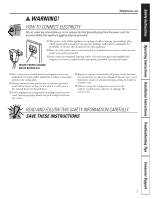
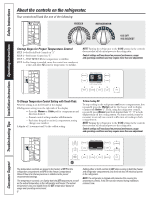
Consumer Support Troubleshooting Tips Installation Instructions Operating Instructions Safety Instructions 012 12 012 12 89 89 89 89 About the controls on the refrigerator. Your controls will look like one of the following: 34 5 67 FREEZER 34 5 67 FRESH FOOD 9 IS COLDEST 0 IS OFF FREEZER 34 5 67 REFRIGERATOR 34 5 67 09IISS OCOFFLDEST 9 IS0CISOOLDFFEST Startup Steps for Proper Temperature Control STEP 1-Set Fresh Food Control on "5." STEP 2-Set Freezer Control on "5." STEP 3-WAIT 12 HOURS for temperature to stabilize. STEP 4-If a change is needed, move the control one number at a time and allow 12 hours for temperature to stabilize. NOTE: Turning the refrigerator to the 0 (off) setting via the controls does not shut off electrical power to the refrigerator. Control settings will vary based on personal preferences, usage and operating conditions and may require more than one adjustment. To Change Temperature Control Setting with Touch Pads: • Freezer setting is on the left side of the display. • Refrigerator setting is on the right side of the display. - Press the Warmer or Colder pad for compartment and direction desired. - Present control setting number will illuminate. - Each time the pad is touched, compartment setting changes one number. A display of 1 is warmest and 9 is the coldest setting. To Turn Cooling Off: To stop cooling in the refrigerator and freezer compartments, first repeatedly press the Warmer pad for the freezer until its display continuously flashes "1". Then, using the refrigerator control, repeatedly press Warmer until both displays flash "0". "0" in both displays turns off the cooling system. On some models, it may be necessary to set only one control to 0 to turn off cooling in both compartments. NOTE: Turning the refrigerator to the 0 (off) setting via the controls does not shut off electrical power to the refrigerator. Control settings will vary based on personal preferences, usage and operating conditions and may require more than one adjustment. The temperature controls are preset in the factory at 37°F for the refrigerator compartment and 0°F for the freezer compartment. Allow 24 hours for the temperature to stabilize to the preset recommended settings. The temperature controls can display both the SET temperature as well as the actual temperature in the refrigerator and freezer. The actual temperature may vary slightly from the SET temperature based on usage and operating environment. 6 Setting either or both controls to OFF stops cooling in both the freezer and refrigerator compartments, but does not shut off electrical power to the refrigerator. NOTE: The refrigerator is shipped with protective film covering the temperature controls. If this film was not removed during installation, remove it now.
-
 1
1 -
 2
2 -
 3
3 -
 4
4 -
 5
5 -
 6
6 -
 7
7 -
 8
8 -
 9
9 -
 10
10 -
 11
11 -
 12
12 -
13
-
14
-
15
-
16
-
17
-
18
-
19
-
20
-
21
-
22
-
23
-
24
-
25
-
26
-
27
-
28
-
29
-
30
-
31
-
32
-
33
-
34
-
35
-
36
-
37
-
38
-
39
-
40
-
41
-
42
-
43
-
44
-
45
-
46
-
47
-
48
-
49
-
50
-
51
-
52
-
53
-
54
-
55
-
56
-
57
-
58
-
59
-
60
-
61
-
62
-
63
-
64
 |
 |