GE PFCS1RKZSS Use and Care Manual - Page 8
About the shelves and bins.
 |
UPC - 084691085423
View all GE PFCS1RKZSS manuals
Add to My Manuals
Save this manual to your list of manuals |
Page 8 highlights
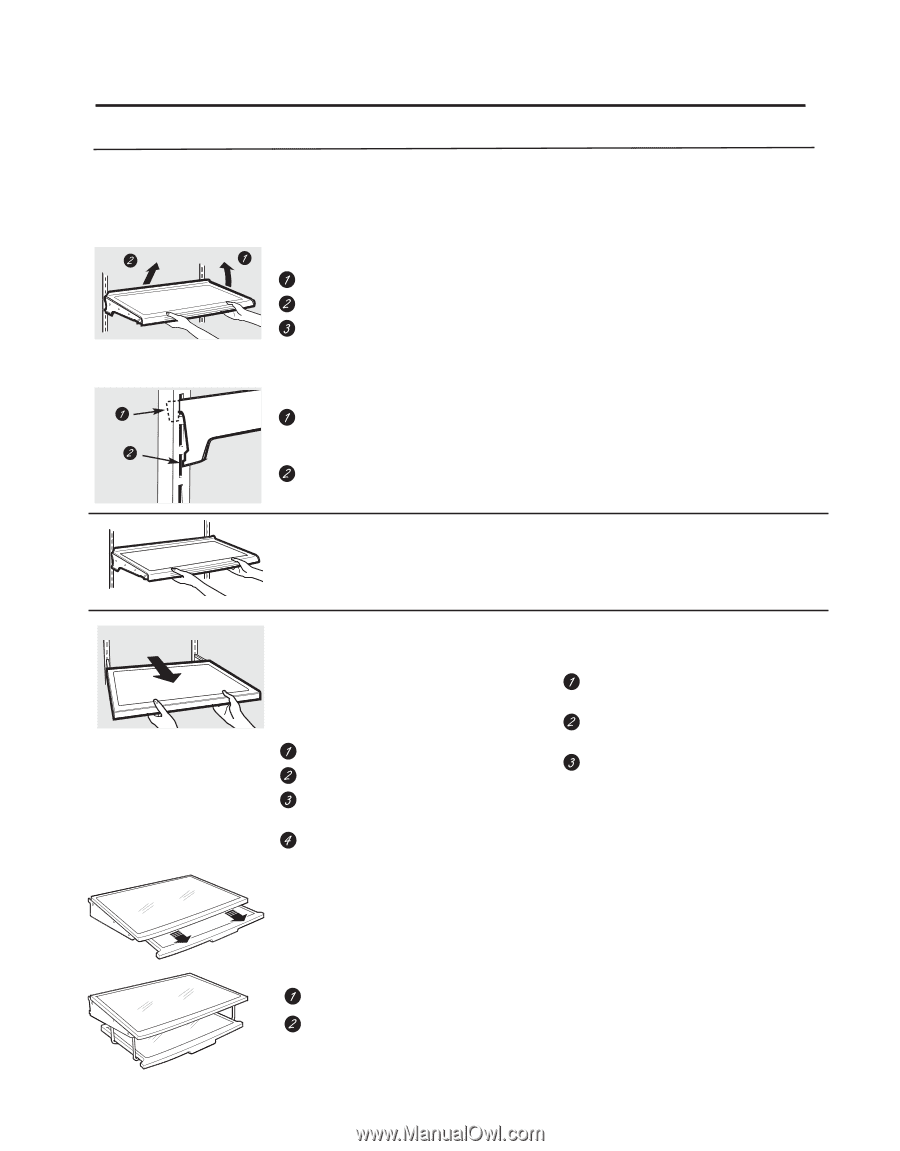
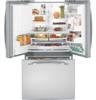
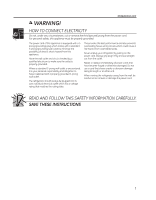
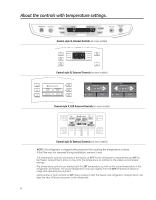
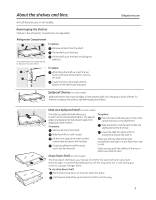
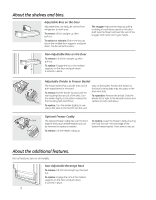
About the shelves and bins. Not all features are on all models. Rearranging the Shelves Shelves in the refrigerator compartment are adjustable. Refrigerator Compartment To remove: Remove all items from the shelf. Tilt the shelf up at the front. Some models have wire shelves that can be adjusted in the same manner. Lift the shelf up at the back and bring the shelf out. To replace: While tilting the shelf up, insert the top hook at the back of the shelf in a slot on the track. Lower the front of the shelf until the bottom of the shelf locks into place. GEAppliances.com Spillproof Shelves (on some models) Spillproof shelves have special edges to help prevent spills from dripping to lower shelves. To remove or replace the shelves, see Rearranging the Shelves. Slide-Out Spillproof Shelf (on some models) The slide-out spillproof shelf allows you to reach items stored behind others. The special edges are designed to help prevent spills from dripping to lower shelves. To remove: Remove all items from shelf. Slide the shelf out until it stops. To replace: Place the rear shelf tabs just in front of the central notches on the shelf frame. Slide the shelf in until the central tabs are slightly behind the front bar. Lower the shelf into place until it is horizontal and slide the shelf in. Lift the front edge of the shelf until the central tabs are above the front bar. Continue pulling the shelf forward until it can be removed. Make sure that the shelf sits flat after reinstallation and doesn't move freely from side to side. Make sure you push the shelves all the way in before you close the door. Drop Down Shelf (on some models) The drop-down shelf gives you the use of another full-size shelf when you need extra storage. It conveniently folds back out of the way when not in use, giving you room for storage of larger items. To use drop-down shelf: Pull forward and down to drop the shelf into place. Pull forward while lifting up to place the shelf out of the way. 8
-
 1
1 -
2
-
 3
3 -
 4
4 -
 5
5 -
 6
6 -
 7
7 -
 8
8 -
 9
9 -
 10
10 -
 11
11 -
 12
12 -
 13
13 -
14
-
15
-
16
-
17
-
18
-
19
-
20
-
21
-
22
-
23
-
24
-
25
-
26
-
27
-
28
-
29
-
30
-
31
-
32
-
33
-
34
-
35
-
36
-
37
-
38
-
39
-
40
-
41
-
42
-
43
-
44
-
45
-
46
-
47
-
48
-
49
-
50
-
51
-
52
-
53
-
54
-
55
-
56
-
57
-
58
-
59
-
60
-
61
-
62
-
63
-
64
-
65
-
66
-
67
-
68
-
69
-
70
-
71
-
72
-
73
-
74
-
75
-
76
-
77
-
78
-
79
-
80
-
81
-
82
-
83
-
84
-
85
-
86
-
87
-
88
-
89
-
90
-
91
-
92
-
93
-
94
-
95
-
96
-
97
-
98
-
99
-
100
-
101
-
102
-
103
-
104
-
105
-
106
-
107
-
108
-
109
-
110
-
111
-
112
-
113
-
114
-
115
-
116
-
117
-
118
-
119
-
120
-
121
-
122
-
123
-
124
-
125
-
126
-
127
-
128
-
129
-
130
-
131
-
132
-
133
-
134
-
135
-
136
 |
 |