GE PK916BMBB Owners Manual - Page 19
Special features of your oven control.
 |
UPC - 084691158813
View all GE PK916BMBB manuals
Add to My Manuals
Save this manual to your list of manuals |
Page 19 highlights
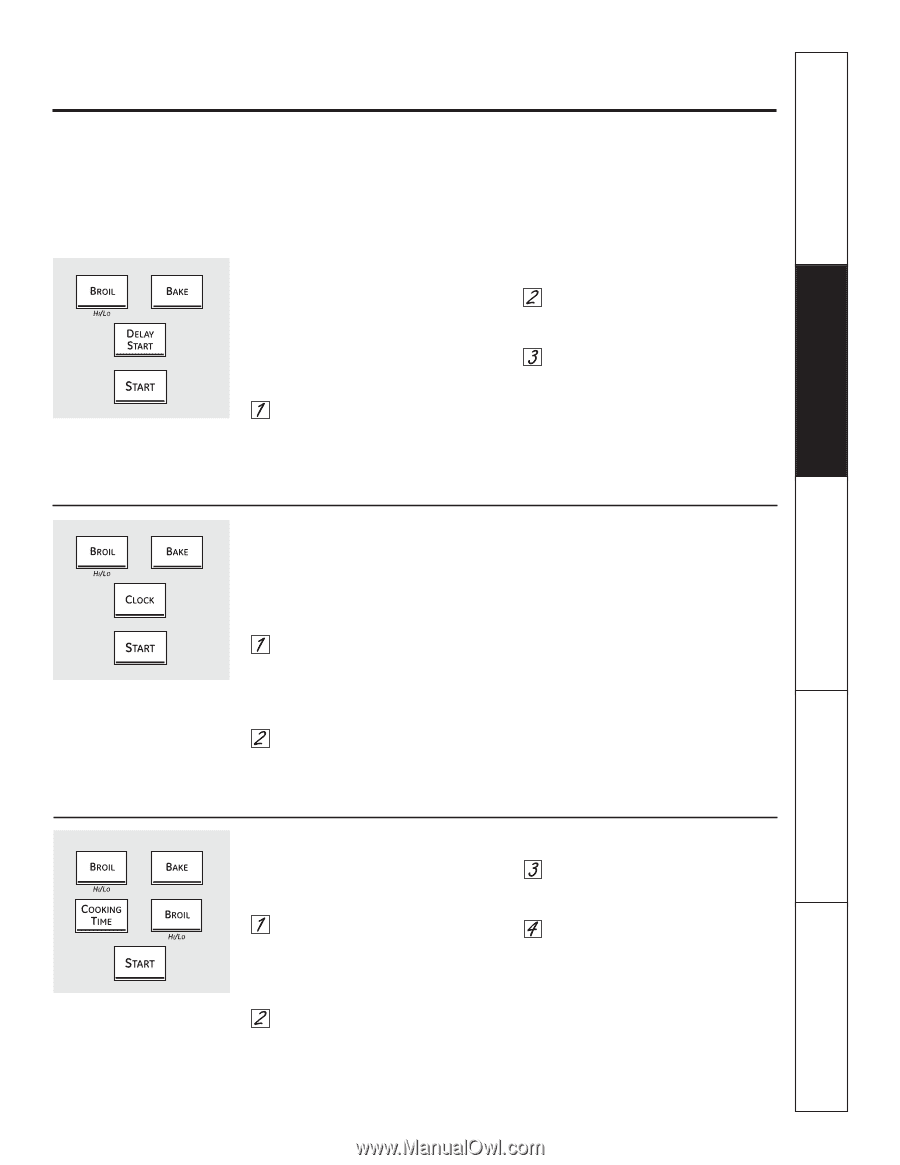
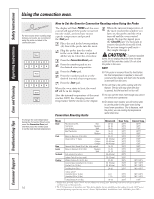
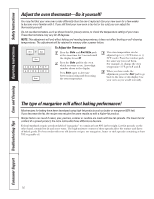
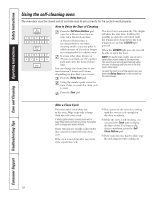
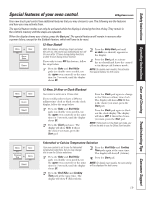
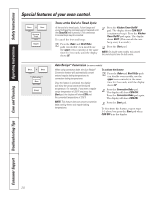
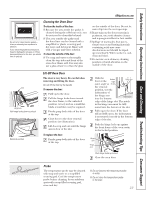
Safety Instructions Operating Instructions Care and Cleaning Troubleshooting Tips Consumer Support Special features of your oven control. GEAppliances.com Your new touch pad control has additional features that you may choose to use. The following are the features and how you may activate them. The special feature modes can only be activated while the display is showing the time of day. They remain in the control's memory until the steps are repeated. When the display shows your choice, press the Start pad. The special features will remain in memory after a power failure, except for the Sabbath feature, which will have to be reset. 12-Hour Shutoff + With this feature, should you forget and leave Press the Delay Start pad until the oven on, the control will automatically turn off no shdn (no shutoff) appears in the oven after 12 hours during baking functions or after 3 hours during a broil function. the display. If you wish to turn OFF this feature, follow the steps below. Press the Start pad to activate the no shutoff and leave the control set in this special features mode. Press the Bake and Broil Hi/Lo NOTE: On double oven models, this activates pads (on double oven models, use this special feature for both ovens. the upper oven controls) at the same time for 3 seconds, until the display shows SF. 12-Hour, 24-Hour or Clock Blackout + Your control is set to use a 12-hour clock. Press the Clock pad again to change If you would prefer to have a 24-hour military time clock or black out the clock display, follow the steps below. to the 24-hour military time clock. The display will show 24 hr. If this is the choice you want, press the Start pad. Press the Bake and Broil Hi/Lo pads (on double oven models, use the upper oven controls) at the same time for 3 seconds, until the display shows SF. Press the Clock pad once. The display will show 12 hr. If this is Press the Clock pad again to black out the clock display. The display will show OFF. If this is the choice you want, press the Start pad. NOTE: If the clock is in the black-out mode, you will not be able to use the Delay Start function. the choice you want, press the Start pad. Fahrenheit or Celsius Temperature Selection + Your oven control is set to use the Fahrenheit Press the Broil Hi/Lo and Cooking temperature selections, but you may change Time pads again at the same time. this to use the Celsius selections. The display will show C (Celsius). + Press the Bake and Broil Hi/Lo Press the Start pad. pads (on double oven models, use the upper oven controls) at the same NOTE: On double oven models, the new setting time for 3 seconds, until the display will be displayed for both ovens. shows SF. Press the Broil Hi/Lo and Cooking Time pads at the same time. The display will show F (Fahrenheit). 19
-
 1
1 -
2
-
3
-
4
-
5
-
6
-
7
-
8
-
9
-
10
-
11
-
12
-
13
-
 14
14 -
 15
15 -
 16
16 -
 17
17 -
 18
18 -
 19
19 -
 20
20 -
 21
21 -
 22
22 -
 23
23 -
 24
24 -
25
-
26
-
27
-
28
-
29
-
30
-
31
-
32
-
33
-
34
-
35
-
36
-
37
-
38
-
39
-
40
-
41
-
42
-
43
-
44
-
45
-
46
-
47
-
48
-
49
-
50
-
51
-
52
-
53
-
54
-
55
-
56
-
57
-
58
-
59
-
60
-
61
-
62
-
63
-
64
 |
 |